2 - physical installation, 2 – physical installation – Teac FE-8 User Manual
Page 6
6
TASCAM FE-8
2 – Physical installation
WARNING
Before undertaking this procedure, make sure the FW-
1884 is turned off, and disconnected from the AC power
supply and computer. The FE-8 should also be discon-
nected from the AC power supply.
1
Decide on which side of the FW-1884 you will
be using the FE-8. Remove that end cheek
from the FW-1884 (the illustration below
shows the left end cheek).
WARNING
The FE-8 is designed to be used with the FW-1884 only
as described in the instructions here. Only use it in this
way, as there is a danger of electric shock under other
conditions (that is, when standing apart from the FW-
1884 or other FE-8 units).
When the end cheeks are removed from the FW-1884,
some sharp metal edges are exposed. Take suitable pre-
cautions not to cut yourself on these edges while fitting
the FE-8.
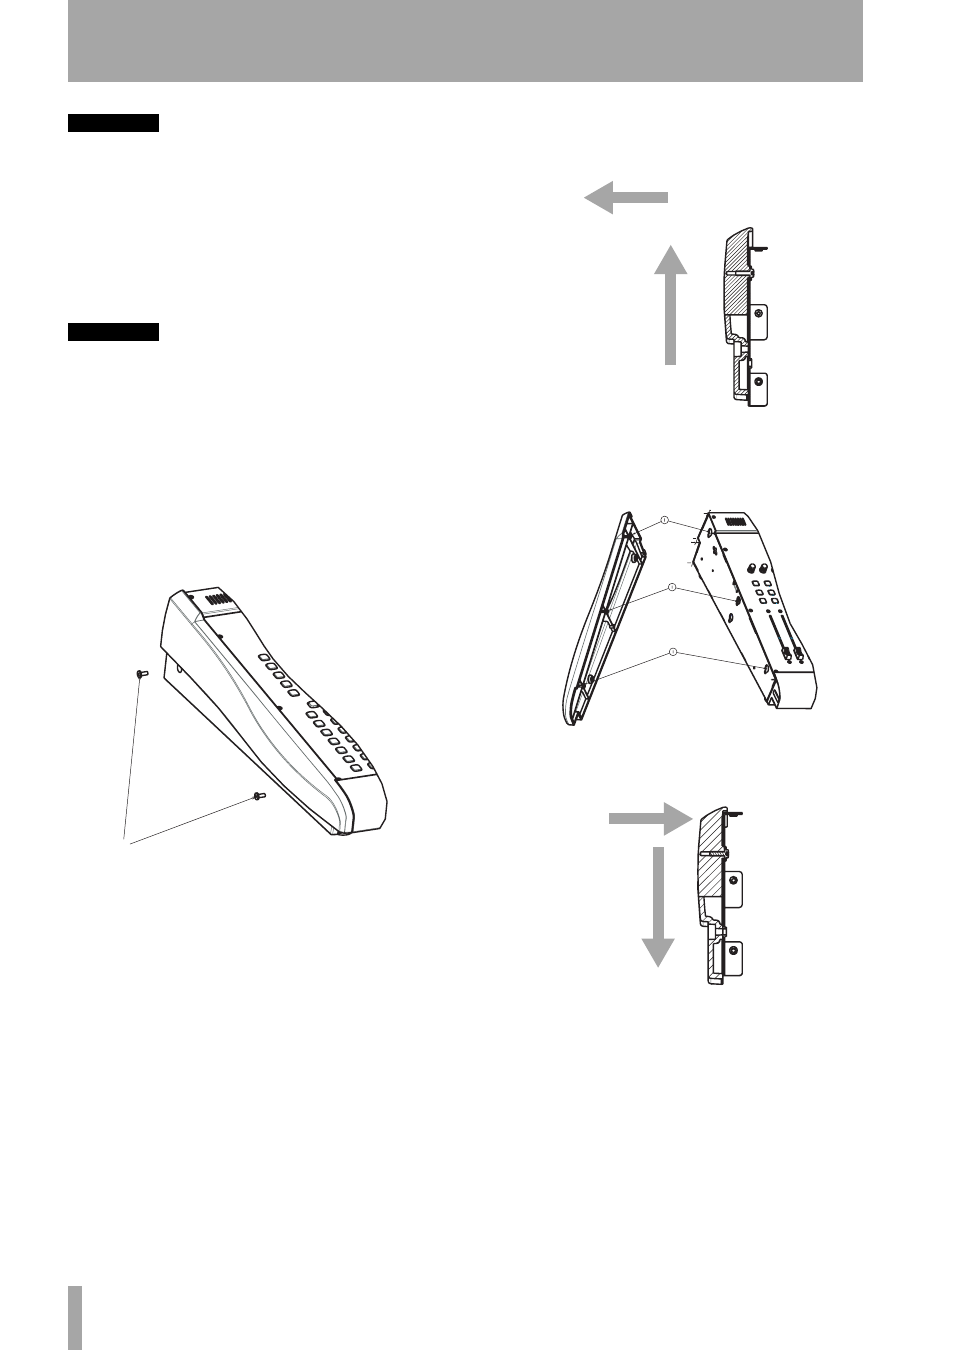
Remove the two screws retaining the end
cheek, and keep them in a safe place.
2
Now lift the end cheek up slightly before
removing it (the illustration here shows a
cross-section through the left end cheek.
3
Fix the end cheek to the side of the FE-8.
Locate the three retaining lugs on the end
cheek to the three holes on the side of the
FE-8.
4
When the lugs are seated in the holes, push the
end cheek down into place.
5
Replace the two screws removed at the start of
this procedure.
1
2
1
2