Gm10f – Skutt GlassMaster Kiln User Manual
Page 32
32
32
u
nique
M
odel
f
eaTures
GM10F
An optional bead door may be purchased any time and fitted to your GM10F.
The GM10F when ordered with a bead door, comes with removable refractory heat baffles designed to
protect the operator from electrical shock. This feature was introduced primarily for people inserting mandrels into
the kiln while it is firing.
The baffles slide into grooves located in the lid and slab next to the element walls. It may be necessary to
slide the baffles back and forth slightly to seat them in the grooves. A 1 5/8” Tri post may be ordered from Skutt
to use as a mandrel rest inside the kiln.
The bead door does not come attached to the kiln and must be assembled. In the box with the kiln you will
find the following:
1) 1 Bead Door handle with rod
2) 4 Split Ring Collars
3) 1 Allen Wrench
Step 1
Remove 3 of the 4 split ring collars using the Allen wrench taped to the
rod and then slide the bead door rod through the first bracket hole.
Step 2
Slide on another spit ring collar and then the bead door.
Step 3
Slide on another split ring collar and then slide the end of the rod through
the right hand bracket so the end is sticking out far enough to slide the last
collar on flush with the end of the rod.
Step 4
Tighten the 2 outside collars making sure they are flush with the bracket.
Step 5
Center the bead door on the hole, slide the 2 inside collars up flush with
the bead door bracket and tighten the set screws. The bead door should be in
the closed position and the wooden handle should be pointing directly towards
you. Rotate the wooden handle 180 degrees so that it is pointing towards the
back of the kiln. The bead door should be completely open. The weight of the
wooden handle should hold the bead door in the open position.
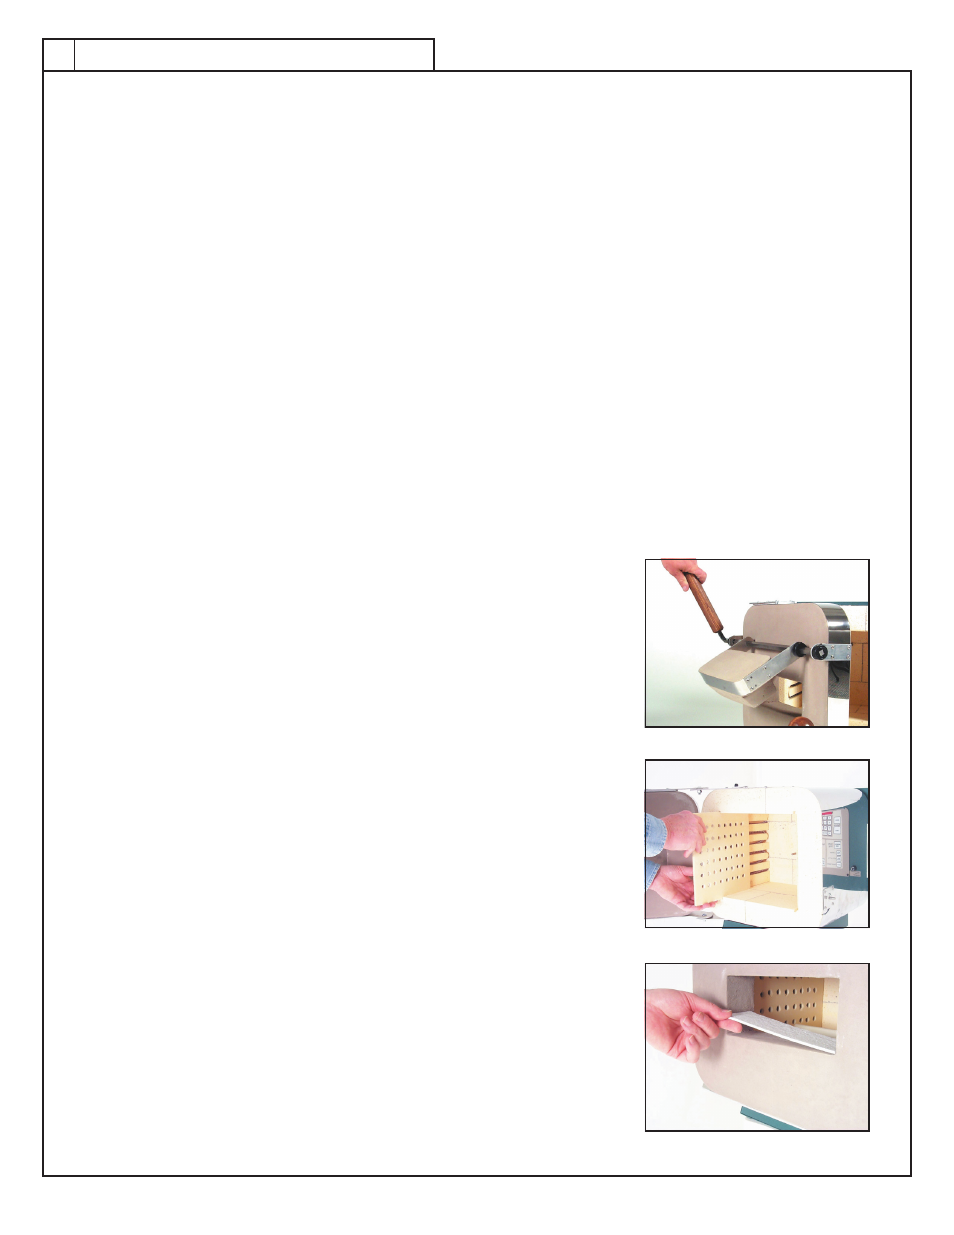
Step 6
Open the side hinged door and slide the baffle plates into the grooves
near the element walls. The baffle plates have a top and bottom. They need to
be positioned so the holes in the baffles are aligned with the element grooves.
Step 7
Place 1 fiber cloth sheet on the bottom edge of the door plate if you are
going to be using mandrels. Use 3 sheets if you would like to seal the door for
fusing.
Your bead door is now ready for use.
Caution: Do not leave the bead door unattended in the open position. Damage could result if the bead door
slams shut accidentally. Always raise and lower the bead door gently.
4) 1 Bead Door
5) 2 Baffle Plates (1 Left and 1 Right)
6) Strips of fiber cloth.