Cleaning and maintenance, Conversion instructions, Gas control conversion – Desa CD36TN-M User Manual
Page 33: Continued, Glass door
www.desatech.com
118531-01A
33
HI
LO
O
F
F P
IL
OT
O
N
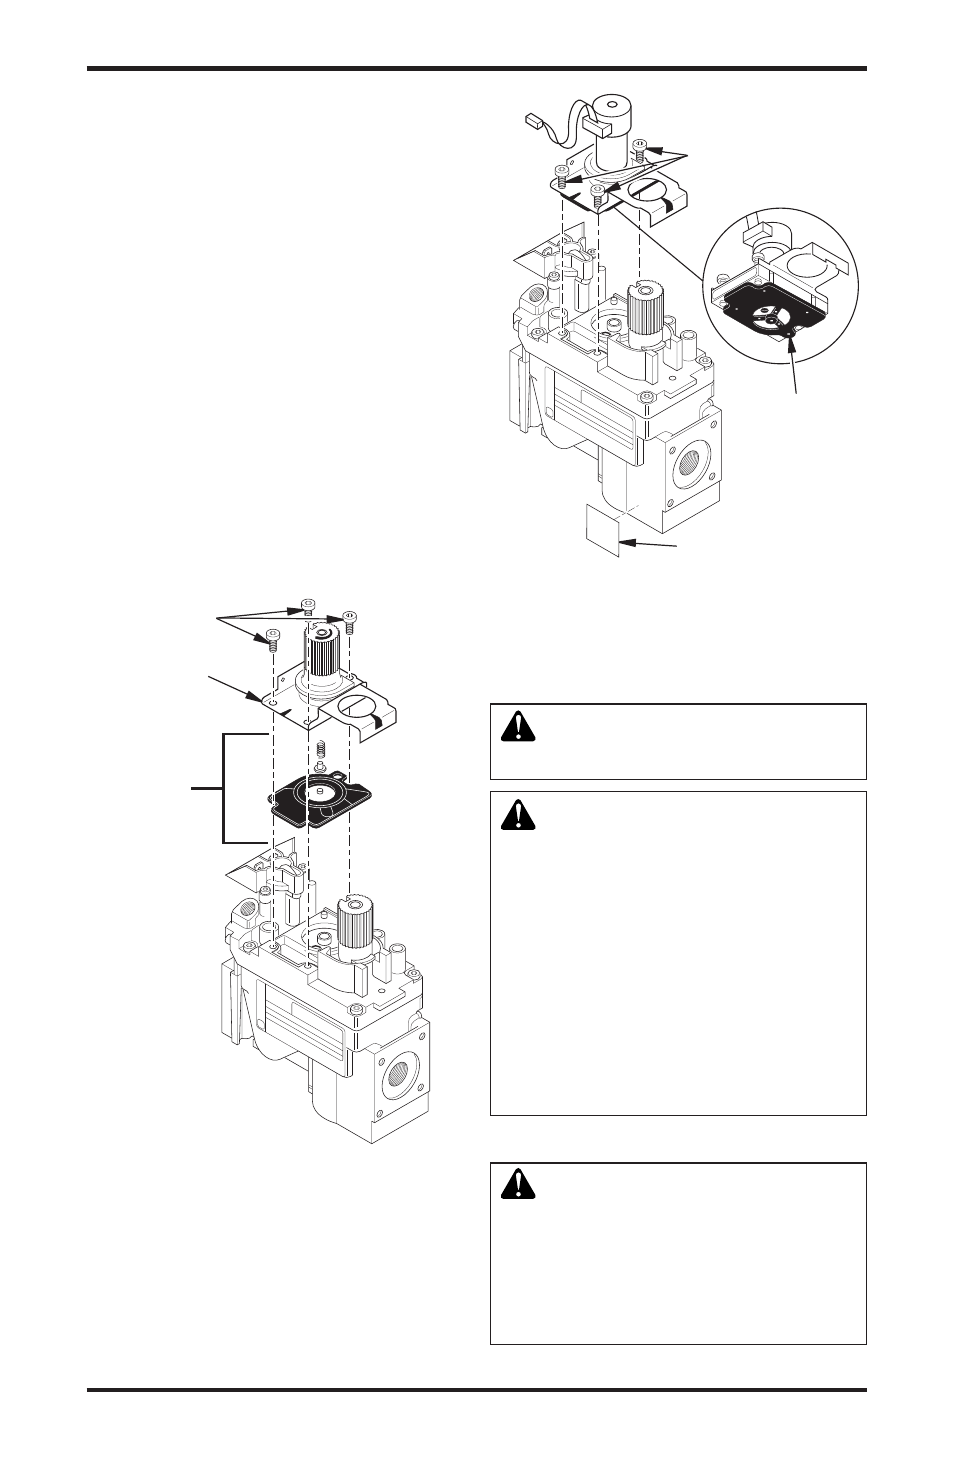
Figure 58 - Removing Mounting Screws,
Regulator, Tower, and Diaphragm/Spring
Components
Mounting
Screws
Pressure
Regulator
Tower
Diaphragm/
Spring
Components
GAS CONTROL CONvERSION
Convert the gas control by swapping out the valve
regulator portion of the gas valve.
1. Using a Torx T20 or slotted screwdriver, re-
move and discard the three mounting screws,
pressure regulator tower, and diaphragm/
spring components (see Figure 58).
2. Insure that the rubber gasket is properly posi-
tioned on the new pressure regulator assembly.
Install LP pressure regulator assembly to valve
using the new mounting screws supplied with
the kit. Tighten screws securely (approxi-
mately 25 in-lbs.) (see Figure 59).
3. Install the identification label enclosed with
the gas valve regulator to the valve body,
where it can easily be seen (see Figure 59).
CONVERSION
INSTRUCTIONS
Continued
O
F
F P
IL
OT
O
N
Figure 59 - Installing Pressure Regulator
Assembly
Mounting
Screws
Rubber
Gasket
Identification
Label
CLEANING AND
MAINTENANCE
WARNING: Turn off fireplace
and let cool before cleaning.
CAUTION: you must keep
control areas, burners and
circulating air passageways of
fireplace clean. Inspect these
areas of fireplace before each
use. Have fireplace inspected
yearly by a qualified service
person. Fireplace may need
more frequent cleaning due to
excessive lint from carpeting,
bedding material, pet hair, etc.
GLASS DOOR
WARNING: Handle glass
door panel with care. Do not
strike, slam or otherwise abuse
glass. Do not operate fireplace
with the glass door unlatched,
removed, cracked or broken.