Conversion instructions – Desa CD36TN-M User Manual
Page 32
www.desatech.com
118531-01A
3
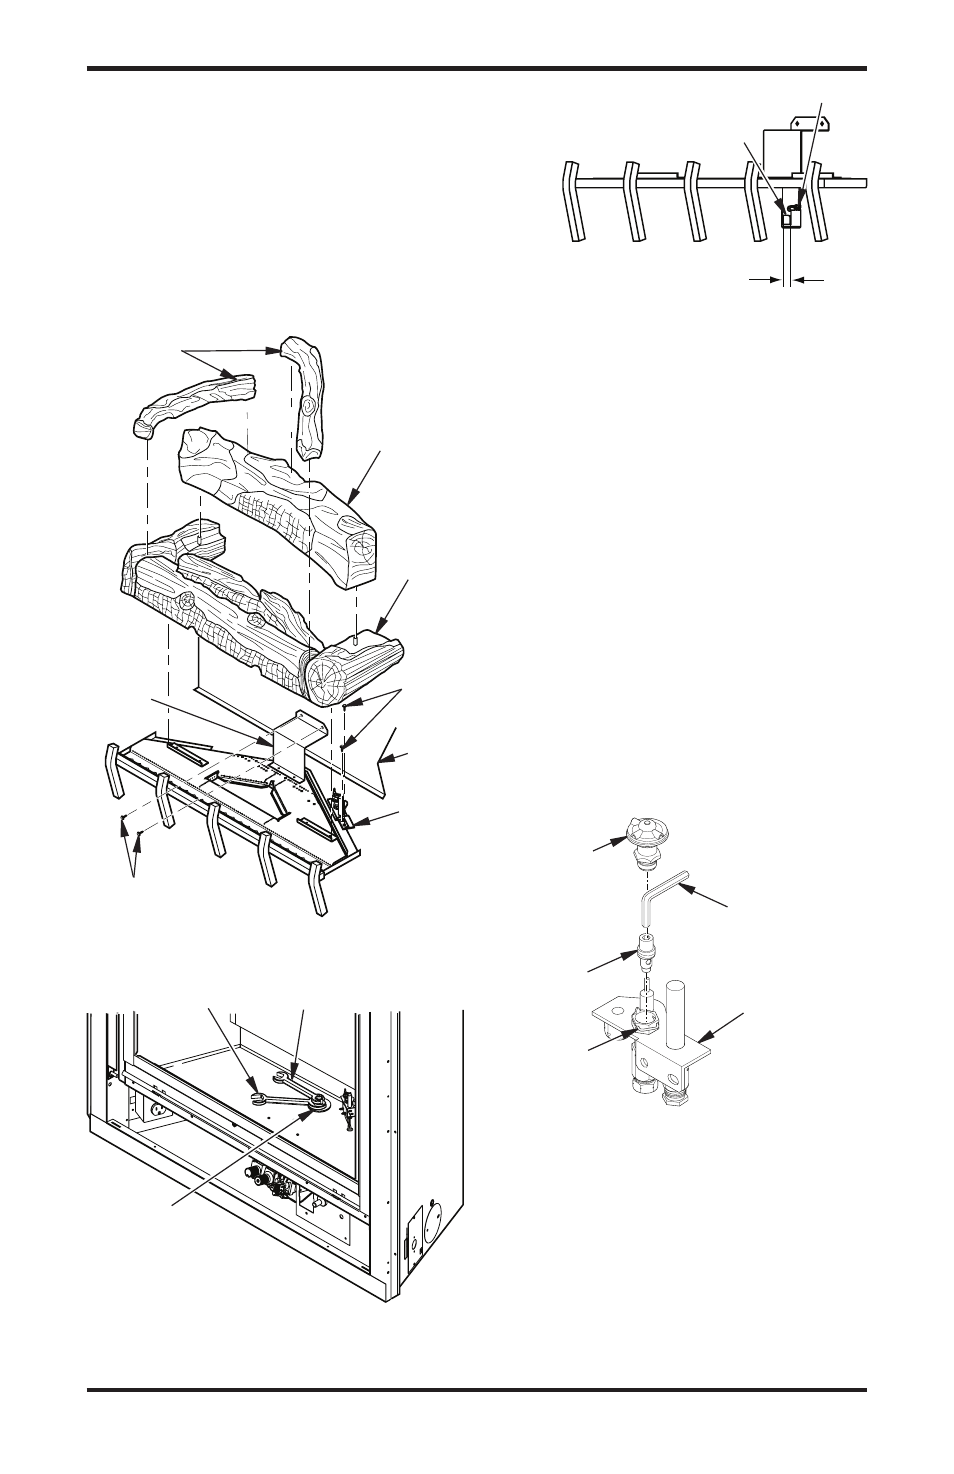
7. Loosen set screw on main burner air shutter,
rotate to fully open, and retighten set screw
(see Figure 56).
8. Reposition burner with air shutter placed over
orifice mount and replace two screws on rear
log stand and two screws at pilot assembly.
Figure 54 - Removing Logs and Burner
Assembly
Figure 57 - Converting Pilot Orifice
PILOT ORIFICE CONvERSION
1. Remove pilot hood by pulling up until it dis-
engages from barrel. Do not remove retainer
clip (see Figure 57).
2. Remove pilot orifice from inside barrel using
5/32" allen wrench to unscrew orifice.
3. Replace pilot orifice with LP orifice supplied
with kit. The number 30 is stamped on the
sleeve for identification. Insert small end of
new pilot orifice into barrel and thread until
tight with allen wrench.
4. Line up notch on pilot hood to positioning
tab on barrel receiver and snap into position.
IMPORTANT:
Be careful not to bend or kink
aluminum tubing during conversion. Make
sure pilot hood and orifice are properly mated
and aligned after finishing the conversion.
Figure 55 - Removing Main Burner
Orifice
Figure 56 - Adjusting Air Shutter
AIR SHUTTER ADJUSTMENT
Fully Open = Propane/LP Gas
1/4" Open = Natural Gas
Air Shutter
Opening
Set Screw
1
1
/
8
" Wrench 11/1" Wrench
Orifice
Mount
Pilot Hood
Pilot Orifice
Barrel Clip
Pilot Bracket
5/3" Allen
Wrench
CONVERSION
INSTRUCTIONS
Continued
Pilot
Bracket
Screws
Top Logs
Rear Log
Base Log
Rear
Panel
Rear
Log
Stand
Screws