Introduction to the apollo 500, Getting started, 1 charging new batteries – Seaward Apollo 500 User Manual
Page 4: 2 power on
Test lead, red, 1.2m
1
Alligator clip, red
1
IEC test lead
1
USB Download Lead
1
Apollo Series Check Box
1
6.2 Optional Accessories
Test n Tag Elite Bluetooth Label Printer
339A970
Test n Tag Pro Bluetooth Label Printer
339A980
Bluetooth Barcode Scanner
339A923
PATGuard 3 Software
see www.seaward.co.uk/PG3Trial
Test adaptor, 110V/230V
270A076
3 Phase Leakage Adaptor 5 Star 16A
391A920
3 Phase Leakage Adaptor 5 Star 32A
391A910
3 Phase Adapter Delta 4 pin 16A 415V (for Rpe & IR)
209A910
3 Phase Adapter Star 5 pin 16A 415V (for Rpe & IR)
209A911
3 Phase Adapter Delta 4 pin 32A 415V (for Rpe & IR)
209A912
3 Phase Adapter Star 5 pin 32A 415V (for Rpe & IR)
209A913
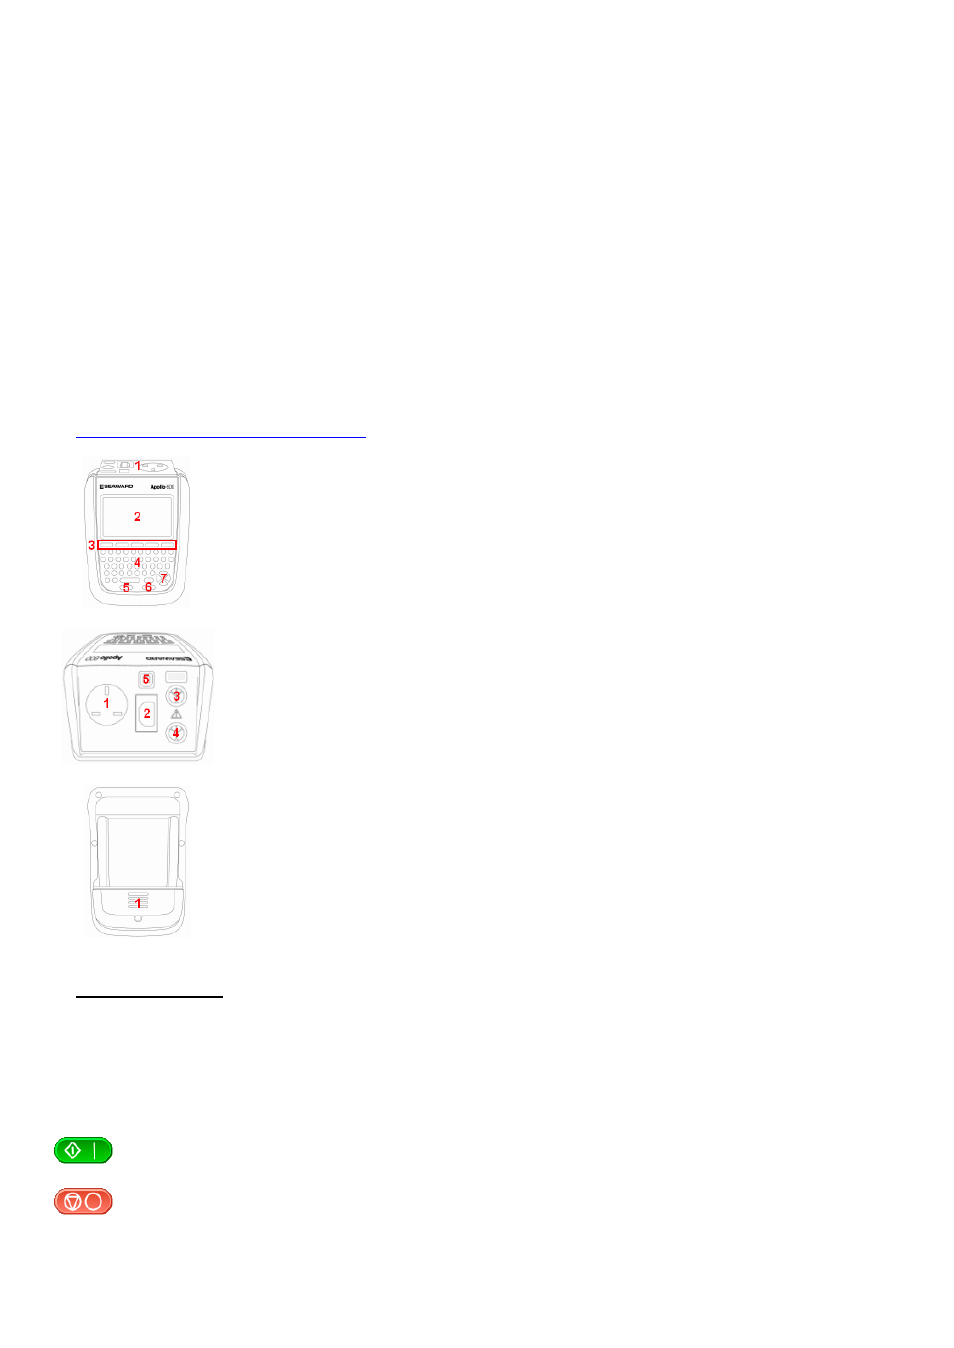
7.
Front
1. Test terminal end plate
2. LCD
3. Function keys
4. QWERTY keyboard
5. Test function STOP key
6. Test function START key
7. Arrow keys
Top
1. EUT test socket
2. IEC test socket
3. Red test terminal
4. Black test terminal
5. USB type B
Back
1. Battery compartment
8.
Getting Started
8.1 Charging New Batteries
Before using Apollo 500 for the first time please ensure that you fully charge the unit using the Seaward black power lead plugged into the mains inlet socket on the top of the
tester.
8.2 Power On
This is the Power On button.
This is the Power Off button
The first time the Apollo 500 is powered up the User will be automatically set to
admin
. The admin user gives full access to all the menus and functionality of the unit.
For further information about changing User and Password see 10.2
User Options.