Precharged line routing – Scotsman C1448R User Manual
Page 11
C1448, C1848, C2148
Remote Condenser Models - User Manual
November 2006
Page 10
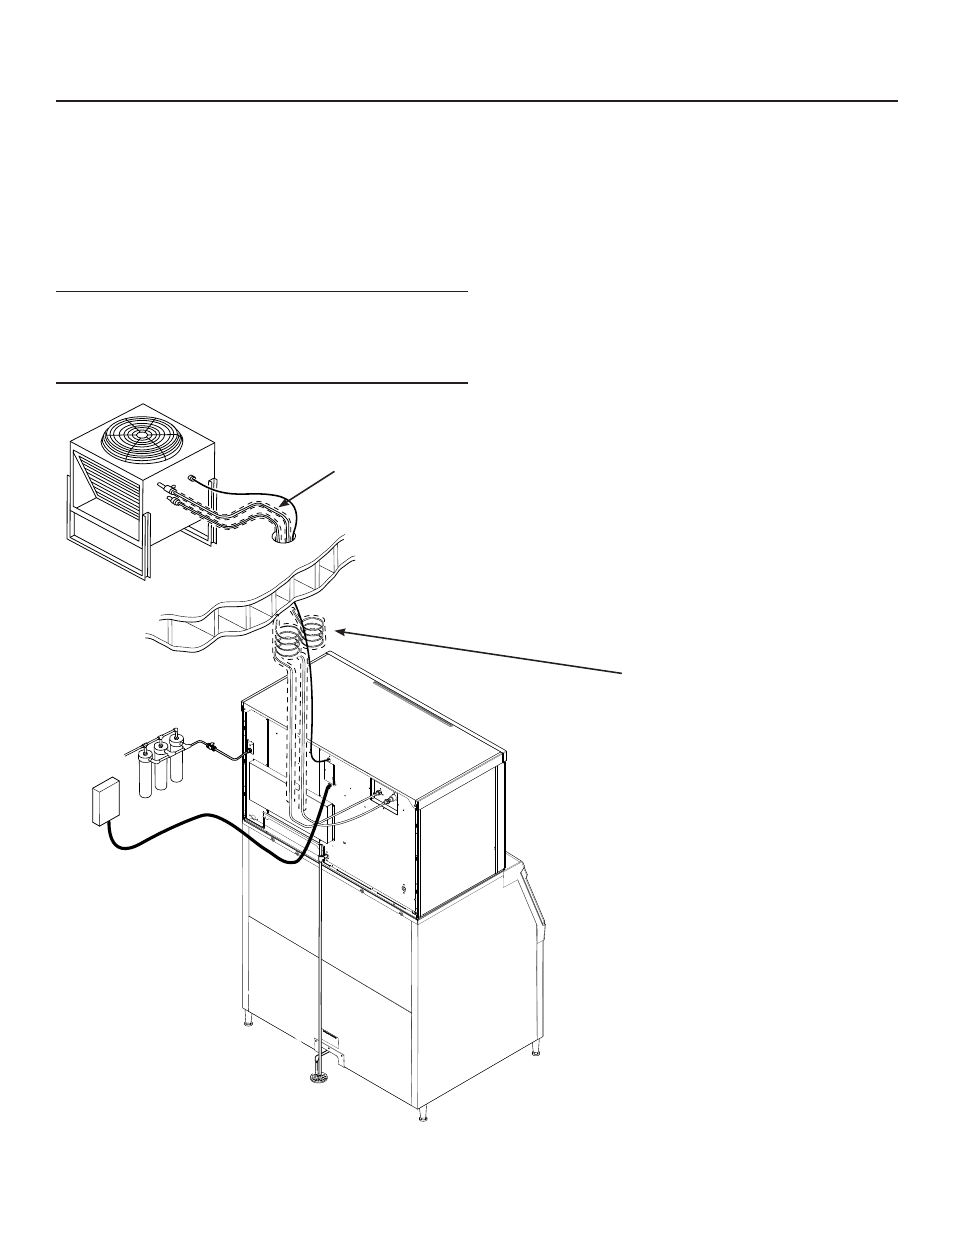
Precharged Line Routing
Do not connect the precharged tubing until all routing
and forming of the tubing is complete. See the
Coupling Instructions for final connections.
1. Each set of pre-charged tubing lines contains a 3/8”
diameter liquid line, and a 1/2” diameter discharge
line. Both ends of each line have quick connect
couplings, the end without access valves goes to the
ice maker.
Note: The openings in the building ceiling or wall,
listed in the next step, are the minimum sizes
recommended for passing the refrigerant lines
through.
2. Have the roofing contractor cut a minimum hole for
the refrigerant lines of 1 3/4”. Check local codes, a
separate hole may be required for the electrical power
supply to the condenser.
Caution: Do NOT kink the refrigerant tubing while
routing it.
3. Route the refrigerant tubes thru the roof opening.
Follow straight line routing whenever possible. Excess
tubing may EITHER be coiled up INSIDE the building
OR cut out prior to connection to the ice maker and
condenser.
If the excess tubing is cut out, after re-brazing the
tubing must be evacuated prior to connection
to the ice maker or condenser.
If the excess tubing is to be coiled, spiral it
horizontally to avoid excess trapping in the
lines.
5. Have the roofing contractor seal the holes
in the roof per local codes
Best Practice: Coil excess
tubing inside the building in a
horizontal coil.
Minimize tubing routed
outside of the controlled
space.