Troubleshooting – REMKO CLK 30 User Manual
Page 10
10
Assembling the burner flange and the burner.
1. Check the flange gasket 6 and replace it if neces-
sary.
2. Attach the burner flange to the unit housing with the
four bolts.
Pay attention to the “UP“ (UP, HAUT) label!
3. Tighten the upper bolts.
4. Turn the lower bolts but do not tighten them so that
the burner flange can still be put together.
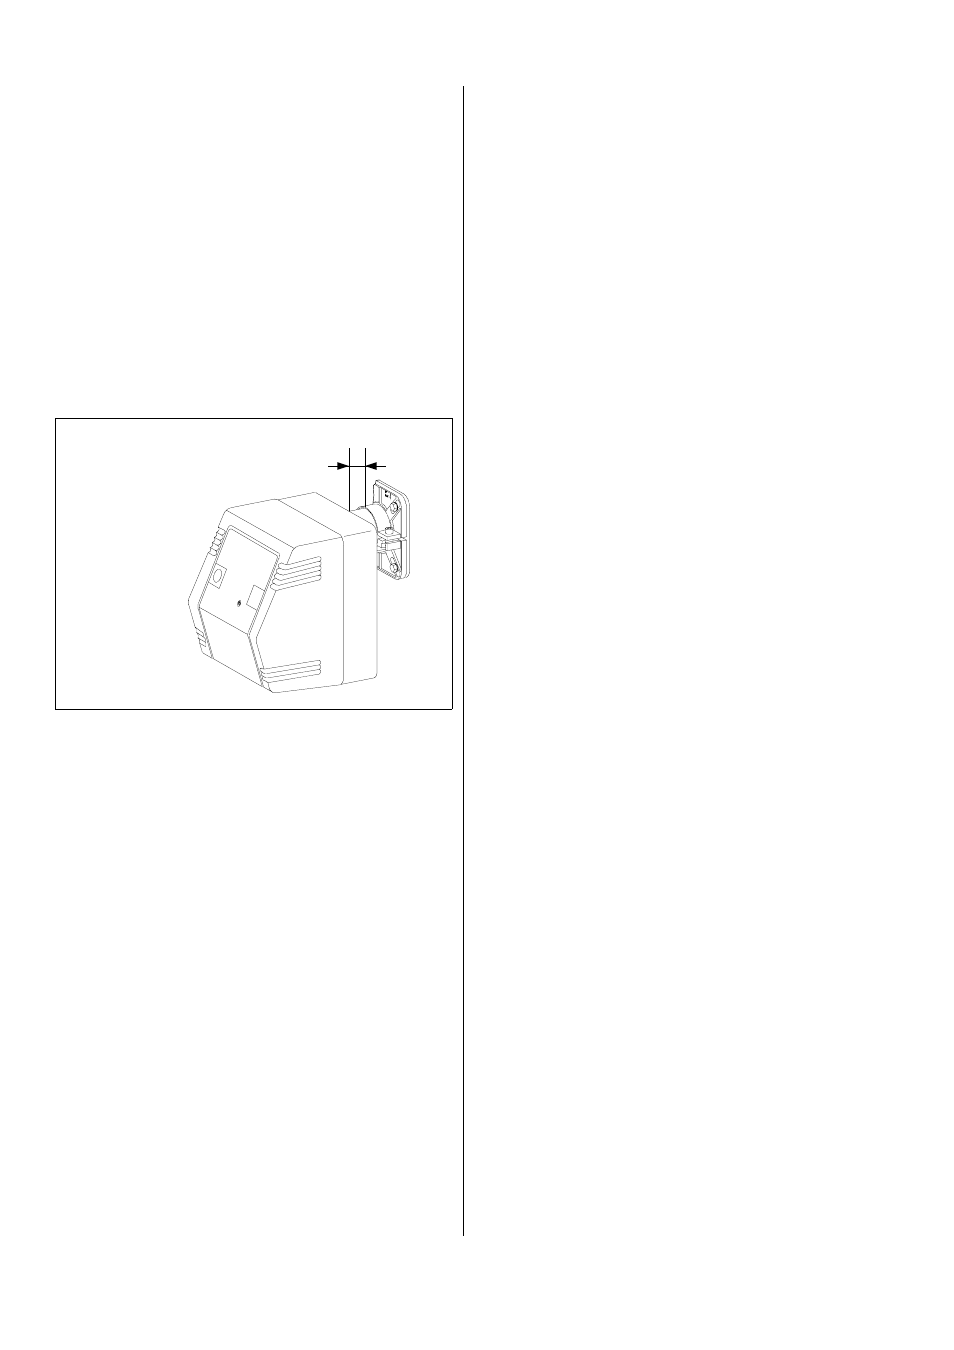
5. Slide the flame tube of the burner into the burner
flange.
Take note of measurement X in the diagram.
6. Attach the flame tube to the flange by lifting the
burner slightly (3° incline).
Use a hexagon socket screw key.
7. Finally, tighten the lower bolts.
8. Replace the burner cover and attach securely with
the quick release fasteners.
X
Burners up to size 33: X = 20 mm
Burners larger than 44: X = 30 mm
Additional maintenance information.
à Maintenance work on the burner may only be done
by authorised personnel.
à Make sure to comply with waste gas emission limits
in accordance with regulations.
à After maintenance work is complete, conduct an
electrical safety test.
Forced-air burner and power supply
1. Check whether fuel filter is dirty.
Replace dirty filters.
2. Check that all shut-off fittings in the oil supply are
open.
3. Check that there is enough fuel in the fuel container.
4. Check whether paraffin has accumulated in the
heating oil.
This can occur even at 5 °C.
5. Check oil tubes for damage.
6. Check the sensors and capillary pipes of the safety
devices for damage or dirt.
7. Check that the temperature monitor (TW) is working
properly.
8. Check the forced-air burner for any dirt in the noz-
zle, air flow plate, filters, etc.
Troubleshooting
Unit does not start:
1. Check power supply.
1~ 230 V.
2. Set operating switch to “I”.
3. Ensure that the “operation” lamp on the control
panel is illuminated.
It must indicate that the unit is in “heating” mode.
4. Check that the bridge circuit plug or the thermostat
plug has been plugged in correctly.
5. Check the room thermostat setting.
The temperature set on the room thermostat must
be higher than the room temperature.
6. Check whether the safety temperature limiter (STB)
was activated.
You must remove the protective cover next to the
control panel.
7. Before resetting the STB, it is absolutely necessary
to determine the reason it was activated and take
appropriate measures.
The following are possible reasons:
− Unit could not cool down because the power sup-
ply was interrupted.
− Temperature of air being blown out is too high be-
cause hoses are not directing air properly.
− Air intakes and outlets are blocked.
8. Check whether the “burner malfunction” control
lamp on the control panel is illuminated.
If so, release the automatic burner relay by pressing
the reset button.
9. Set operating switch to “II”
If the fan now starts running, look for the malfunc-
tion in the burner.
G
Prior to doing any work on the unit, unplug it from
the power supply!