4 operation, Operation – REMKO RKL 491 DC User Manual
Page 9
4
Operation
The system can be operated by means of the control panel on the device or via the standard infrared remote
control unit. The functional operation of the buttons among themselves is identical, however, the designation
can vary. The batteries must be correctly inserted before the infrared remote control is used.
9
6
7
5
8
2
1
REMOTE
DRAIN WATER
AUTO
SWING
TIMING
ON
OFF
TIMER
SET
RESET
THERMO CONTROL
COMP. ON
DE-
HUM.
FAN
LO MED
HI AUTO
MODE
3
4
10
11
12
13
14
15
13
16
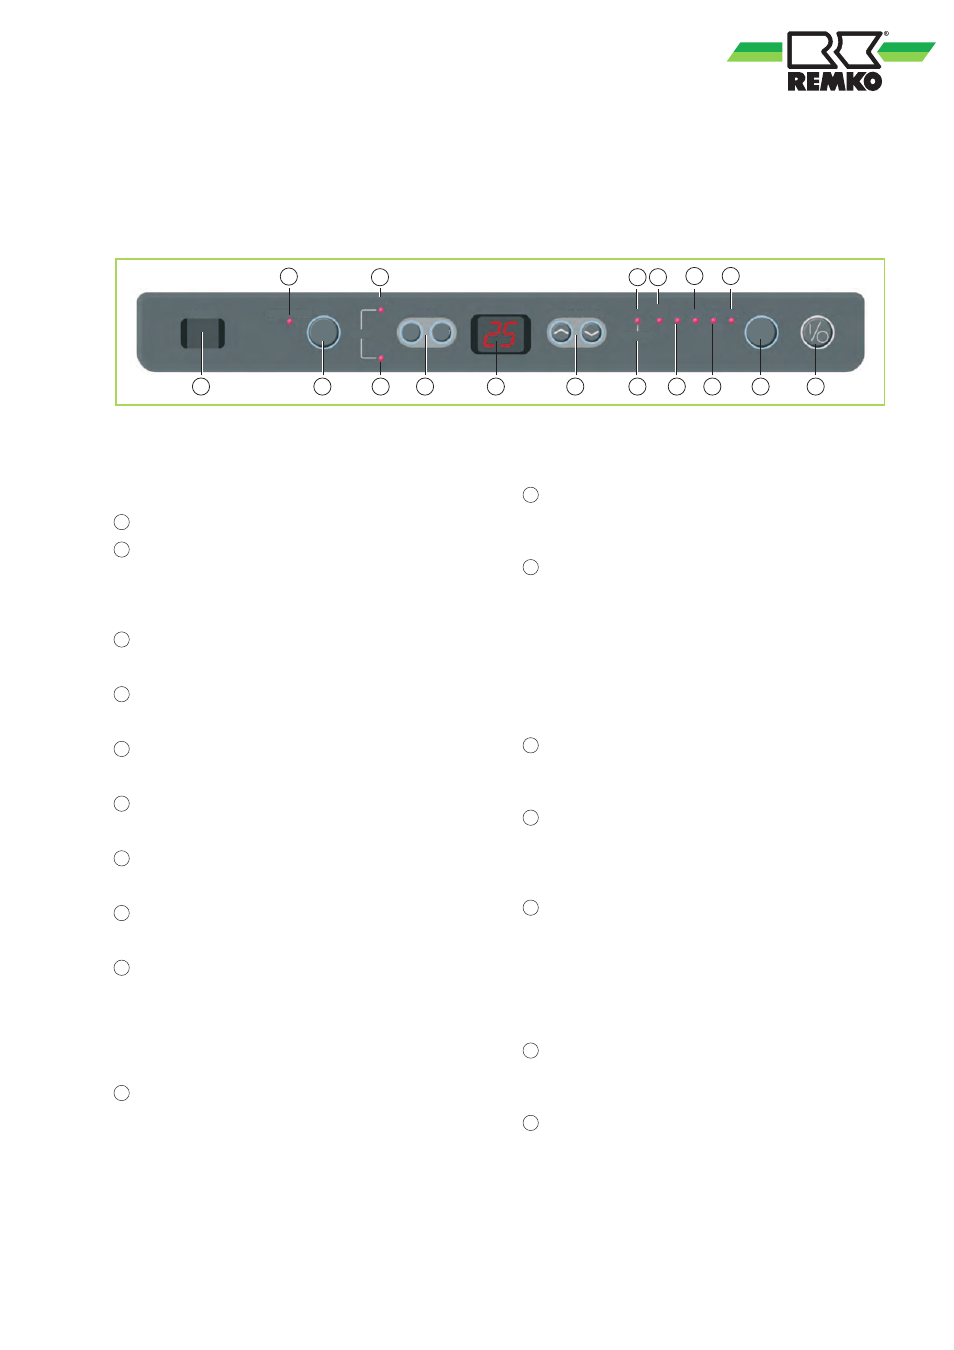
Fig. 3: Control panel
Legend
1
„ON / OFF“ button
2
„MODE“ button (Fan speed-mode)
The fan speed is indicated by means of LEDs in
the selected modes AUTO-HI-MED-LO or circu-
lated air mode FAN.
3
LED „AUTO“ (Fan mode)
Indication of the automatic fan operation.
4
LED „HI“ (Fan mode)
Indication of the high fan operation.
5
LED „MED“ (Fan mode)
Indication of the average fan operation.
6
LED „LO“ (Fan mode)
Indication of the low fan operation.
7
LED „DE- HUM.“ (Dehumidifying mode)
Indication of the dehumidifying mode.
8
LED „FAN“ (Circulated air )
Indication of the circulated air.
9
LED „COMP. ON“ (Compressor operation)
The controller controls the cooling output by
means of switching the compressor on or off. Com-
pressor operation is indicated by means of the
LED. If the LED flashes, the compressor will be
activated in max. 3 mins.
10
Button „▼ ▲“ Temperature setting
The desired nominal temperature can be set with
the „▼ ▲“ buttons in steps of 1°C between 16 and
30°C.
11
Display
The display shows the set nominal temperature or
the residual time of a programmed timer.
12
"ON" and "OFF" timer
The timer function can be used to switch the
device on or off automatically in hourly intervals
( „▼▲“ buttons) by means of pressing the "SET"
button. The function can be used to program the
switch-on timer when the device is off and the
switch-off timer when the device is on, for up to 24
hours. Both timers can be deleted by means of
pressing the "RESET" button.
13
LED „TIMING ON and OFF“
Indicator of activation (LED ON) or deactivation
(LED OFF) of the timing on and off
14
„AUTO SWING“ button
The direction of the discharged air via the oscil-
lating fins can be adjusted to fixed or oscillating by
pressing the "AUTO SWING" button.
15
LED „DRAIN WATER“
If the pump is unable to transport the collected
condensate then this is signalised via an acoustic
alarm in combination with the flashing "DRAIN
WATER" LED. The device will be operational again
after the container is emptied by means of the con-
densate drain.
16
Infrared receiver
The device receives the signals from the infrared
remote control via the sensor.
17
„FAN“ button(only on the infrared remote con-
trol)
The ventilator speed can be adjusted by means of
pressing the "FAN" button.
9