Still (fig. 14), Section still (fig. 15), Remko rkl – REMKO RKL 491 DC User Manual
Page 16
NOTICE!
Never twist the the fixed upper section.
12.
Screw continuously until the connection is
disconnected.
NOTICE!
Do not stop screwing in the event that
refrigerant escapes and a slight hissing
sound is heard.
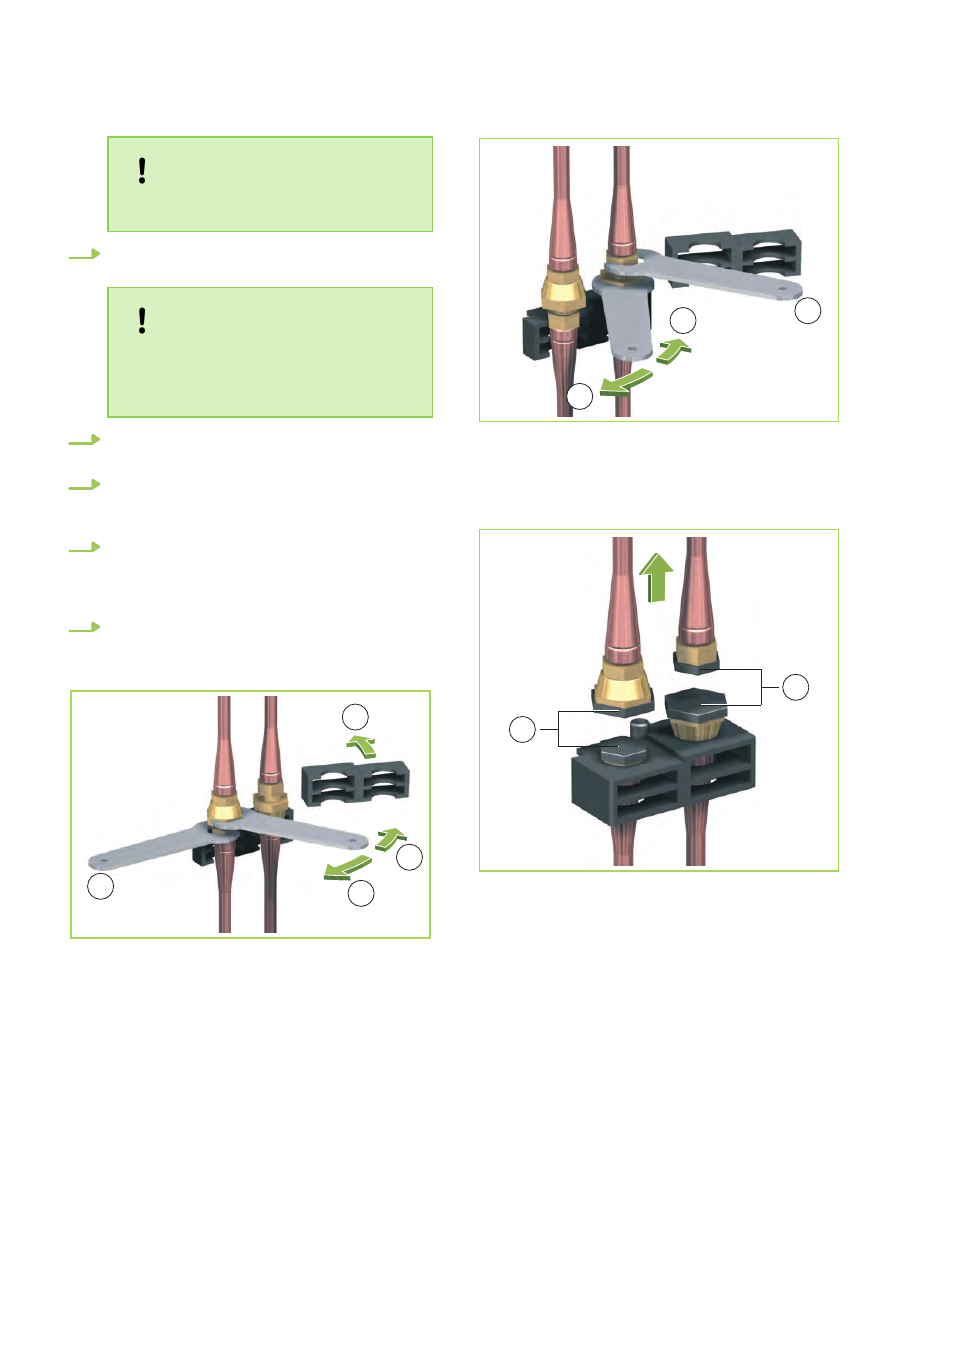
13.
Screw the protective caps provided onto the
4 coupling halves (Fig. 16).
14.
Ensure that there is a wall opening available
of Ø 60 mm in the event that the connecting
line is to be fed through a wall.
15.
After the placement or mounting of the indoor
unit and outdoor unit is complete, the con-
necting line can be hooked up to the indoor
unit in the opposite order.
16.
After making the connections, check the
quick-release couplings for leaks.
A
B
C
D
Fig. 14: Unscrew the left-hand union nut
A: Hold to prevent turning
B: Tighten
C: Loosen
D: Remove cable strap
A
B
C
Fig. 15: Unscrew the right-hand union nut
A: Hold to prevent turning
B: Tighten
C: Loosen
1
1
Fig. 16: Screw on protective caps
1: Protective caps
REMKO RKL
16