Backstop™ instructions – PSE Archery Bow 2012 User Manual
Page 5
5
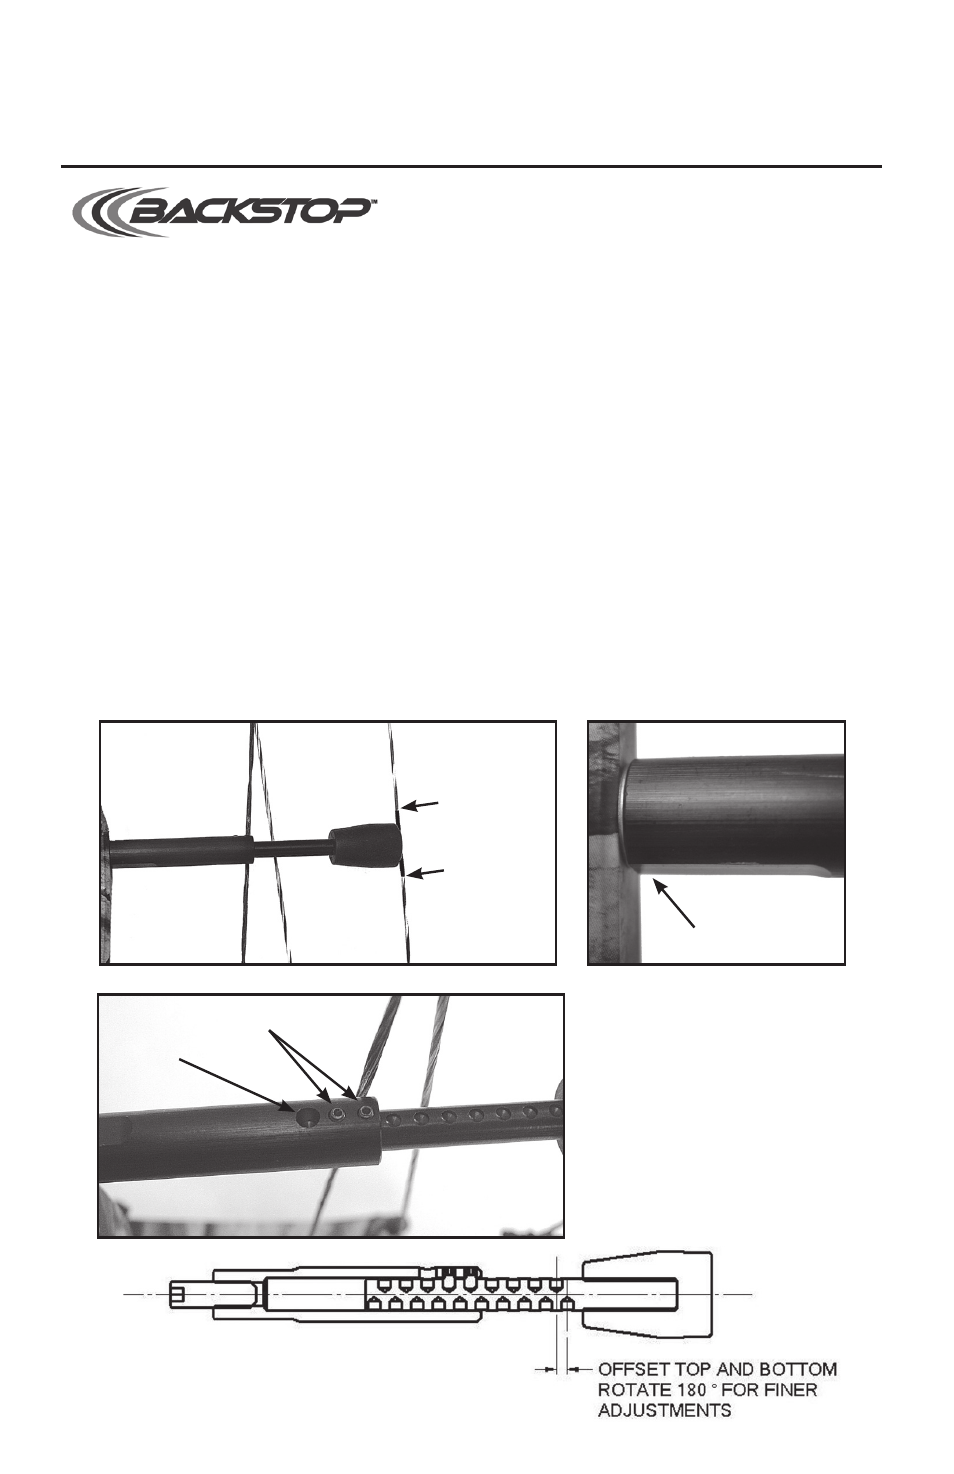
1. Remove the setscrews from the base using a 1/16” hex wrench.
2. Install the Backstop
™
into the threaded hole below the
grip on the string-facing side of the bow.
3. Extend the Backstop
™
until it makes contact with the string. Mark the string ¼” above
and ¼” below where it makes contact with the string. Remove the Backstop
™
and
add serving to that area of the string. Reinstall the Backstop
™
.
4. To avoid any possibility of the cables striking the setscrews, the setscrews must be
facing away from the cables. If they are not, remove the Backstop
™
base, add the
washer provided and reinstall the Backstop
™
base as shown.
5. Securely tighten the base to the bow handle.
6. Extend rod from base until rubber stopper contacts the string. Rotate rod until the
indentation in the rod closest to the alignment hole (see picture) can be identified.
Rod should be rotated 180° and the rod/stopper lightly pushed into the string until
the next available indentation is visible (Detent holes are offset – see picture below).
Install the setscrews to secure rod in this position. Tighten setscrews.
BackstOp™ instructiOns
Serve string
in this area.
Setscrews
Alignment
hole
Add washer
if setscrews
are near
cables.
Note: Many PSE bow models come from the factory with the Backstop
™
installed.
These instructions refer to reinstallation or adjustment if needed after making adjustments
to your PSE bow.