Using the linear scaling assistant – Measurement Computing USB-5100 Series User Manual
Page 46
USB-5100 Series Software Help
Modifying a Plot
Using the Linear Scaling Assistant
To use the Linear Scaling Assistant, complete the following steps:
1.
At launch time:
Using a logger with a sensor that supports scaling at launch time, click the Launch icon on
the toolbar. Click the Scaling button. Double-click the assistant name or select the assistant and click
Create
.
At plot setup:
Read out a logger or open a file that supports linear scaling. Select
the Linear Scaling
Assistant
and click
Process
.
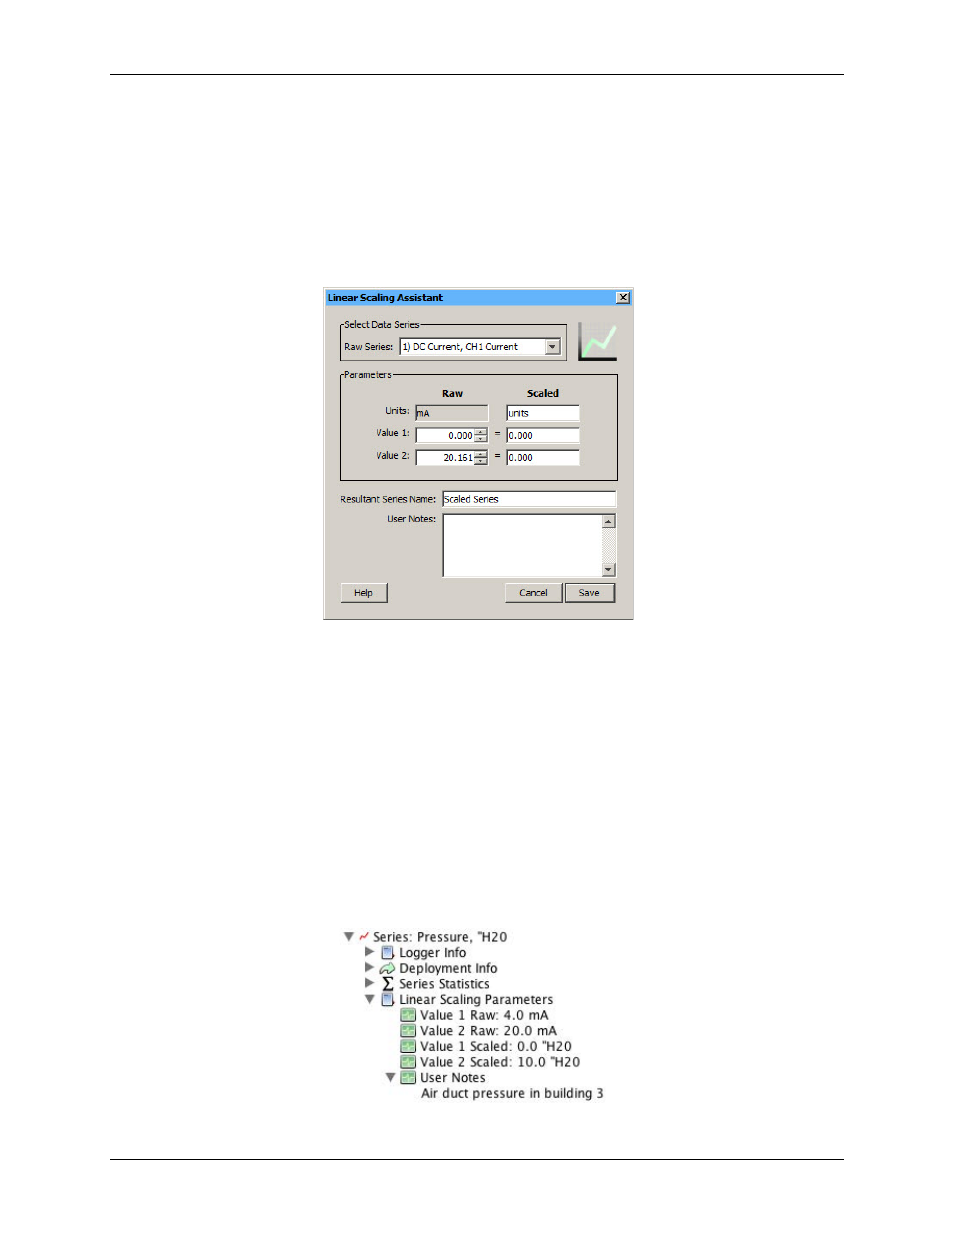
2. In the Linear Scaling Assistant dialog box, choose the data series to convert from the
Raw Series
list.
Figure 27. Linear Scaling Assistant Dialog Box
3. In the Scaled column of the Parameters panel, type the units name for the scaled series and enter the scaled
values in the Scaled column to correspond with the numbers in the Raw column. (The default values in the
Raw column are based on the high and low values supported by the sensor, but you may use different
values, as long as those values fall within the sensor's range.) These numbers establish a linear relationship
between raw and scaled values.
4. In the
Resultant Series Name
field, keep the default name or type a new one.
5. Type any
User Notes
concerning the series you are creating (optional).
6. Click
Create New Series
.
If you ran the assistant from the Launch Logger dialog box, the Scaling button displays the number of
newly created series.
If using this assistant while plotting, the new series is listed and selected in the Plot Setup dialog. Click the
Plot button to display the series.
The scaled series appears in the plot immediately or when you read out the logger if configuring this at
launch time. The settings for the scaled series are listed in the Details pane of the plot.
Figure 28. Scaled Series in Details Pane
46