English unpacking, Assembly – DeWalt DW744 User Manual
Page 7
3
English
Unpacking
Open the box and slide the saw out , as shown in Figure 1.
Carefully unpack the table saw and all loose items from the
carton. Examine all parts to make sure that parts have not
been damaged during shipping. If any parts are missing or
damaged, contact your dealer to replace them before
attempting to assemble the tool.
Figure 2 shows all the loose items and hardware packed
with the saw.
1. Rip fence
2. Blade (attached to saw base)
3. Arbor wrench and spindle wrench (attached to saw
base)
4. Blade guard
5. Throat plate
6. Miter gauge
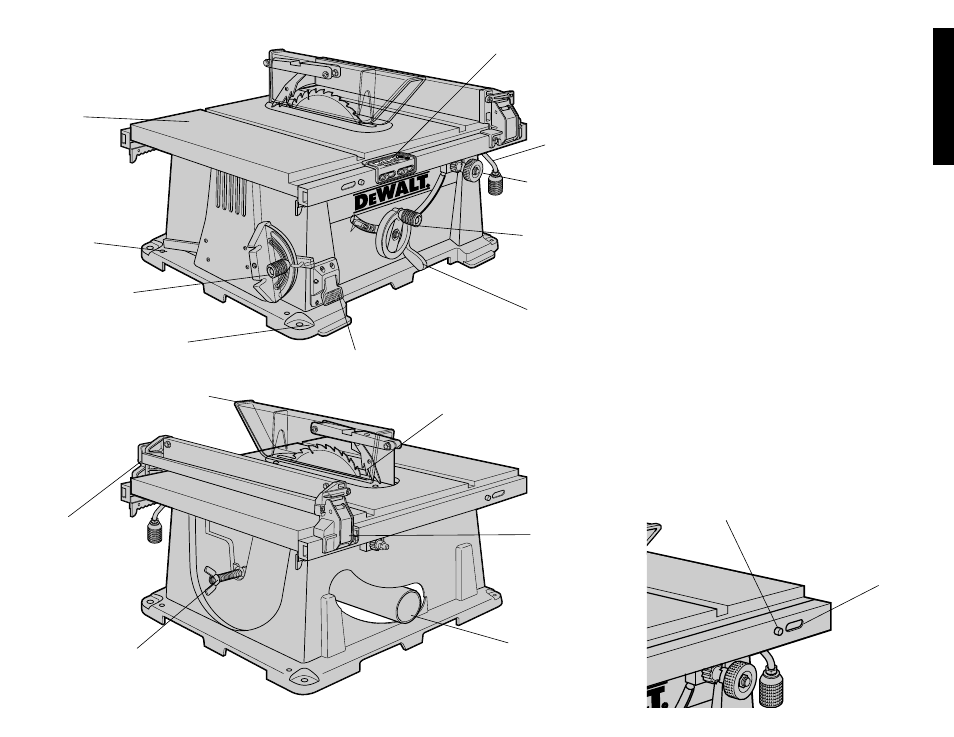
Examine Figures 3 & 4 to become familiar with the saw and
its various parts. The following sections on assembly and
adjustments will refer to these terms and you must know
what and where the parts are.
Assembly
YOUR SAW SHOULD BE ASSEMBLED IN THE
FOLLOWING ORDER:
1. Blade
2. Rip fence (NOTE: Adjust rip scale before proceeding.
See “Adjusting Rip Scale” below.)
3. Blade guard
4. Throat plate
Tools needed for assembly include a screwdriver and the
wrenches included with your saw.
ASSEMBLING THE RIP FENCE
The rip fence can be installed on the left or right side of your
table saw.
FIG. 3
TABLE
MITER
GAUGE
SCREW-DOWN
HOLES
MOUNTING
HOLES
RAIL LOCK
LEVER
BEVEL LOCK
LEVER
ON-OFF SWITCH
ANTI-KICKBACK TEETH
DUST EXHAUST
RIP FENCE
LATCH
BLADE HEIGHT
ADJUSTMENT
WHEEL
FINE ADJUST
KNOB
RIP SCALE
INDICATOR
WORK SUPPORT
EXTENSION
(RETRACTED)
BLADE/WRENCH
STORAGE
FIG. 4
FIG. 5
PIN
OPENING
BLADE GUARD