LSC Lighting NEXUS User Manual
Page 32
NexLan Software
NEXUS
Operator Manual V2.0
Page 26
© 2011 LSC Lighting Systems (Aust) Pty. Ltd.
When you have selected a channel(s), set the merge for these channel(s) by clicking
the “Merge Type” button. The DMX output for each channel can be either:
“Primary”, the channel will output the selected Primary channel.
“Secondary”, the channel will output the selected Secondary channel.
“Tertiary”, the channel will output the selected Tertiary channel.
“HTP” (Highest Takes Precedence), the channel will output the highest value
of the Primary, Secondary and Tertiary channel.
“HTP Max”, the channel will output the highest value of the Primary and
Secondary channel with the Tertiary channel acting as a Grand Master setting
the maximum output level.
“Control”, the channel will output the Primary or the Secondary or both
(HTP) depending upon the value of the Tertiary (Control) Channel. Tertiary @
0% = Primary, Tertiary @ 50% = Both (HTP) and Tertiary @ 100% =
Secondary Channel. For example, you could use a DMX channel on your
lighting console to switch the output of a Nexus DMX port between the
lighting console output (on the primary universe) and a media server output
(on the secondary universe).
“Fade”, the channel will crossfade between the Primary and Secondary
channels with the Tertiary acting as a crossfade control channel.
When you have selected a channel(s), its output can be soft patched from any input
channel of the universe(s) selected for that channel in the “Merge” column or it can
be set to a fixed value.
To patch the selected channel(s) to a channel in the Primary universe click
“Primary”.
To patch the selected channel(s) to a channel in the Secondary universe click
“Secondary”.
To patch the selected channel(s) to a channel in the Tertiary universe click
“Tertiary”.
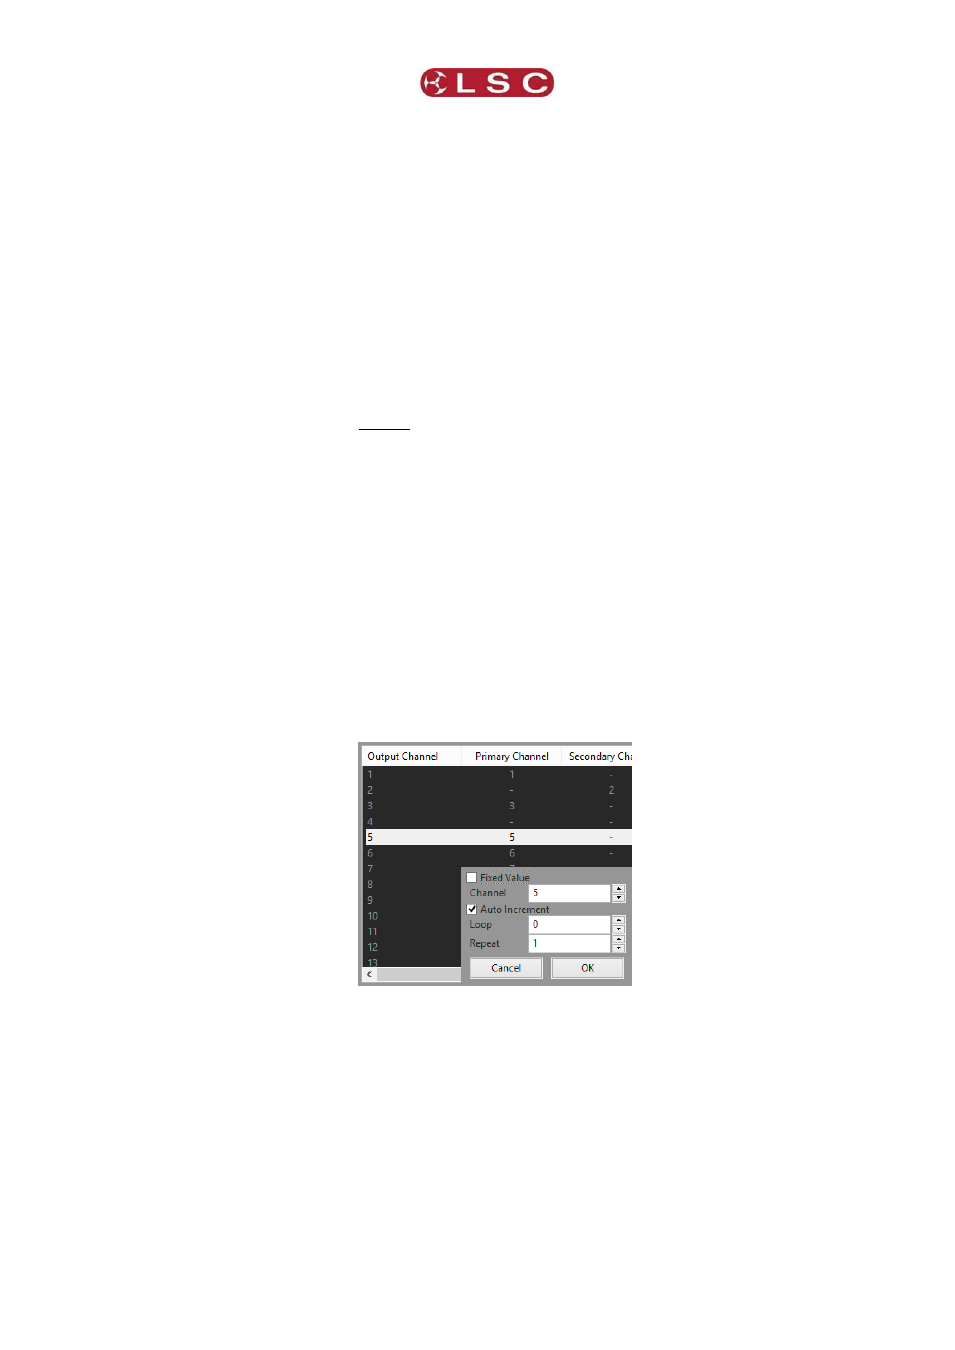
The channel selector box opens………………
Set the “Channel” number of the input universe to which the selected output channel
is to be patched and click “OK”.
If a range of channels has been selected you can patch them in sequential order by
setting the first “Channel” number and ticking the “Auto Increment” box (ticked by
default).
If a range of channels has been selected you can patch them to a smaller quantity of
input channels by setting a “Loop” value. For example, select 9 output channels, set
the input channel to 1 and set “Loop” to 3. The output will be patched as 1, 2, 3, 1,
2, 3, 1, 2, 3.