Shower area installation step 3.21, Step 3.22, Step 3.23 – Infloor Electric Cable Series 386 User Manual
Page 15
15 of 36
Copyright ©2014
This application into a shower area must be verified by the local inspector or the authority
having jurisdiction (AHJ).
Shower area installation
STEP 3.21
Cables only with (-W) on the nameplate label may be installed into a floor or bench seat
located in a shower area. It must never be installed into walls. In general, the cable should be
completely embedded into mortar directly below the surface coverings of tile or stone. Other
types of coverings are not recommended. It may be installed into a mortar layer lower than
this and beneath the waterproof system, however performance will be reduced.
See the Appendix for an example of this type installation.
It is recommended that a dedicated cable be installed in the shower area separate from the
rest of the bath floor. In case there is ever a problem with the shower installation, this cable
could be disconnected without loss of heat to the rest of the floor.
STEP 3.22
Make sure the power lead factory splice (the connection between the power leads and the heating
cable) is located outside the shower area and at least 1’ away from shower openings and other
similar areas normally exposed to water. Make sure the control is located at least 4' away from
shower openings such that it cannot be exposed to water or touched by a person in the shower area.
STEP 3.23
If the heating cable must enter the shower area over a curb, secure the cable at the edges
in an "s-shaped" curve to ensure the cable is not bent sharply or pinched when surface
coverings are installed. Do not damage any waterproofing components, and do not run the
heating cable through a non-masonry curb, causing it to overheat.
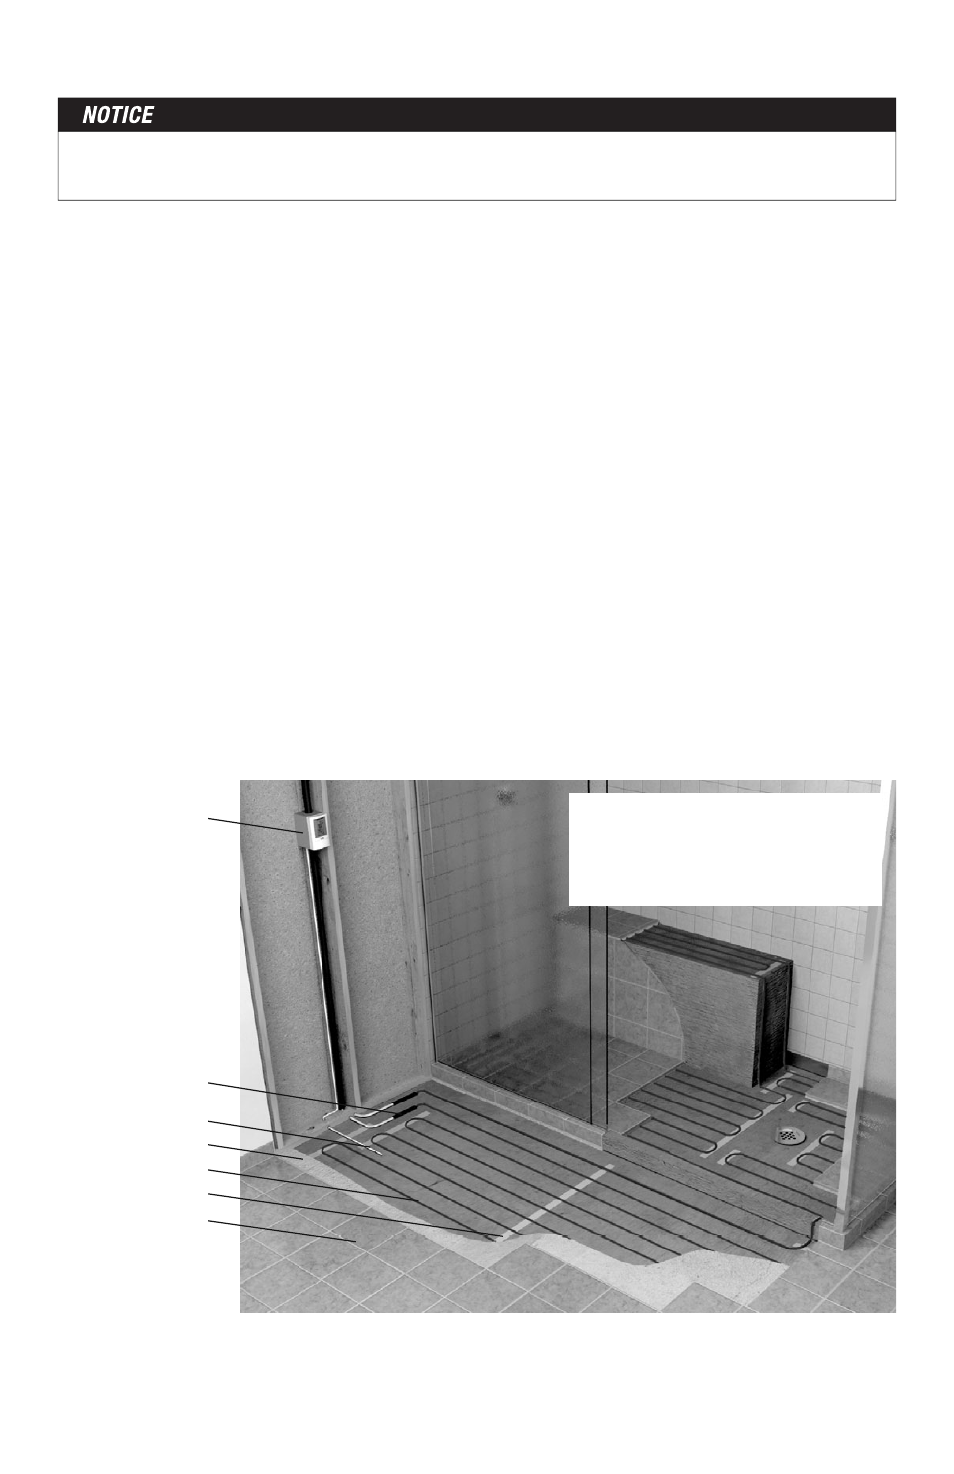
Infloor Thermostat
Factory Splice
Floor Sensor
Infloor Electric Cable
Wire Strap
Thin Set Mortar
Tile/Stone
A (-W) on the nameplate label
indicates a Infloor Electric Cable
cable is approved for installation
in shower floors and/or benches.