Dolmar PS-350 User Manual
Page 15
___
Reparaturanleitung PS-4600 / PS-5000
15
Repair manual PS-350 / PS-420
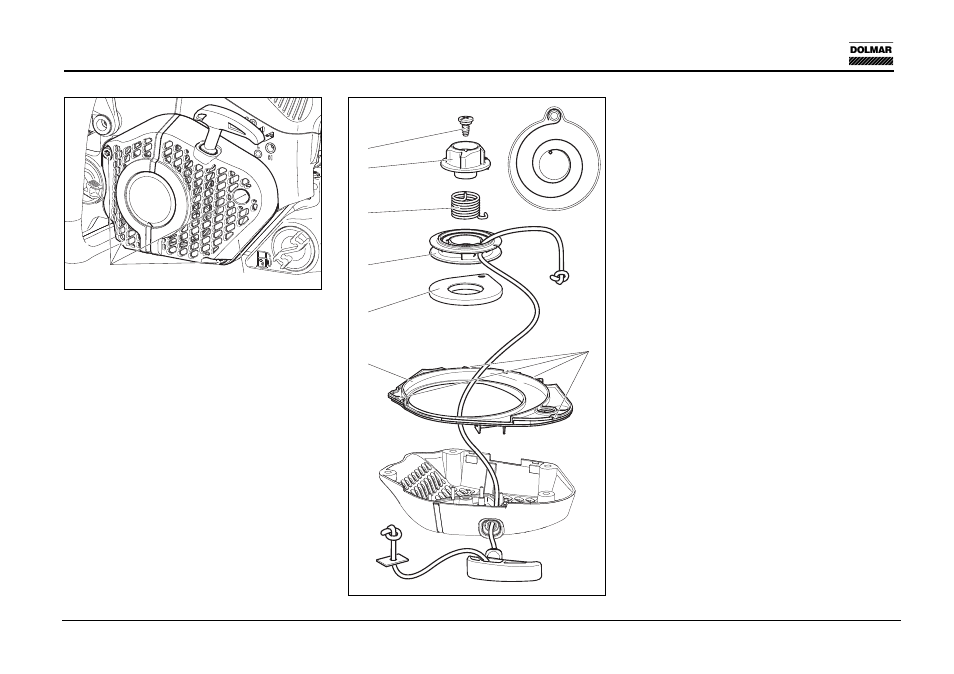
If the spring pops out, put it back into the plastic
housing as shown in the schematic.
Assembly
Note: If installing a new return spring cassette,
grease it on the spring side.
Carefully insert new return spring cassette 9
and push it in. Lightly grease the surface of the
spring and spring cassette with multipurpose
grease (944.360.000).
Thread in a new starter cable (dia 3.5 mm /
1/8“, length 980 mm / 38.5“) as shown in the
illustration, tie a knot (as shown in the
illustration) in both ends, and tighten both knots.
Put on the cable drum 8 and turn it slightly until
the return spring engages.
Insert spring 7 in actuator 6 and insert together
into the cable drum 8 while turning slightly
counter-clockwise. Insert and tighten screw 5.
Tension the return spring clockwise. Turn the
return spring about 6 turns with the aid of the
cable, which should be pressed into the gap in
the cable drum.
Place the air guide 3 in the fan housing and
make sure the two recesses 4 engage.
Position the fan housing 2 correctly on the saw,
press against it slightly, and pull the starter
handle until the starter catches.
Tighten screws 1.
1
2
4
5
6
7
8
9
3
06 STARTER
Disassembly
Unscrew four screws 1.
Remove fan housing 2.
Remove air guide 3 from fan housing.
Detension the return spring.
Injury hazard! Unscrew screw 5 only after
detensioning the return spring!
Unscrew screw 5 and remove actuator 6 and
spring 7.
Pull off the cable drum 8.
Knock the fan housing against a tabletop with
the entire contact surface of the hollow side,
so that the return spring cassette 9 pops out
of the fan housing.
Caution! The return spring can jump out of
the plastic cassette! Always wear
protective goggles and gloves!