Gullco GM-03-300 User Manual
Page 6
4
SETUP
Once the “MAGNETIC MOGGY” has been assembled and installed, as detailed in the Technical
Manual, adjust the vertical and horizontal slides so that they are in the middle of their strokes.
Insert the welding gun or cutting torch, into the gun holder. Position the gun or torch to the desired
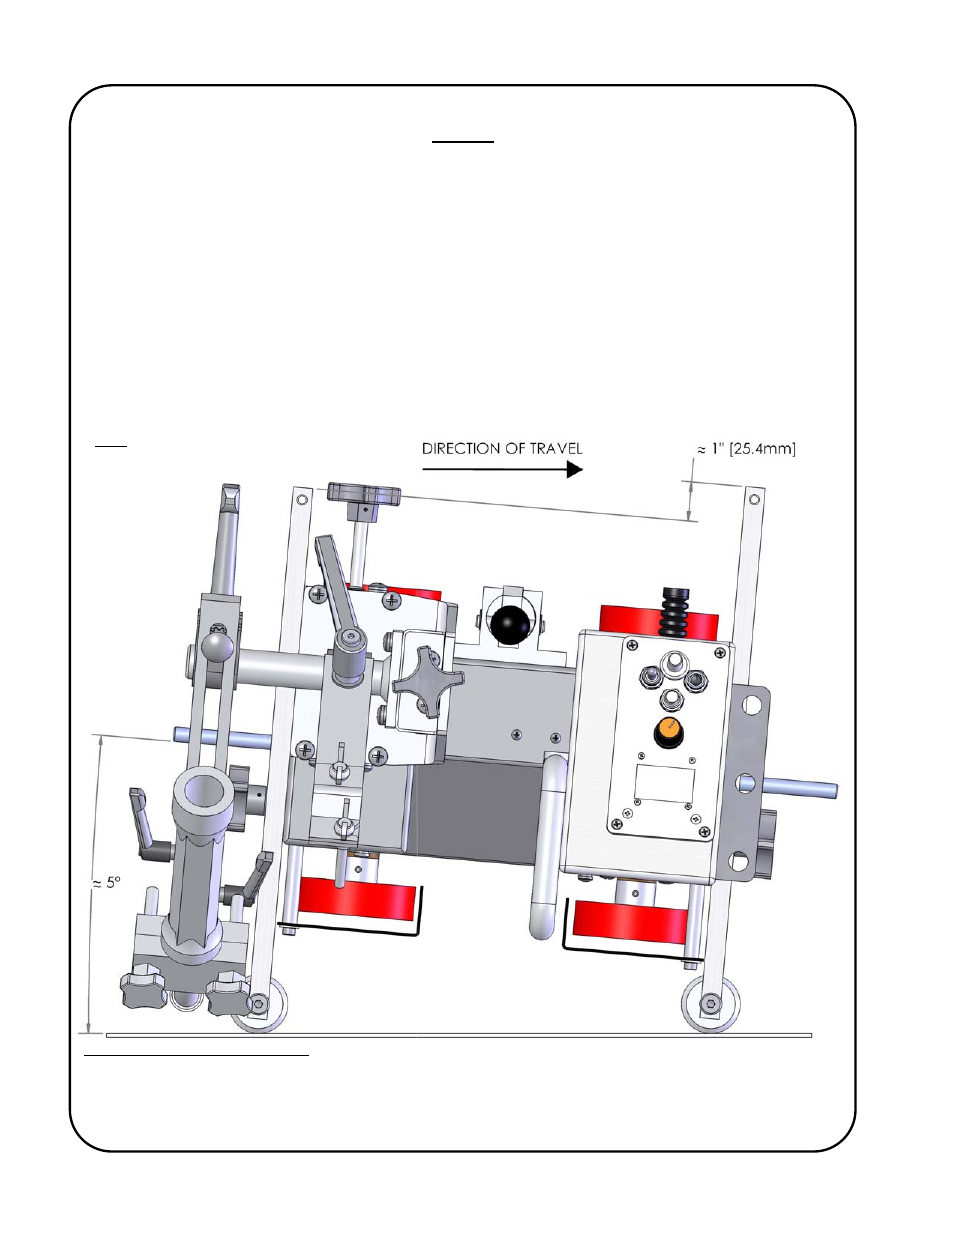
operating position. Then adjust the two guide roller assemblies so that when both guide wheels are
running along the vertical member of the work-piece to be welded (or a template, guide or fence if
no vertical member is available), the leading guide wheel is marginally less extended than the
trailing guide wheel. On a straight work-piece, the optimum amount of difference is approximately
1” [25.4mm]. This places the “MAGNETIC MOGGY” carriage at approximately 5º off parallel to the
work-piece, ensuring that as the “MAGNETIC MOGGY” travels along, it is always driving in towards
the vertical guide. This ensures that the gun/torch to joint distance is always maintained. Fine
positioning of the gun/torch to joint may then be performed with the horizontal and vertical slides.
1
Note: wheels not exactly as shown, for
illustrative purposes only