Step 1 – software setup – Genee World Virtual G Pad User Manual
Page 4
4
Step 1 – Software Setup
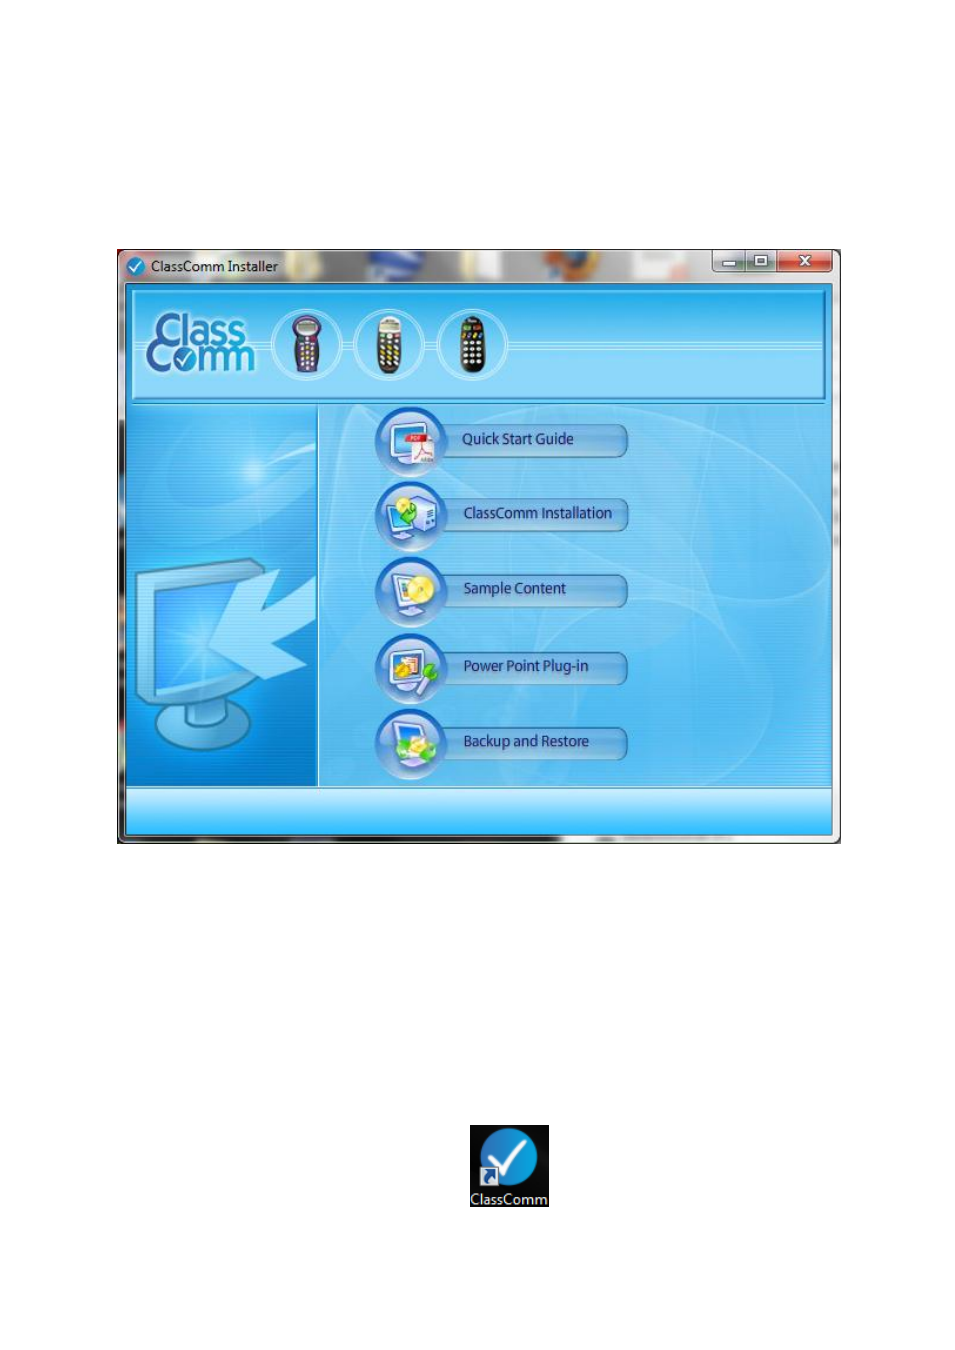
1 – Insert the disk and double-click ClassComm.exe. This will open the ClassComm installation menu
screen:
2 – Click the “ClassComm Installation” option to install the main application. Follow on screen
instructions to complete the installation.
3 – Click “Sample Content” to select and install the required sample educational content which
contains fully mapped PowerPoint presentations. (Optional)
4 – Install the “Power Point Plug-in” module. This will add the Slide Mapper to MS PowerPoint
allowing for presentation mapping.
5 – The “Backup and Restore” option allows users to take a Backup from older ClassComm
installations and then restore these settings into the latest ClassComm software. (Optional Step).
6 – Launch ClassComm from the Desktop icon...