Voice coil replacement for 13315 series drivers, Cleaning the magnetic gap – GAI-Tronics 13411-001 and 13411-002 Replacement Voice Coil / Diaphragm Assemblies User Manual
Page 3
Pub. 42004-110A
Model 13411-001 and 13411-002 Replacement Voice Coil/Diaphragm Assemblies
Page:
3 of 3
f:\standard ioms - current release\42004 instr. manuals\42004-110a.doc
5/11
Voice Coil Replacement for 13315 Series Drivers
1. Remove the six flange bolts from the driver, and remove the rear housing.
CAUTION
Handle the castings with extreme care. The mating flange surfaces must
not be scratched, scored, or otherwise damaged.
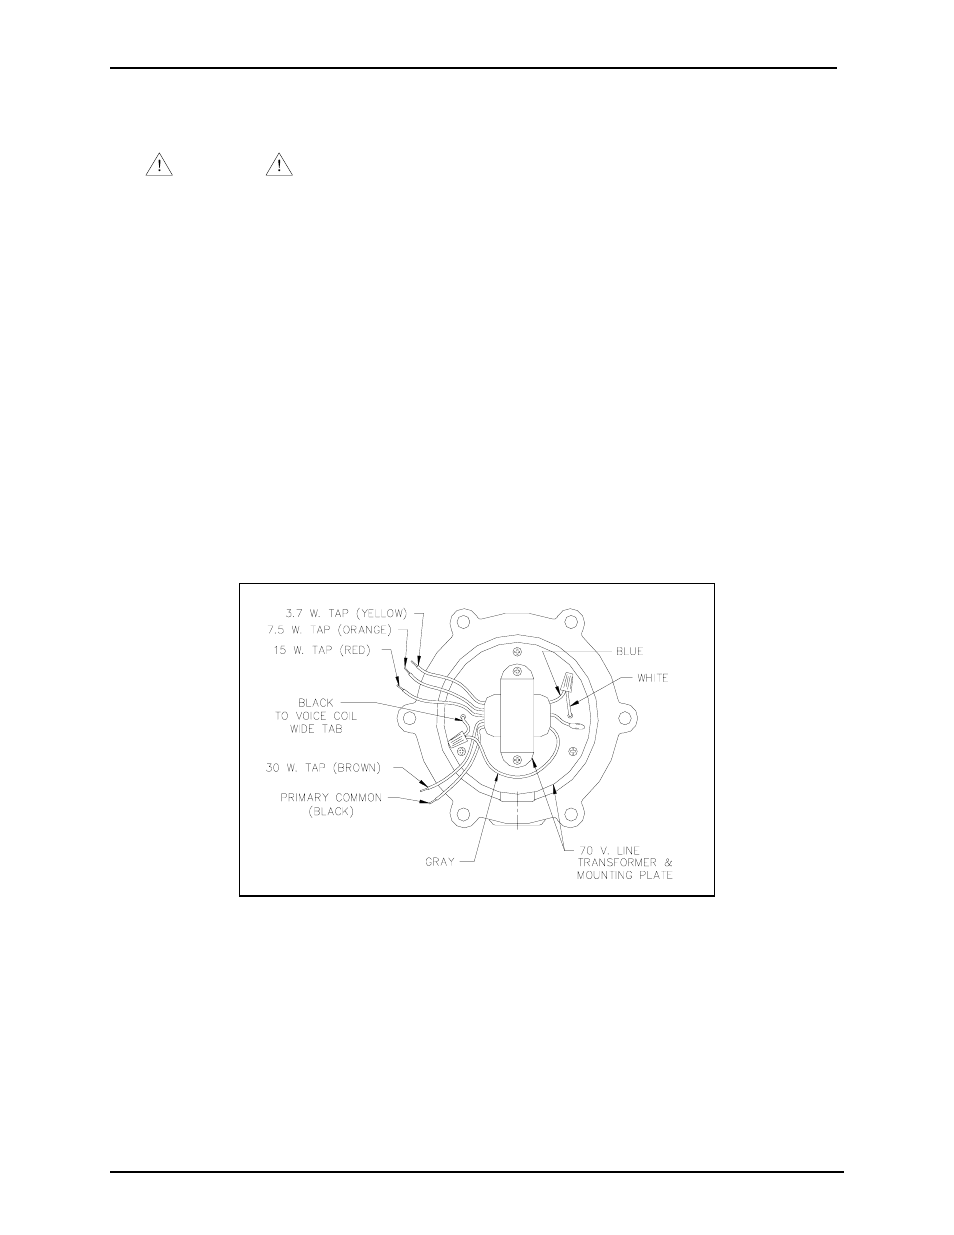
2. For Model 13315-003, the 16-ohm with a 70-volt transformer, remove the wire nuts connecting the
transformer secondary to the voice coil leads.
3. Remove the three screws retaining the transformer mounting plate and remove the plate assembly.
4. Perform steps 3 through 6 in the “Voice Coil Replacement for 13314 Series Drivers” section.
5. Connect the black wire to the wide tab of the voice coil and the white wire to the narrow tab.
6. For Model 13315-003, bring the black and white wires through their associated clearance holes in the
transformer mounting plate, and reconnect the plate to the front housing.
7. Reconnect the gray wire from the transformer to the black voice coil lead and the blue transformer
common wire to the white voice coil lead using suitable splice connectors. See Figure 2 below.
8. Replace the rear housing cover and bolts. N
OTE
: Bolts must be torqued to 40 foot-pounds (54.2
N-m).
Cleaning the Magnetic Gap
If any material (fillings, dust, etc.) is apparent in the magnetic gap, it may be easily cleaned using a small
piece of masking tape doubled over with its adhesive side out. Insert the tape end into the gap, and slide
it all the way around. Repeat this process until the masking tape comes out clean.
Figure 2. 13315-003 Rear View with Cover Removed