Operating instructions (from a pc) – Drake DSE24 HD Video Encoder w/QAM output & CC User Manual
Page 13
13
Click on the desired value for
that parameter. the value list
will then disappear and the
new value will appear in the
window for that parameter.
8) Repeat this procedure for
each parameter you wish
to change. you will notice
that some of the parameter
windows may be grayed out.
this is because that parameter
cannot be selected due to the
value setting on some other
parameter. for example,
Horizontal Shift and Horizontal
width cannot be selected if Composite or Component
video has been chosen.
9) when you have finished changing the parameter
values to suit your situation, click on the SAVe button
at the bottom of the parameters list. this will cause the
changes to be transmitted to the DSe24 and stored in its
memory.
10) Clicking the ‘Set Defaults’ button at the bottom of
the window will cause all values in the parameter list to
change to the factory defaults. you will need to click on
the SAVe button to transfer these values to the DSe24.
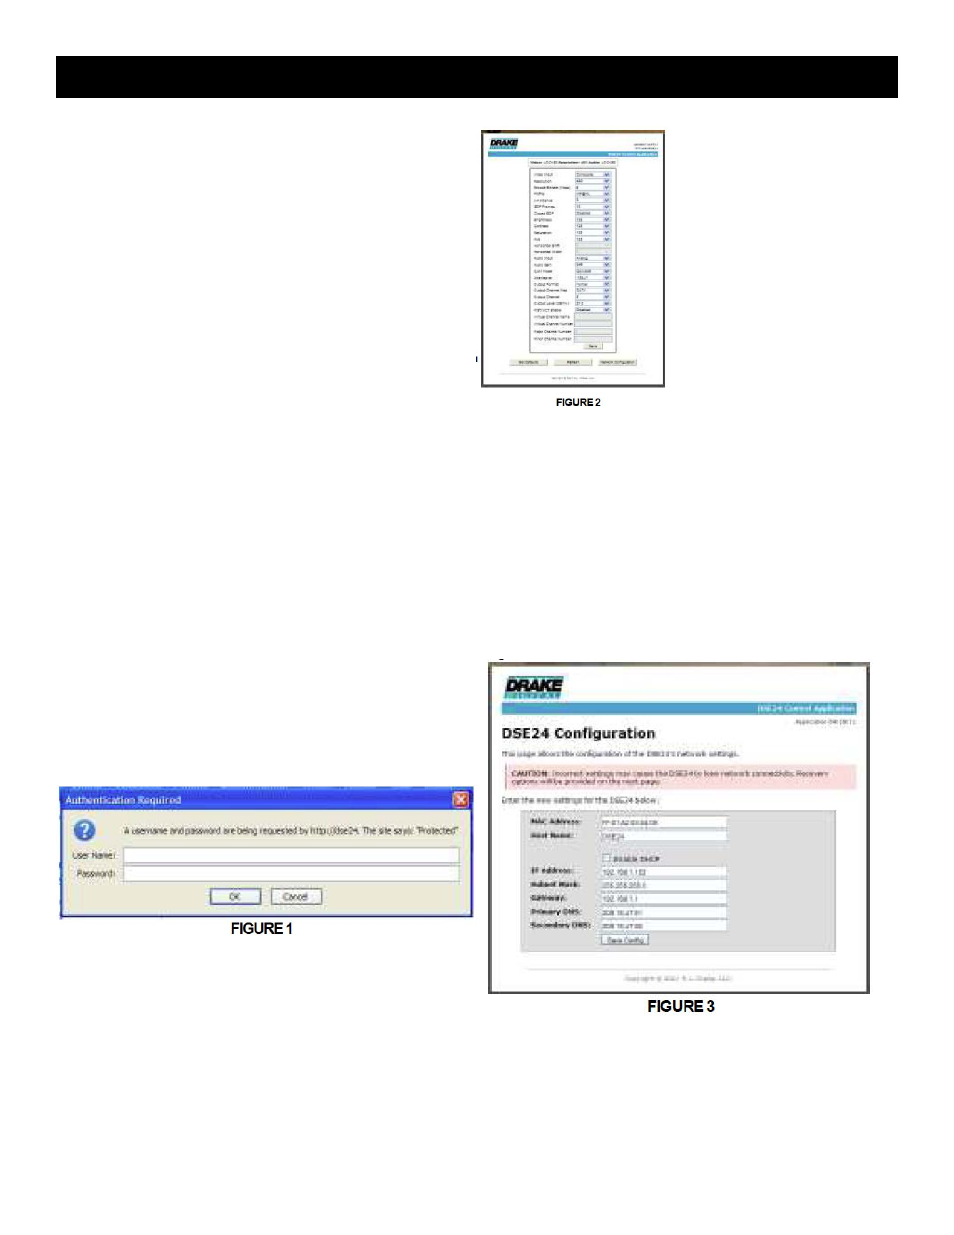
13) once you have set all network parameters as
required for your system, press the ‘Save Config’ button.
this will transfer all network settings to the DSe24 and
will cause it to reboot using the new settings. you will also
be presented with a screen confirming that the settings
have been successfully saved. this screen also contains
instructions for reconnecting to the DSe24 in the event
that connection problems are encountered.
Operating Instructions (From a PC)
Operating Instructions - From a PC
1) Confirm that all connections to the DSe24 have
been made as described previously. with power to
the DSe24disconnected, connect an ethernet cable
from the ethernet jack on the back of the DSe24 to
the ethernet connector on your PC or to your network
router. then apply power to the DSe24.
2). After the DSe24 has booted up, scroll to the uSeR
NAme screen using the Left or RiGHt arrow buttons
and enter program mode by pressing and holding the
eNteR button.
3) Program the desired uSeR NAme, PASSwoRD
and HoSt NAme using the alphanumeric techniques
described in the previous section.
4) while still in program mode, scroll to the DHCP
screen, and select either eNAbLeD or DiSAbLeD.
if eNAbLeD is selected, iP ADDReSS, SubNet
mASK, and GAtewAy ADDReSS will be selected
automatically. if DiSAbLeD is selected, enter these
three menu items manually. Press eNteR to save
these settings.
5) the following discussion assumes that the PC you
plan to use to control the DSe24 is up and running
and your web browser of choice has been activated.
in the browser’s web address window, type in the iP
ADDReSS or HoSt NAme that you programmed into
the DSe24. you will be presented with the dialogue
box shown in figure 1 below.
type in the user Name and Password that you
programmed into the DSe24 previously and click on
oK.
6) you will then be presented with the main control
screen similar to the one in figure 2. you will notice that
all DSe24 parameters are listed along with the values
that were previously selected for each parameter from
the DSe24 front panel. At the top of the display you will
note that the status of the audio and video along with
the currently selected resolution are shown.