Replacing the cutting blades – DR Power TreeChopper User Manual
Page 19
CONTACT US AT www.DRpower.com 19
Replacing the Cutting Blades
Tools and Supplies needed:
Two 3/4" Wrenches
9/16" Wrench
Leather Gloves
1.
Place the Cutter Head Assembly flat on the ground and remove the Bolt, Flat
Washers and Locknut from the two pivot points using two 3/4" Wrenches
(Figure 19).
2.
Remove the two Coupling Nuts that secure the Front Circular Blades with a
3/4" Wrench (Figure 20).
3.
Remove the two Adjustment Pin Bushings that were under the Coupling
Nuts.
4.
Remove the 18 Locknuts that secure the Upper Cutting Plate to the Lower
Cutting Plate using a 9/16" Wrench.
5.
Pull the Upper Cutting Plate away from the Lower Cutting Plate.
Note: Take note of all Shim and Spacer locations for reassembling.
6.
Remove the front and rear Shims (Figure 21).
Note: The front Triangular Blades can be flipped so the unused rear facing sharper
edge is now facing forward to minimize sharpening time. However when
both edges are dull the entire cutting edge will need sharpening.
7.
Remove and replace the Blades as needed.
Note: Ensure that the Circular Blade Bushings are in place when the Blades are
installed.
8.
Reassemble the Cutter Head Assembly in the reverse order that it was
disassembled.
9.
Perform a Circular Blade adjustment before tightening Coupling Nuts and
18 Locknuts mentioned in steps 2 and 4 (see next section “Front Circular
Blade Adjustment”).
Bolts, Flat Washers
and Locknuts
Figure 19
Coupling Nuts
and Adjustment
Pin Bushings
Figure 20
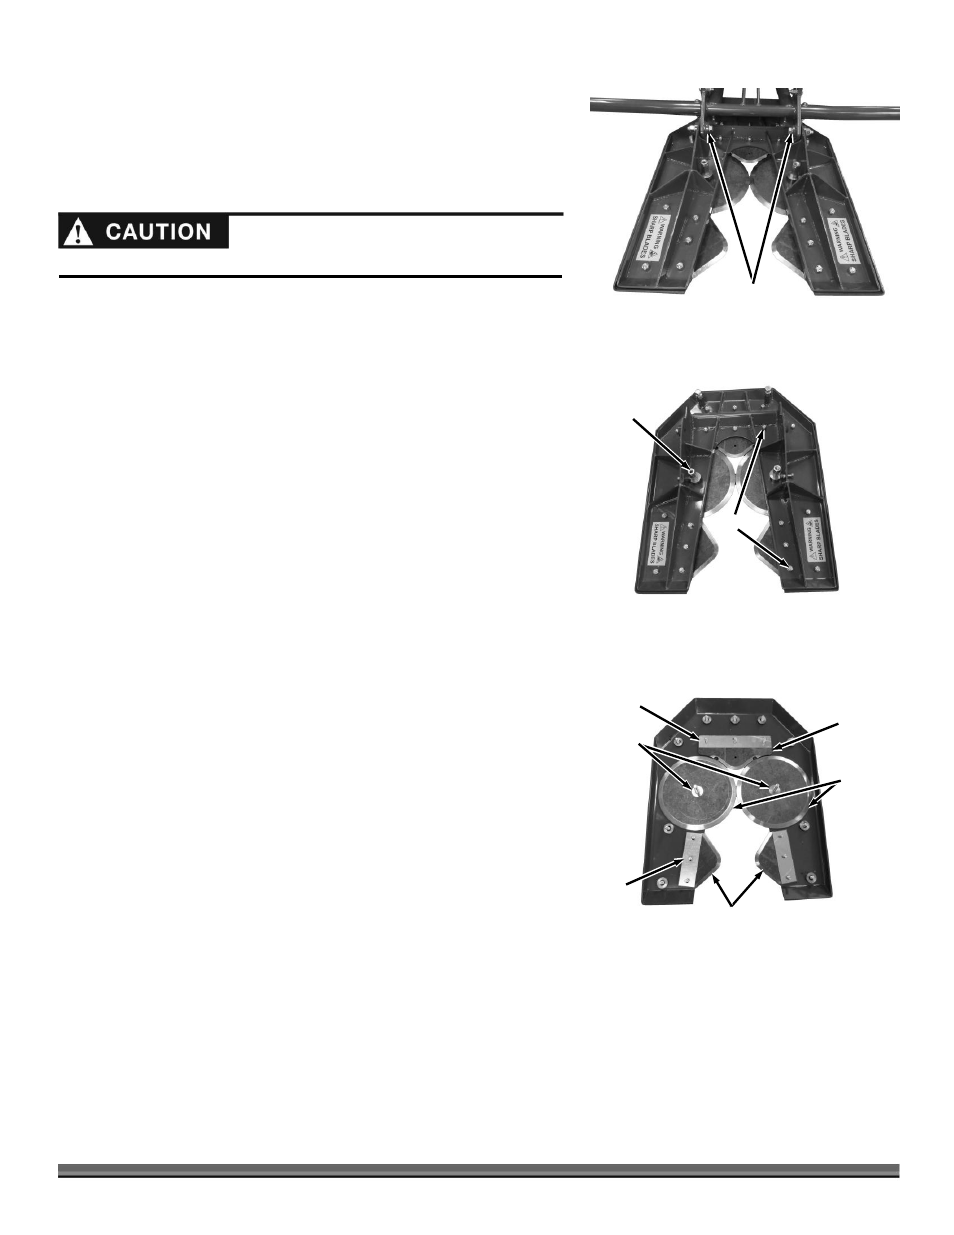
Locknuts
Front
Circular
Blades
Figure 21
Front Triangular
Blades
Rear
Blade
Rear
Shim
Front
Shim
Circular
Blade
Bushings
Wear gloves to protect your hands from sharp blade edges.