Assembling and installing the dr treechopper – DR Power TreeChopper User Manual
Page 11
CONTACT US AT www.DRpower.com 11
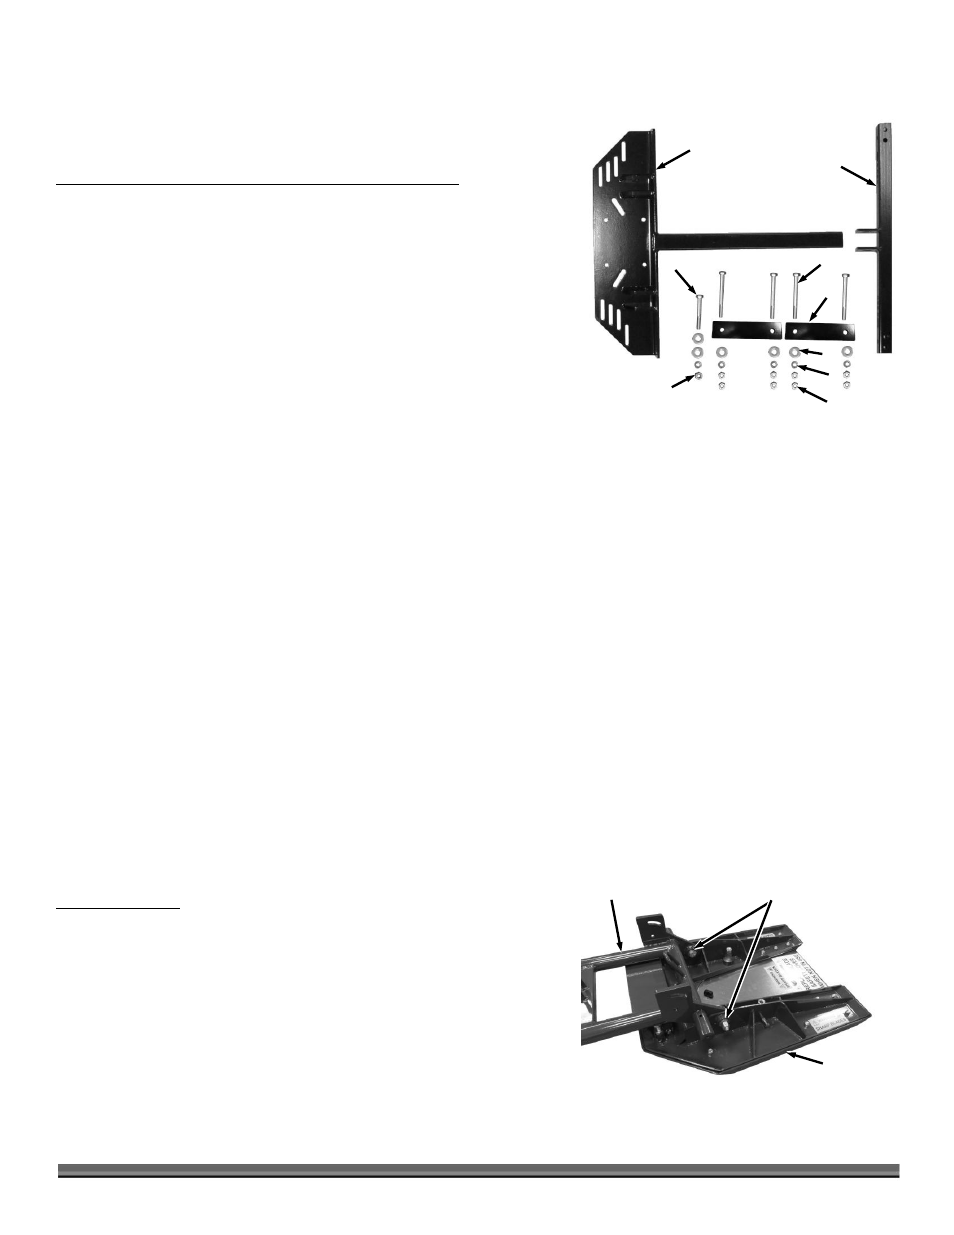
Beam Frame Kit #31959: (Figure 6 and List below)
Note: For assembly reference, the item numbers below match the item numbers of
the applicable exploded illustration in Chapter 6.
Item
Description
Qty
01.............. Cross Bar, Universal ...................................................1
02.............. Mount, Universal ........................................................1
03.............. Washer, Flat, 3/8", USS .............................................6
04.............. Nut, Nylon Lock, 3/8-16, ZP......................................1
05.............. Washer, Lock, 3/8" .....................................................5
06.............. Nut, 3/8-16, Zp ...........................................................8
07.............. Bracket, Beam Frame .................................................2
08.............. Bolt, 3/8-16 X 2.75", Gr5, ZP .....................................1
09.............. Bolt, HCS, 3/8-16 X 4-1/2", Gr5, ZP .........................4
Compare the contents of the shipping package with the parts supplied list above
and Figure 6. If you have any questions, contact us at www.DRpower.com or
call 1-800-DR-OWNER (376-9637).
Installation Notes
The universal mounting plate has been designed to easily attach to most ATV frames.
The mounting bracket attaches to the frame of your ATV which must not be dented, bent, collapsed or rusted. Secure mounting
is necessary for safe and successful use of the TreeChopper.
The TreeChopper should only be installed on ATVs that are 400cc or more and have 4-wheel drive.
Always keep all guards and shields in place when the TreeChopper is not in use. This includes during assembly and while
attaching or detaching the TreeChopper to your ATV.
Proper installation of the mounting bracket onto the frame of your ATV is necessary for safe and successful use of the
TreeChopper. The mounting bracket must be securely affixed to the frame of the ATV. If mounting to the frame and skid plate,
the skid plate must be constructed of heavy metal. Do not attach to a plastic skid plate.
If the metal skid plate is not flat and causes the Mounting Bracket and Cross Brace to not be flat against the frame, you cannot
safely mount to your ATV. It is very important to make sure the mounting bracket fits securely to the frame of the ATV
Always install the Blade Guard when the TreeChopper is not in use.
Assembling and Installing the DR TreeChopper
Tools and supplies needed:
Two 7/16" Wrenches
Two 9/16" Wrenches
Two 3/4" Wrenches
Gloves
Mounting for ATVs
Note: The following photos in this chapter focus on the installation of the Round
Tube Frame Kit #31956 but the steps describe all kits. Please refer to the
Illustrations in Chapter 6 for accurate representation of the parts and
assembly order of your kit.
1.
Attach the Cutting Assembly to the Chassis (Figure 7) with two 1/2-20
Bolts, four 1/2" Flat Washers and two 1/2-20 Locknuts using two 3/4"
Wrenches. Do not tighten the hardware completely to allow the Cutter
Assembly to rotate independently of the Chassis.
2
Figure 6
1
8
7
3
5
6
4
9
Bolt, Flat Washers
and Locknuts
Figure 7
Cutter
Assembly
Chassis