DR Power 3-Point Hitch Rapid-Feed User Manual
Page 35
CONTACT US AT www.DRpower.com or CALL TOLL FREE 1-800-DR-OWNER 31
Removing and Replacing the Chipper Knife
Tools Needed:
• 5/16" Wrench
• 9/16" Socket
• 7/32" Allen wrench
• Awl or Sharp Tool
• Gloves
1. Remove the Belt Guard (see “Removing and Replacing
the Drive Belt” in this Chapter to remove the Belt
Guard).
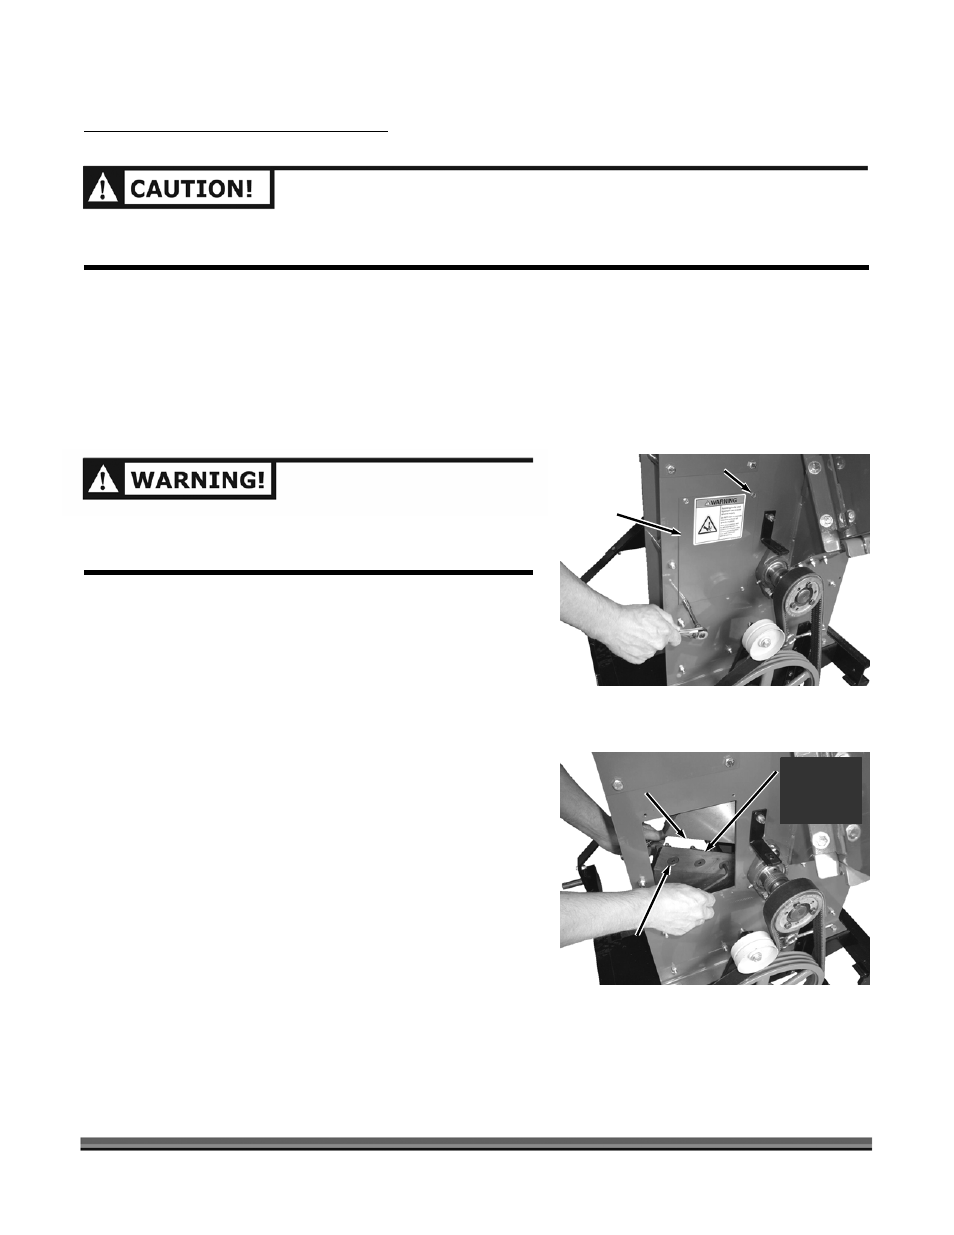
2. Using a 5/16” Wrench, remove the Self -Tapping
Screws and remove both Knife Access Covers from the
front and back of the Chipper Assembly (Figure 38).
3. Rotate the Flywheel using a stick until the three
countersunk Allen Screws and Lock Nuts attaching the
Knife to the Flywheel are visible through the Access
Openings.
4. Clean out the heads of the Allen Screws with an Awl or
Sharp Tool.
5. Insert a 7/32” Allen Wrench into the head of a screw
(Figure 39).
6. While holding the Allen Wrench, remove the Lock Nut
using a 9/16" socket.
7. Repeat Steps 5 and 6 for the remaining two Allen
Screws.
BE CAREFUL AND WEAR GLOVES WHEN WORKING NEAR
THE CHIPPER KNIFE. THE KNIFE EDGE CAN CUT YOU IF
YOU COME IN CONTACT WITH IT.
IF THE FLYWHEEL SURFACE IS NOT CLEANED PROPERLY AND THE CHIPPER KNIFE IS NOT MOUNTED
FLUSH ON THE FLYWHEEL, THE KNIFE COULD CRACK WHEN THE HARDWARE IS TIGHTENED.
Rear Knife
Access Cover
(one on the
front side
also)
Figure 38
Screws
Chipper Knife
(sharp edge
facing up and
towards you)
Figure 39
Countersunk
Allen Screws and
Locknuts
Flywheel
Slot