Drive clutch cable adjustment – DR Power Walk-Behind 6.5 (Pre-August 2010) User Manual
Page 39
CALL
TOLL-FREE
1-800-DR-OWNER 35
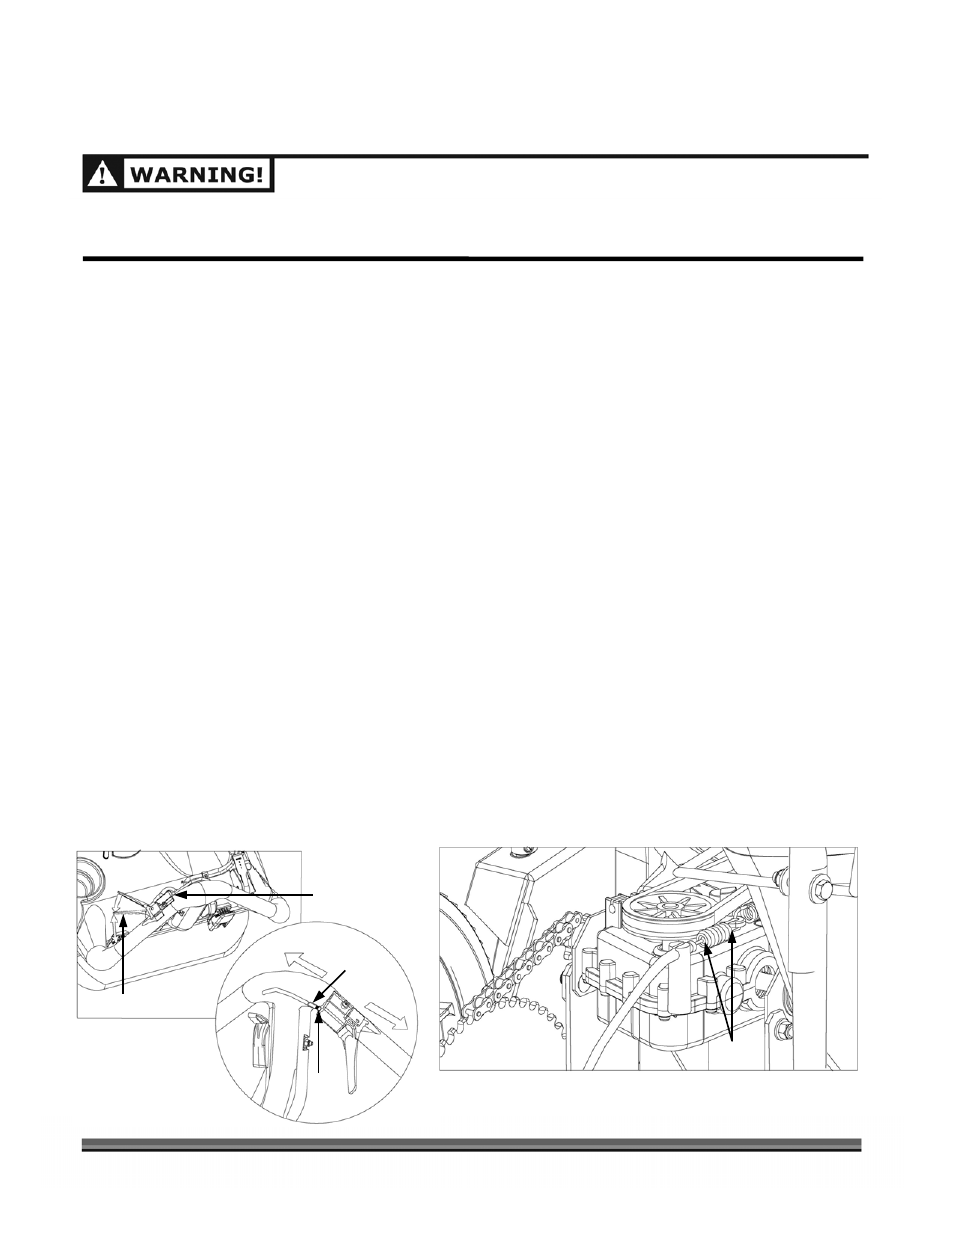
Drive Clutch Cable Adjustment
WHEN PERFORMING ANY MAINTENANCE, YOU MUST FIRST SHUT OFF THE ENGINE, WAIT FIVE (5)
MINUTES TO ALLOW PARTS TO COOL AND DISCONNECT THE SPARK PLUG WIRE, KEEPING IT AWAY
FROM THE SPARK PLUG.
Tools Needed:
•
7/16" Socket with 6" Extension
•
(2) 1/2" Wrench
•
Tape Measure
1. Remove the Belt Cover using a 7/16" Socket with a 6" Extension to remove the four (4) 1/4" Cover Bolts
(Figure 19 on page 33).
2. Pull the machine backward and squeeze the Drive Clutch Lever until it stops freewheeling. At this point,
the Drive Clutch Lever should be about 4" from the tip of the Lever to the Handlebar (Figure 21a).
3. Measure the amount of Clutch Spring stretch (Figure 21b). The Clutch Spring should measure 1-1/8"
when engaged.
Tip: Either tie the Drive Clutch Lever to the Handlebar or have someone hold it for you during the
measurement.
4. Using two (2) 1/2" Wrenches, loosen the Lock Nut and then tighten or loosen the Cable Adjuster Nut in
front of the Drive Clutch Lever (Figure 21a) until you obtain the 4" distance as noted in step 2.
5. Holding the Adjuster Nut in place with one Wrench, tighten Cable Lock Nut firmly with the other
(Figure 21a).
6. Release the Drive Clutch Lever and then move it to the Handlebar again and hold it. Check the Clutch
Spring length to assure it stayed in adjustment.
7. Readjust
as
required.
8. Reinstall the Belt Cover and reconnect the Spark Plug Wire.
9. Test run the DR WALK-BEHIND LEAF & LAWN VACUUM to insure proper operation after this or any
other maintenance procedure.
Figure 21a
Figure 21b
Cable
Adjustment
4" from Handle
Lock
Nut
Adjuster
Nut
Loosen
Tighten
1-1/8"