Assembly of the antenna – DH Satellite GIBRALTER IV MOUNT User Manual
Page 8
ASSEMBLY OF THE ANTENNA
(On Ground: Lift As One Piece Antenna)
FIG. #9
Page 6A
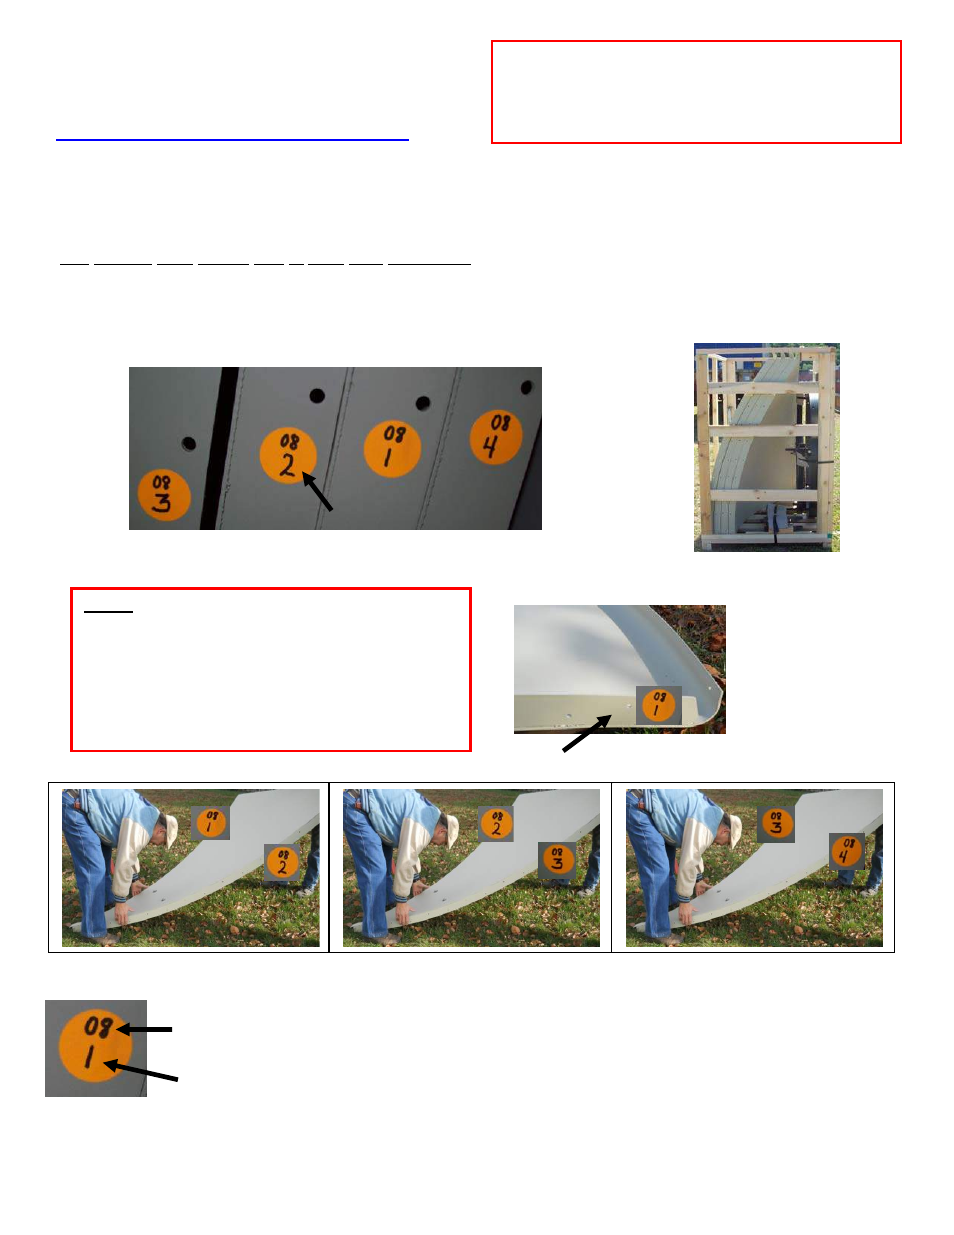
The antenna will come in 4 or 8 pieces each having a color coded dot on the rib (see FIG. #9). NOTE: After
complete installation you will no longer see the colored dots. You must take two sections of the antenna
and place them on a flat surface face down allowing for the installer to work on attaching the numbered ribs.
The antenna must always stay in crate until assembled. (see FIG. #10). Take panel one labeled 08/1 and 08/2
and attach it to panel 2 which is labeled 08/2 on one rib and 08/3 on the other rib. Connect panel 1 with rib
#2 (labeled 08/2) to panel 2 with rib #2 (labeled 08/2), matching the #2 on each rib of the two panels (See
photos below). Install 1/4" x 3/4" bolts in all holes, finger tight. Continue on to the next panel in the same
manner until finished with all panels. Now tighten all hardware.
Match 2 with 2
The top number represents the serial number of the antenna. *Example: In FIG. #9 you will see 4
sections with the top number 08. You will take all four pieces of 08 to make one complete antenna.
Rib number. *Example: On a 4 piece 3.0m antenna the dot will have a 08 on the upper part of
the dot (serial number) and the lower number of 1, 2, 3, 4 are the rib numbers.
Rib
IMPORTANT!!
If you have purchased a 4 piece or 8 piece
sectional antenna follow the instructions on page
6A and 6B.
NOTE:
The aluminum antenna is also stamped in the lip. This
number reflects the position of the panel.
The number stamped on the rib reflects the antenna as a
whole for bulk shipping. Each section has one rib stamped.
The number will be the same on all ribs making it one
complete antenna.
See optional sectional installation on page 6B: “Installing by Sections to Ring”
FIG. #10