Installation of base – DH Satellite GIBRALTER IV MOUNT User Manual
Page 3
Installation of Base________________________________
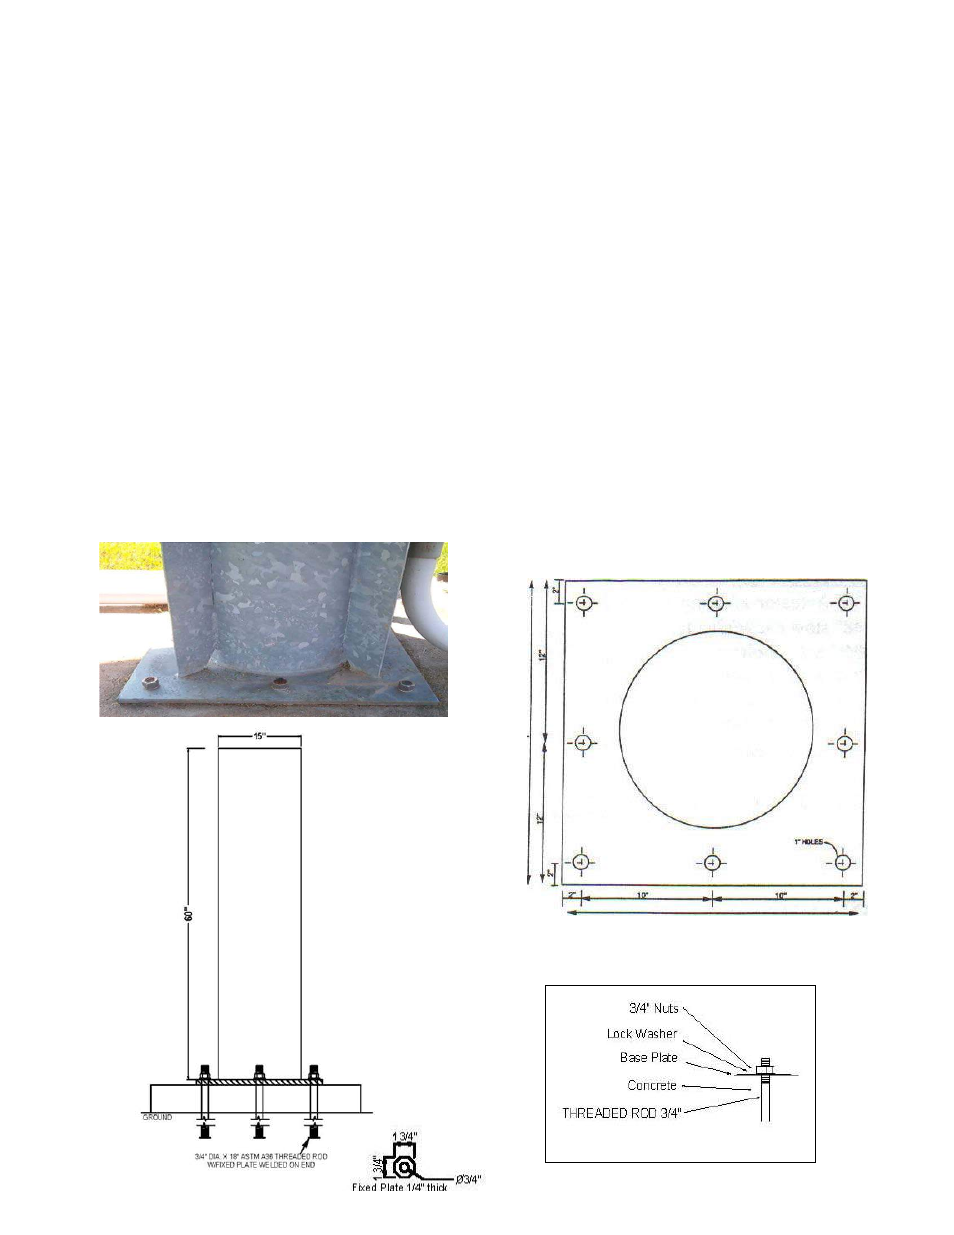
Look at the drawings below. Figure #1 shows a base plate using 18” anchors. This mount option can be used either
with a square foundation or sono tube. Please see drawing on page 2A for recommended concrete base. In areas of
deep frost we recommend that this base go below frost levels. Rebar can be used to reinforce the structure. Please
contact your local concrete contractor or a local Engineer to determine these needs.
WE RECOMMEND THAT YOU
CHECK WITH A LOCAL ENGINEER TO DETERMINE SOIL TYPE AND BEARING TO VERIFY THAT THIS
BASE WILL WORK FOR YOUR LOCALE.
When pouring the concrete, be sure to have the base template ready and insert the anchors as per Figure #2.
Leave approximately 2" of the bolt out of the concrete. These bolts can be installed after the mount is delivered by
drilling the holes in the concrete and using lead heads, Garonite or a resin mortar to secure the bolts. If you decide to
put the bolts in after the concrete has set, you must install regular hardened bolts. (We recommend the bolts be installed
prior to the delivery of the mount.) Our people have installed both lead heads and Garonite. DH recommends the
Garonite.
When installing the Gibralter stand, carefully lower it over the bolts and then tighten the nuts in place. Be sure to install
a lock washer. It is always a good idea to get the base plumb although this is not critical with this Azimuth-Elevation
mount as it would be with a Polar mount. The front of the mount should be facing South in the Northern Hemisphere.
(The rear of the mount will have the gearbox.) With the Gibralter mount, you will have over 250 degrees of travel, but
you do not have a full 360 degrees of azimuth. I mention this for those of you who are installing the Gibralter to track
things other than the Geosynchronous Satellite belt.
24” x 24” x 1/2”Base Plate
Page 2
Figure #2
(18” Long)
Figure #1