Assembly of the 2 piece antenna with joiner strip, Assemble ring to base stand – DH Satellite GIBRALTER IV MOUNT User Manual
Page 5
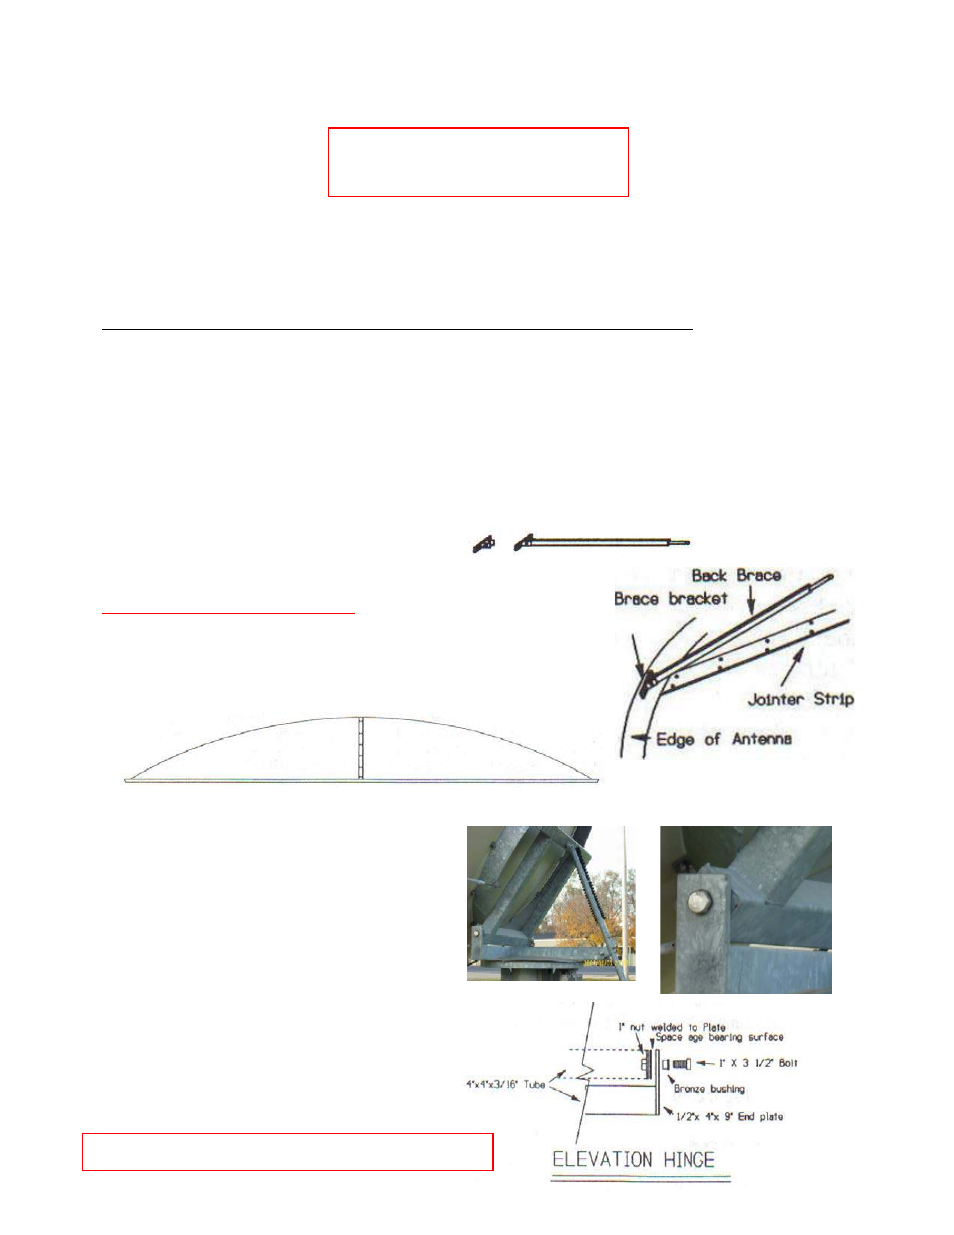
Assembly of the 2 Piece Antenna with Joiner Strip
Disregard this section if you have
a 1pc, 4pc, or 8pc Antenna.
At this time the antenna will come in either one or two pieces when using the Gibralter mount. Please ignore this
paragraph and go on to the next page if you have requested your antenna to be shipped in one piece. Those of
you who are using a two piece antenna, you must now follow the directions in this section before going further.
(Please use extreme care in handling of sections so not to twist or distort the sections prior to assembly.)
The antenna must always set on the lip when assembling or storing, laying face down. See Figure #3. Before
sliding the halves together, one person should get under the antenna with the 14" x 3/4" bolts supplied. Use
the proper joiner strips and push the bolts from the inside out and secure with the 1/4" nuts. (Install all bolts
before tightening.) The joiner strips and the dish will have serial numbers that match. Be sure the numbers
match if you are using multiple antennas so you are attaching the correct panels to complete the antenna. These
numbers are on the inside lip of the dish and the end of the joiner strip (see Figure #4). Tighten these very tight
so the dish holds the shape it had when made. Below is a listing of the additional number of 1/4" bolts that
should be in your bolt bag when your antenna is in two pieces
.
(A manual cutting process is used for all two piece antennas. It is critical that
you match sections correctly.)
12' (3.7m) -28 - ¼” x ¾” bolts
12’5 (3.8m) -32 - ¼” x ¾” bolts
12’9 (3.9m) -32 - ¼” x ¾” bolts
Discontinued
14' (4.2m) -36 - ¼” x ¾” bolts
14' 9" (4.5m) -36 - ¼” x ¾” bolts
16' (5m) -36 - ¼” x ¾” bolts
Figure #4
Figure #3
Assemble Ring to Base Stand
In most instances, you will have to assemble the
60" ring to the 16" dia. base. Look at the photo of
the mount on page 5, and you will notice that the
top of the mount has two brackets to attach the
elevation arm and the elevation stabilizer. The
bottom has the 4" bar closest to the ring; it also has
the hole in each end. Line up the bottom
framework of the ring with the swivel brackets, set
in the green bearing surface washer, place the two
1" x 3 1/2" bolts through the swivel brackets (there
is a brass bushing in the hole) and tighten. The
washers go between the ring and the tabs on the
mount (see Figure #5).
----------------------------------------------------
Figure #5
Page 3
2pc antenna discontinued as of January 2013