Daktronics venus, Creating a hy-tek sequence – Daktronics Venus 1500 Controlled signs with Hy-Tek & FinishLynx User Manual
Page 6
Daktronics Venus
®
1500 Controlled signs with Hy-Tek & FinishLynx Quick Guide
6
Daktronics, Inc. © 2007
P.O. Box 5128, 331 32
nd
Ave Brookings, SD 57006
ED17910-Rev 1 P1153
www.daktronics.com
tel (605) 697-4036 or (877) 697-1115 fax (605) 697-4444
Creating a Hy-Tek Sequence
Complete steps 1-4 from creating a FinishLynx Sequence on page 3
then follow steps 5 and 6.
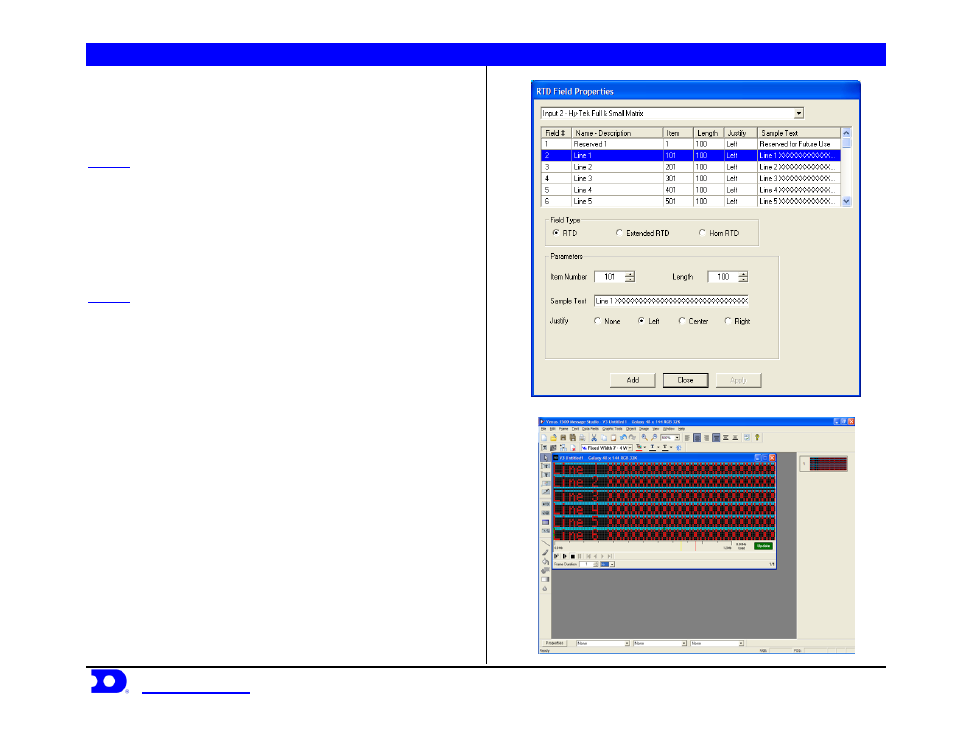
STEP 5:
Add the RTD fields to the frame. On the V1500 Message
Studio, pick the icon on the tool bar that says RTD shown in Figure 13.
Left click once on the icon then move the mouse over the frame and
pick were it will go. The RTD box is moveable after it is created. Now
the screen in Figure 14 will come up. Left click on the drop down
arrow and pick Input 2. This should automatically select the Hy-Tek
Full and Small Matrix.ITF that was configured in Venus 1500 Real
Time.
STEP 6:
Determine how many lines of information will be displayed.
From the item list choose Line 1 for line 1 on the display, 2 for 2, etc. A
sample sequence for a 48 x 144 is shown in Figure 14.
Figure 13: RTD Field Properties
Figure 14: Hy-Tek RTD Sequence