Daktronics venus, Creating a finishlynx sequence – Daktronics Venus 1500 Controlled signs with Hy-Tek & FinishLynx User Manual
Page 4
Daktronics Venus
®
1500 Controlled signs with Hy-Tek & FinishLynx Quick Guide
4
Daktronics, Inc. © 2007
P.O. Box 5128, 331 32
nd
Ave Brookings, SD 57006
ED17910-Rev 1 P1153
www.daktronics.com
tel (605) 697-4036 or (877) 697-1115 fax (605) 697-4444
Creating a FinishLynx Sequence
STEP 1:
From the V1500 shell, open the V1500 Message Studio. Select
FileÆNew and pick the sign to create the desired sequence.
STEP 2:
Now in the V1500 Message Studio, select
FrameÆAddÆGraphic. This will add a graphic frame to the
sequence. Graphic frames are preferred for RTD because it allows
positioning of the RTD boxes exactly where the user desires. On the
right there should be a story board with 2 frames, (frame 2 is the one
that was just added). Pick Frame 1, right click and pick Delete
Frame(s) to remove the unwanted frame.
STEP 3:
Next change the Frame Duration from 2.0 seconds to 1 hour.
This is done to keep the one-tenth of a second running time smooth.
STEP 4:
Now it is important to select the font to be used. It is
changeable once the field has been added by selecting the text and
picking a new font.
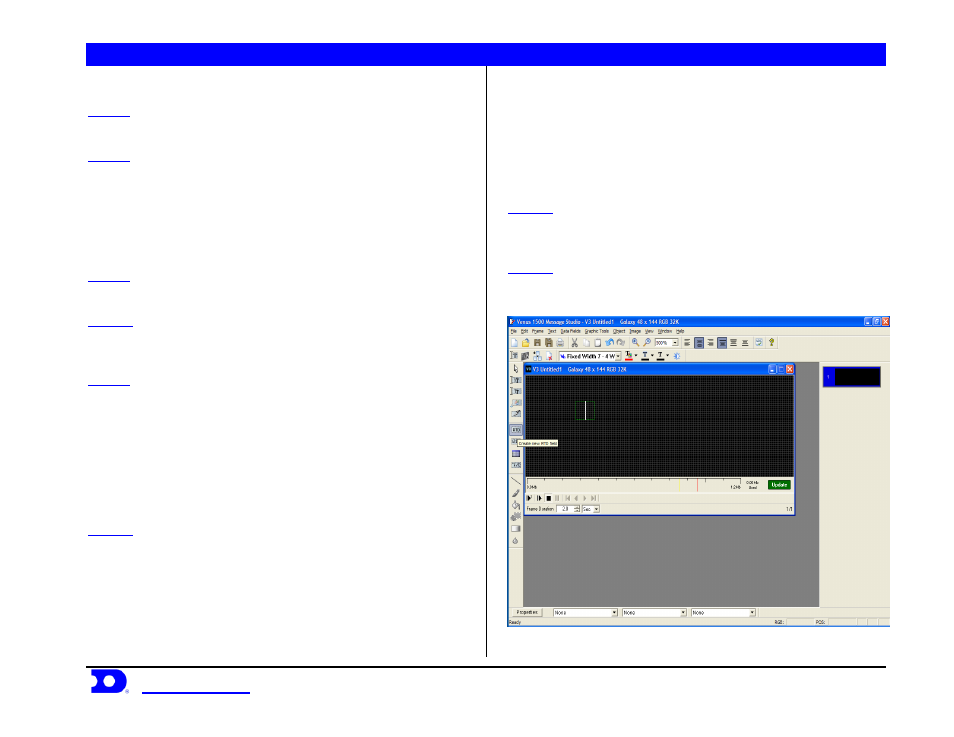
STEP 5:
Add the RTD fields to the frame. In the V1500 Message
Studio, pick the icon on the tool bar that says RTD shown in Figure
10. Left click once on the icon then move the mouse over the frame
and pick were it will go. The RTD box is moveable after it is created.
Now the screen in Figure 11 will come up. Left click on the drop down
arrow and pick Custom ITF. To the right of the drop down arrow left
click once on the “...” (browse). From
C:\ProgramFiles\Daktronics\Common\InputTempletes\ select
FinishLynx.itf. This is the “list” of data available from FinishLynx.
STEP 6:
Once the list is up use the scroll bar on the right to see the
entire list. From the list select the line with the information that is
desired and add it into the current RTD box. For example, box 1 might
be the event title, so pick Field #4. Notice that the parameters at the
bottom of Figure 12 have changed. Justify should be set to None.
Change the Length to fit the sign. Since Event Title is a word, do not
change the Item Number. It needs to start displaying from the
beginning of the field. If this were a number field like running time
then it should display MN:SC.TH and not the whole field of
HR:MM:SC.THT. To do this, change the Length from 12 to 8 and
change the Item Number from 1 to 4. This will filter out the first 3
characters which were HR: and the last one-thousandths of a second
digit. Another example would be Line 1 Place. Notice that it will show
numbers up to 999. To show a place up to 99 change the Length to 2
and increase the Item Number by 1. This will “filter” out the
hundreds digit.
STEP 7:
Finish positioning the field and repeat steps 4 though 6 for
each field to be displayed. A sample sequence for 48 x 144 is shown in
Figure 12.
STEP 8:
Remember to save and name the sequence.
NOTE: To remove the beginning of an item (i.e. the hours digits on time),
increment the “item number” and decrement the “length”.
Figure 10: RTD Field Properties