3 parking garage display operation – Daktronics DF-1050/1051/1052/1053 User Manual
Page 38
5-2
Parking Garage Display Operation
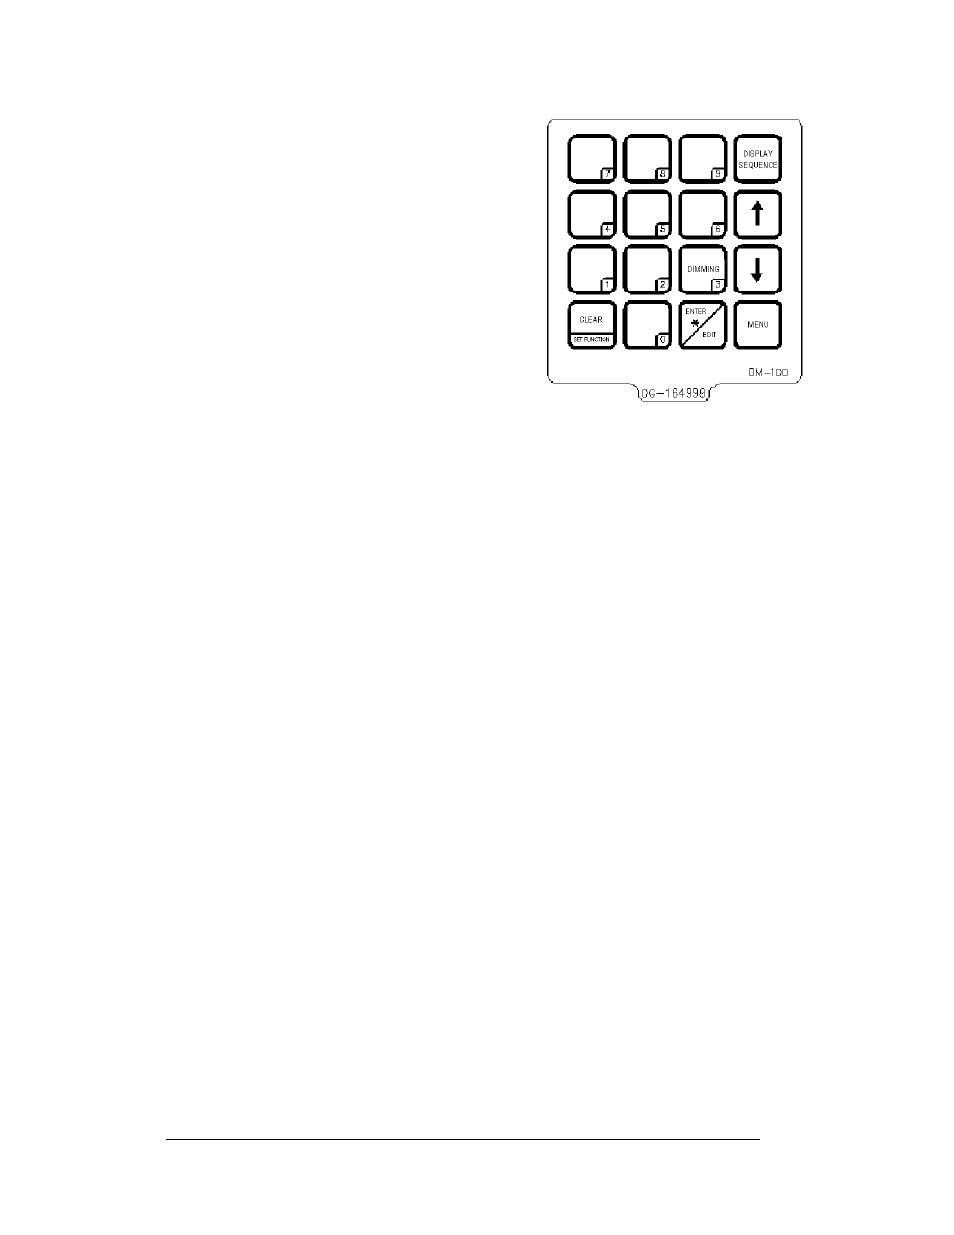
Figure 24 illustrates the DM-100 insert used
to control the displays. If an insert
is lost or damaged, a copy of the insert
drawing, A-164998, can be used until a
replacement is ordered. The drawing is located
in the Appendix A.
To start the controller and begin programming
with the insert, refer to the following display
operation information. Read each subsection
carefully to fully understand the operating
procedures.
5.3 Parking Garage Display Operation
The DataMaster 100 controller can be configured to program information displayed
on the DataMaster Parking Garage sign. The console can program “OPEN” or
“FULL” for each level, or a numeric value, (9999-0), representing the number of
open positions. The instructions provided in this section discuss the functions the
operator uses to control the Parking Garage display.
In the event that the Parking Garage display malfunctions, refer to ED13481:
Frequently Asked Questions in Appendix B, and to the troubleshooting tables in
Section 4.4 of this manual. Both of those subsections detail measures that can be
taken to correct various problems.
Note: There is more than one way to reach certain LCD screens on the DM100. One
way is by using the menu and then the arrows to reach the desired programming
location. The other way is to set the first parking garage display and then continue to
enter though the additional screens.
Parking Garage Display Startup
To operate the DataMaster Parking Garage displays, the DataMaster 100 must first
be programmed to the parking function. Use the <
CLEAR/SET FUNCTION
> key on
startup. The following text will be displayed on the LCD during startup:
Daktronics, Inc.
Brookings, SD
DataMaster 100
ED-13374 V3.X
Figure 24: DataMaster 100 Insert LL-2551