3 service and diagnostics – Daktronics DF-1050/1051/1052/1053 User Manual
Page 30
Maintenance and
Troubleshooting
4-2
1. The drop-in cabinet style displays have screws holding the faceplate in
place. The other cabinets have screws along the bottom and the faceplate
will then slide down and out when they are removed.
2. Remove the No. 10 screws (four or six, depending on the model) securing
the digit face panel to the display cabinet.
3. Carefully pull the face panel out of the display.
4. Unplug the 9-pin connectors on the rear of the digits by squeezing the two
tabs together and carefully pulling the connector from the digit.
4.3 Service
and
Diagnostics
Digit
Replacement
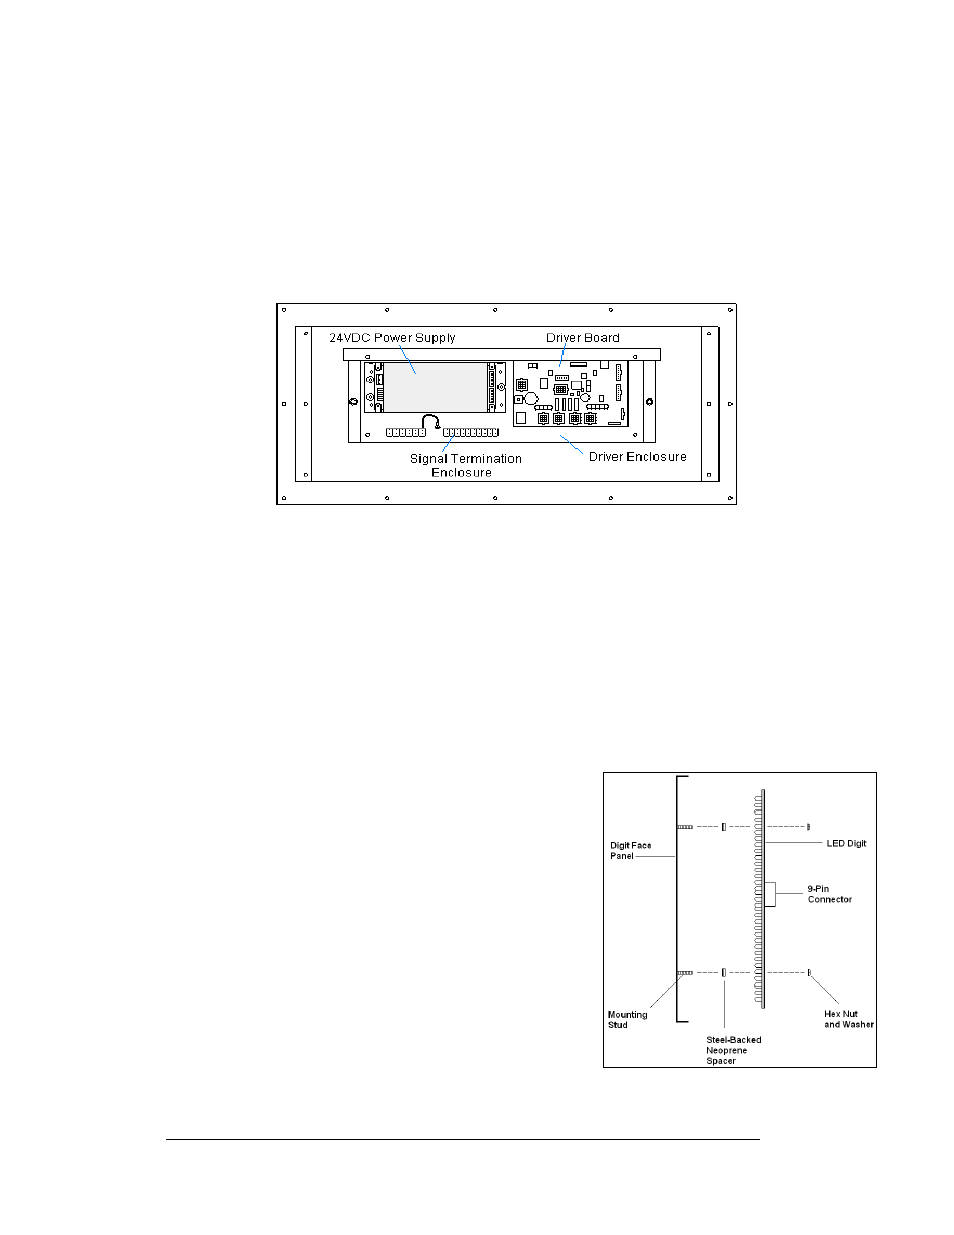
The digit circuit board, the platform for the LEDs is mounted to the back of the face
panel. Do not attempt to remove individual LEDs. In the case of a malfunctioning
board, replace the entire digit panel. Refer to Figure 19 for the digit assembly.
To remove and replace a digit, follow these steps.
1. Follow the steps in Section 4.2 to gain access to
the digits.
2. Unplug the connector on the back of the digit.
3. Unscrew the four nuts, securing the failed digit
to the panel.
4. Lift the digit off of the panel. (Take note of the
digit orientation.)
5. Replace the digit with a new one. Secure the
replacement with the nuts you removed from the
failed digit. Note that standoffs, or spacers, are
used between the front of the digit and the face
panel, but the LEDs must protrude through holes
in the face panel.
6. Plug the 9-pin connector into the rear of the
digit. These are keyed connectors, which means
they will only fit one way. Do not force the
connection!
7. Replace the digit panel by securing it with the
No.10 screws.
Figure 18: Parking Garage Display
Figure 19: Digit Replacement