Caple CR1001SS User Manual
Page 9
9
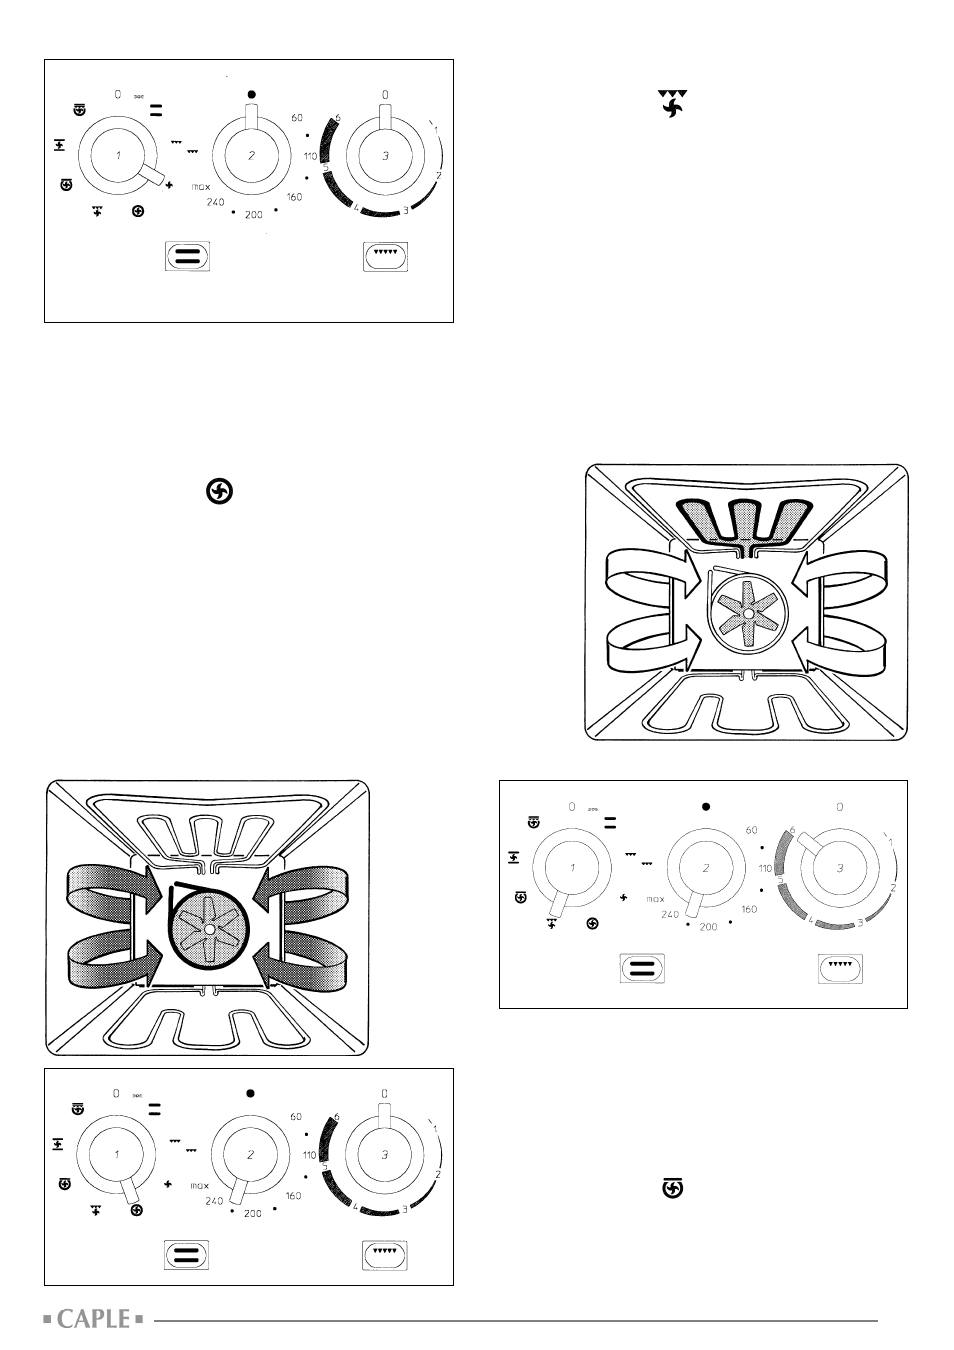
Setting 4 - hot air cooking (fan oven)
(fig. 13 - 13/A)
- Turn knob (1) to symbol
- Knob (3) to zero
- The fan and the circular element on the back of the oven are
switched on.
- The red light indicates they are in operation.
- Turn the thermostat knob (2) to the chosen temperature.
- The yellow light comes on and will switch off when the set tem-
perature is reached.
- Wait for the yellow light to go out before placing the foods in the
oven.
- The heat is spread evenly through the inside of the oven.
- Different types of food can be cooked on more than one shelf.
- This cooking mode is especially suitable for cakes, meat and fish.
- When more than one shelf is used, the cooking times indicated
must be increased by approximately 10/15 min.
Setting 5 - fan grilling (gentle grilling)
(fig. 14 - 14/A)
- Turn knob (1) to symbol
- Turn knob (3) to 6.
- The grill element and the fan on the back of the oven are ope-ra-
ting.
- The red light confirms they are in operation.
- Turn the thermostat knob (2) to the chosen temperature.
- The yellow light comes on and will go out when the chosen tem-
perature is reached.
- Arrange the foods on the grill grid and place it so that the foods
are about 5 cm below the element.
- Place the tray on the appropriate runners.
- To prevent smoking, pour a little water into the tray and keep the
level topped up during cooking.
- The oven door must be kept closed.
- This cooking mode is an alternative to the turnspit; the fan co-
mes on and distributes the heat radiated by the grill.
- It is especially suitable for meat, roasts and poultry.
- Turning the knob N° 3, you can select a gradual variation of the
grill cooking temperature.
Setting 6 - delicate cooking
(constant temperature)
(fig. 15 - 15/A)
- Turn knob (1) to symbol
- Turn knob (3) to Zero.
- The top electric element, the back element and the fan on the
back of the oven are operating.
- The red light confirms they are in operation.
- Turn the thermostat knob (2) to the chosen temperature.
fig. 13
fig. 13/A
fig. 12/A
fig. 14
fig. 14/A