Description of the appliance, Description of different accessories – Campomatic C964XRSIFSCN User Manual
Page 8
8
�
�
�
�
�
�
�
�
�
��
��
��
�
�
� �
���
���
���
��
��
��
��
��
��
��
��
��
�
�
��
��
��
��
��
��
��
��
��
��
�
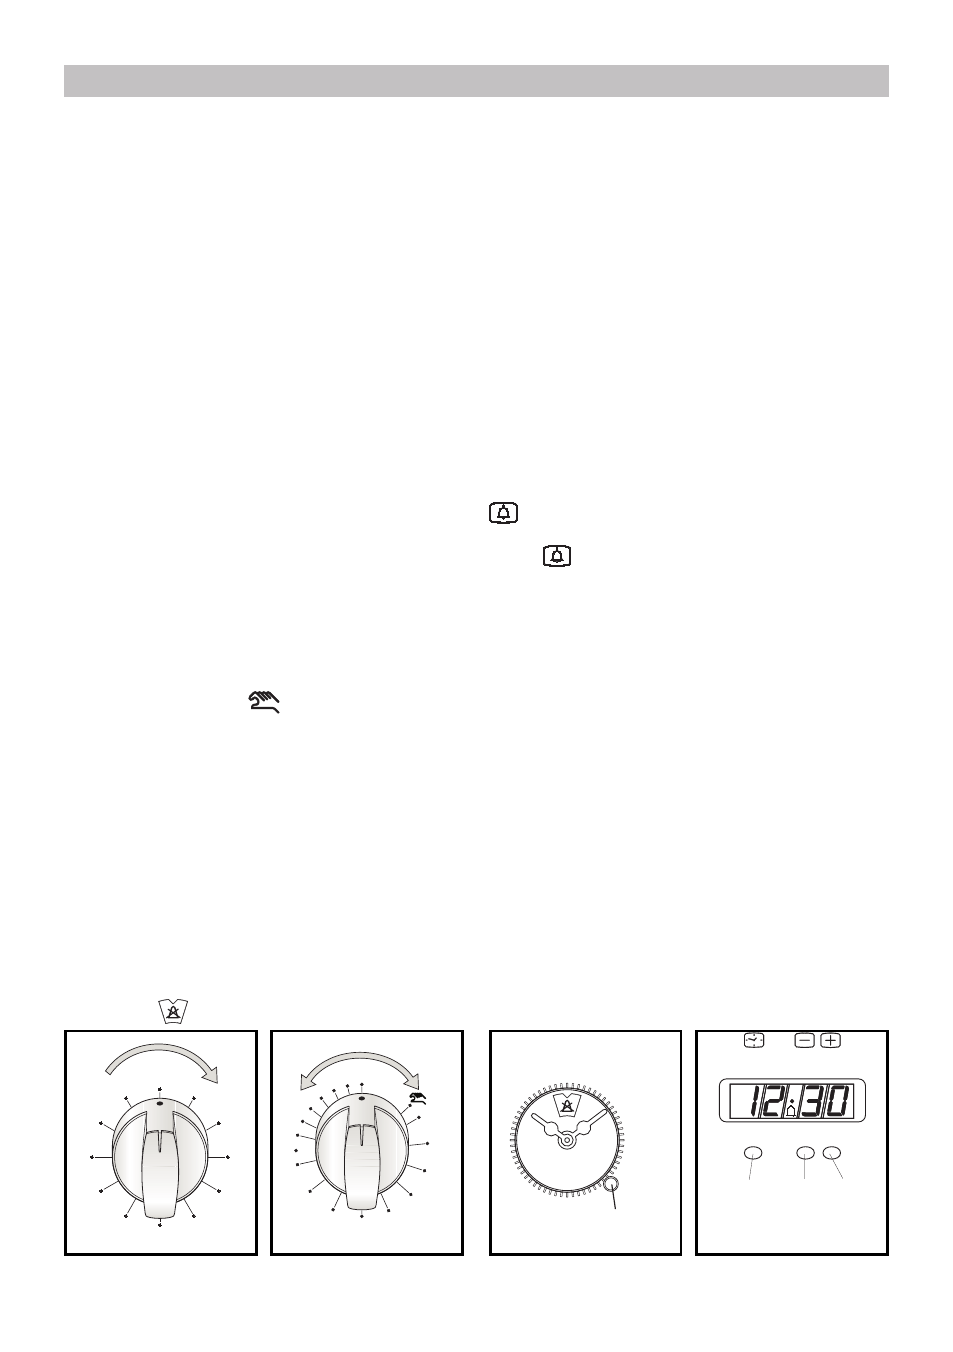
DESCRIPTION OF DIFFERENT ACCESSORIES
TIMER
To set cooking time, first wind the timer up by turning it
completely once from left to right and then back to the
number of minutes you want. The timer will ring when the
set time has elapsed.
TIMER WITH COOKING TIME
This accessory has a dual function: it signals how much
cooking time has elapsed and it also turns the oven off
automatically. N.B.: When the pointer of the knob is on
«•» position, the oven cannot work.
If you use the oven without any programming, check
that the timer is on the manual position.
Semi-automatic operation
After having selected a cooking, to set cooking time, first
wind the timer up by turning it completely once from left
to right and then back to the number of minutes you want,
from 0 to 120 minutes: the oven will switch on. Once the
programmed time has elapsed the buzzer will ring and the
end of cooking time device triggers.
Manual operation
It the cooking time is more than 2 hours, or if you want to
use the oven without the timer, turn knob from right to left
until the pointer is on the
symbol.
When the food is cooked do not forget to move the
knob pointer round to position «•».
ANALOGICAL CLOCK
This clock has a dual function: a clock and minute minder.
Setting the time
Subsequent to wiring or after a power cut, press and turn
knob (M) clockwise to set the time.
Minute minder
Turn knob (M) clockwise without pressing it and select
the length of time wanted (up to 50 minutes). When the
set time has elapsed the buzzer will sound: turn the knob
round to the
symbol to stop it.
DESCRIPTION OF THE APPLIANCE
ELECT
RONIC CLOCK
This accessory functions as a clock and a minute
counter. The digital display (L) always shows the time
but will display the minute counter time when this
function is set.
Setting the time (from 0.01 to 24.00 - hh,mm)
After connecting to the electricity mains or subsequent
to a power cut the figures “0.00” will flash on the display.
Press push button 1 and start setting the current time
by pressing push button 2 or 3. The function will start 7
seconds after setting.
Minute counter (from 0.01 to 0.99 = hh,mm)
By selecting the time on the minute counter with push
button 3, this function will be active all of the time (time is
set in 10 second units). The time will disappear leaving
the minute counter time showing on the display and the
symbol lights up. Time is given in seconds during
countdown. At the end of the set time the buzzer goes
off, the
symbol disappears and the time reappears.
You can see the time while the minute counter is
functioning by pressing push button 1.
Buzzer
The buzzer goes off at the end of the minute counter
function and lasts about 7 minutes. The buzzer can be
stopped by pressing button 3.
Buzzer intensity
There are three different buzzer intensities: to select
the one you want press push button 2 when the time
is displaye
d.
Correcting/cancelling the minute counter function
To correct or cancel the time set on the minute counter,
press keys 2 and 3 simultaneously and then release
key 3 first. The time can be corrected at any moment
by pressing push button 1 followed by 2 or 3.