Hearth access and assembly, Continued – Desa (V) CB36(N User Manual
Page 16
15
www.desatech.com
117437-01
HEARTH ACCESS AND ASSEMBLY (Cont.)
Installing Logs and Glowing Embers
HEARTH ACCESS AND ASSEMBLY
Continued
INSTALLING LOGS AND GLOWING EMBERS
A 4 piece ceramic log set comes packed inside the unit fi rebox.
Removal of glass door is necessary to unpack and assemble the logs
and add hearth treatments. Follow steps under Removing/Replacing
Glass Door, page 14 to access the logs and burner.
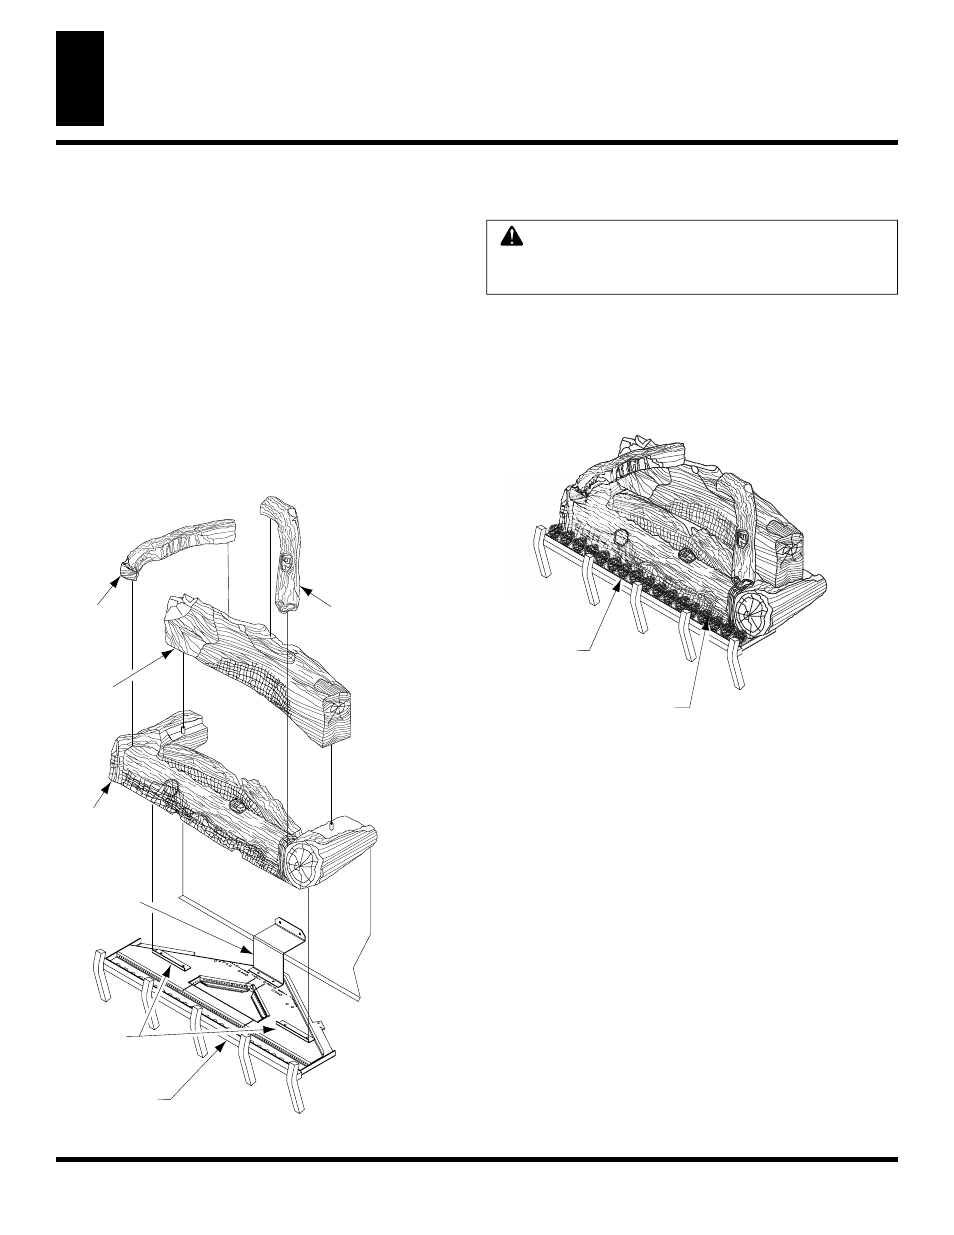
Assemble the logs and add burner treatments as follows:
1. Position the base log onto burner log mounts. (see Figure 31).
Note: The cut out on the bottom should fi t over the mounts
and the base log should be positioned against the rear panel
2. Position the holes on the bottom of the rear log over the pins
on the base log Figure 31).
3. Position the top left log and top right log onto the rear log
and base log as shown in (see Figure 31).
BURNER
PAN
REAR
PANEL
REAR LOG
STAND
LOG
MOUNTS
REAR
LOG
TOP
RIGHT
LOG
TOP
LEFT
LOG
Figure 31 - Installing Logs
4. Open the bag of ember materials.
5. Break apart about quarter sized pieces and place about a
single layer along the full length of the ember tray to hide
the bottom edge of the base log. (see Figure 32).
6. Replace the glass door and louver panels. See Removing/
Replacing
Glass
Door, page 14.
WARNING: The glass door must be securely in
place before running this fi replace. Do not run this
fi replace if glass is missing or broken.
Figure 32 - Applying Ember Material
EMBER
MATERIAL
EMBER
TRAY