Threading the machine – Baby Lock Crown Jewel II (BLCJ18-2) Manual User Manual
Page 23
16
C
D
E
Tension
Assembly
Take-Up
Spring
Take-Up
Lever
F
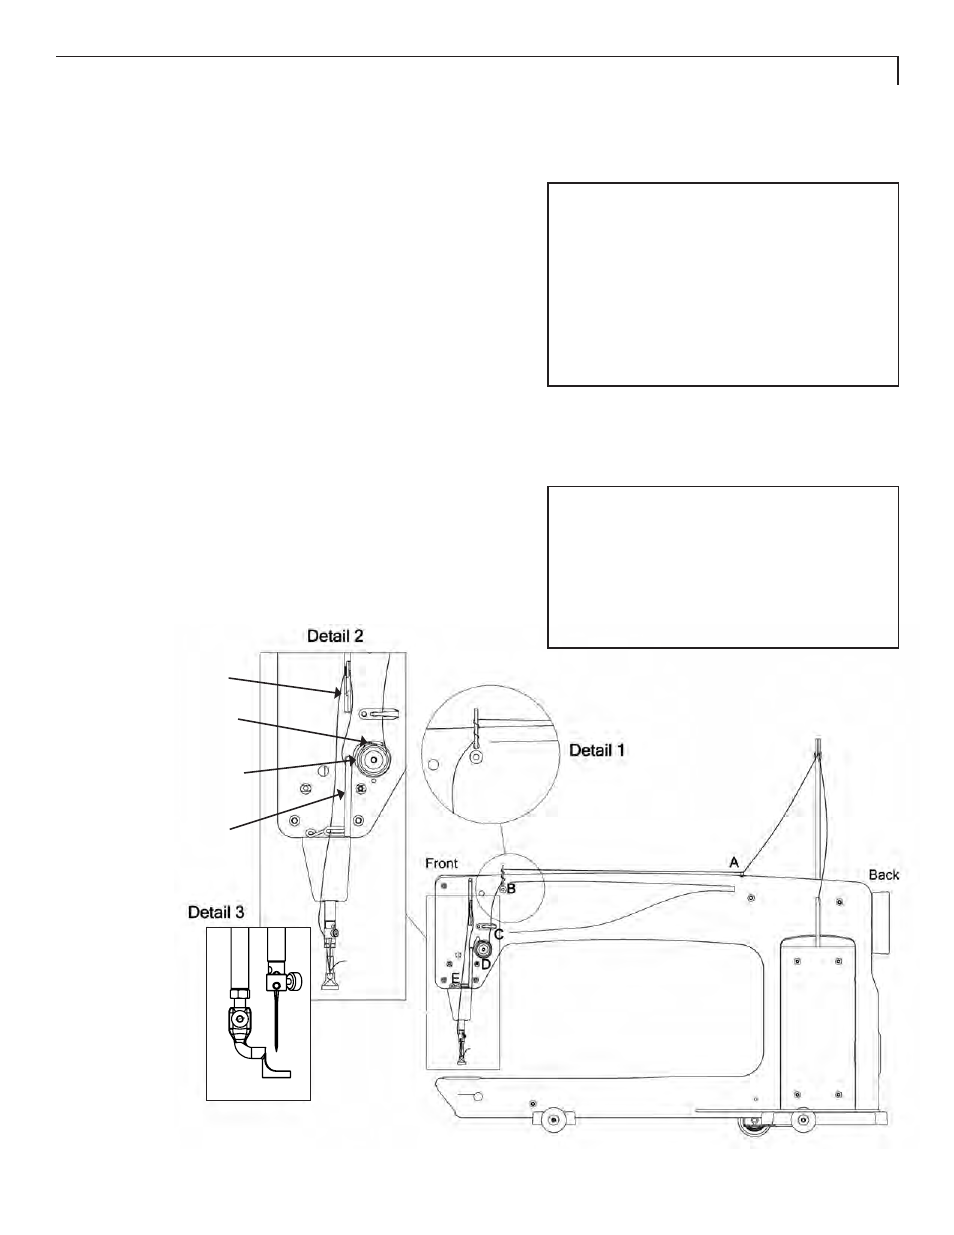
Threading the Machine
1.
Slide thread (cone or spool) onto spool pin,
insert the thread through the thread-mast
eyelet from back to front, continuing to thread
guide A.
2.
After inserting thread through thread guide A
continue to the three-hole thread guide B.
Wrap all three holes from back to front, hand-
wheel side to needle side (Detail 1) being care-
ful not to cross threads. This is recommended
for most threads. However, some very delicate
threads or metallic threads may require less
tension. If you are having thread breakage
problems, try threading only one or two holes.
3.
Thread continues through thread guide C,
and then down to the tension assembly
(Detail 2).
NOTE: It is important that the thread is
“flossed” up between the two tension discs.
If the thread is not firmly in place between
the two tension discs, the thread will lay on
top of the tension discs (no tension) and
looping can occur.
Diagram F
NOTE: The purpose of this guide is to prevent
loops of thread coming off of the thread cone
and going into the top tension as a knot,
causing thread breakage and bad tension.
For most threads on a cone, it is important to
thread all three holes for consistent results—
should top thread tension need to be adjusted
it should be done at the top tension assembly.
Stirrup
Thread Guide
D