Inserting (or changing) the needle, Needle guide – Baby Lock Crown Jewel II (BLCJ18-2) Manual User Manual
Page 19
12
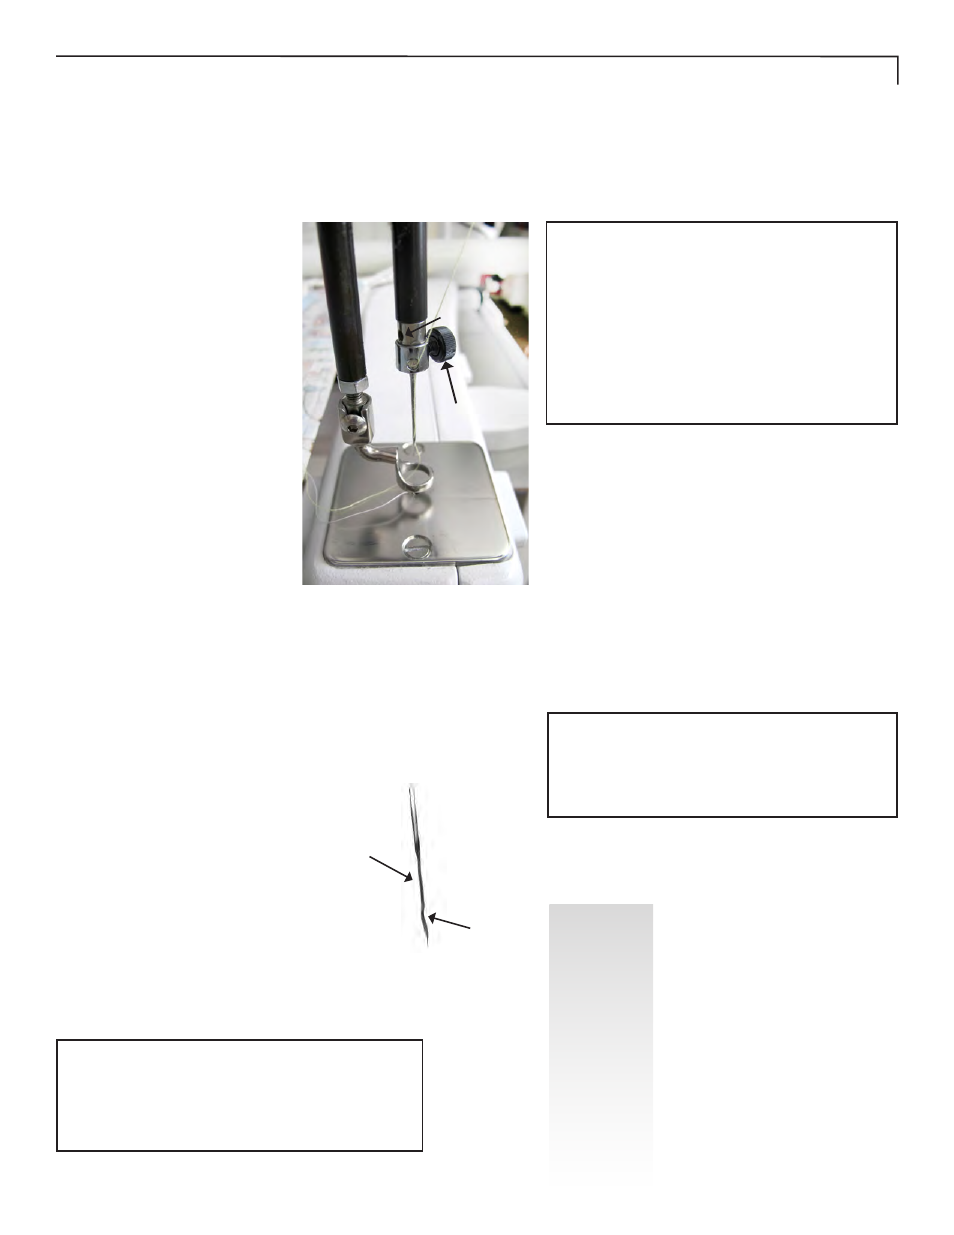
Inserting (or Changing)
the Needle
Figure 8
Groove/
Front Side
Scarf/
Back
Side
Diagram D
(Side View)
IMPORTANT NOTE: Check the needle to
confirm it is fully inserted. The needle bar has
a sight opening above the needle bar clamp
screw—make sure the needle is touching the
top of the sight opening. If it is not, the
machine timing will be off and it may be
possible for the needle to collide with internal
parts causing damage not covered by warranty.
5.
Carefully tighten the needle bar clamp screw.
Over tightening the needle clamp screw will
result in damaging the screw by stripping the
threads. Stripped threads are not covered un-
der warranty. A side effect of damaged threads
from over tightening the needle clamp screw is
that it may become difficult to insert the needle
properly into the needle bar. To avoid over
tightening the screw, while using the screw-
driver, is once the screw no longer turns freely
is to then gently turn the screwdriver until the
screw is tightened snuggly.
NOTE: Changing the needle is recommended
for each new quilt loaded on the machine
or any time the needle becomes bent, dull
or burred.
1.
Move the needle bar to the
highest position by turning
the handwheel counter-
clockwise or pressing the
needle up/down control on
the handles.
2.
Turn all power to
machine off.
3.
Loosen the needle bar clamp
screw with the appropriate
screwdriver (Figure 8).
4.
Referring to Diagram D,
with the scarf (small recess
area on the back side of the
needle, just above the needle
eye) facing toward the rear
of the machine (handwheel
location) and the long
groove down the front of
the needle facing the front
of the machine (bobbin case
location), push the needle all
the way up into the needle
bar until it stops. Check the
sight opening to verify that
the top of the needle can go
no farther.
Needle size
Thread size
12 & 14
monofilament, 100 wt. silk,
60 wt. poly, mylar
16
monofilament, hologram
100 wt. silk, 60 wt. poly,
50 wt. poly, 50 wt. cotton,
some 40 wt. threads
18
40 wt. cottons and poly,
30 wt. cottons and poly
20
Any thread 30 wt. and heavier
such as 12 wt., 19 wt., 30 wt.
Needle Guide
Needle
Bar
Clamp
Screw
CAUTION: Never leave machine unattended
when plugged in. Always unplug this machine
from the electrical outlet immediately after using
and before maintenance.
Sight
Opening