Installing machine on carriage – Baby Lock Crown Jewel II (BLCJ18-2) Manual User Manual
Page 15
8
Installing Machine
on Carriage
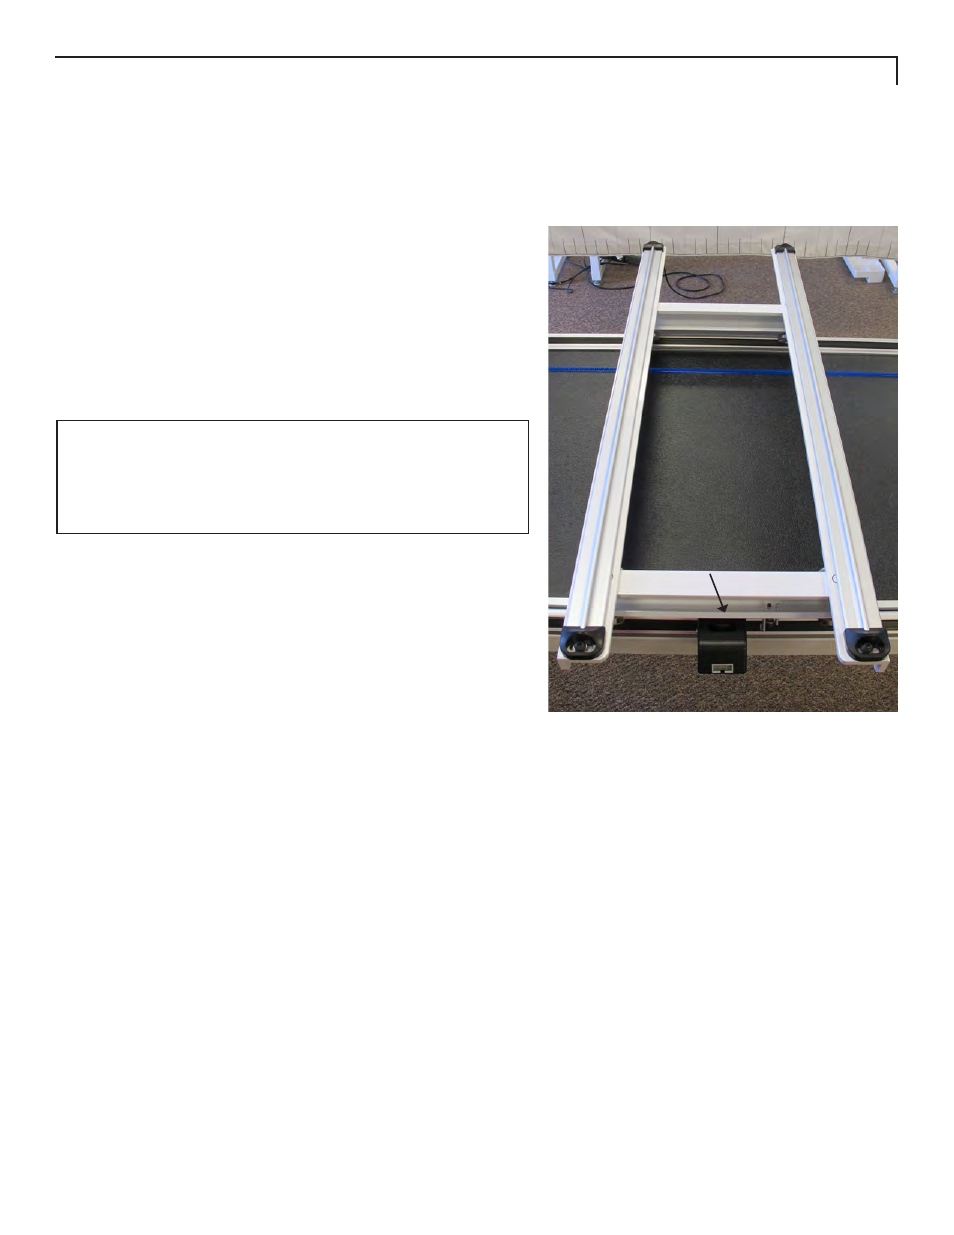
1.
Place the carriage on the table rails ensuring that the carriage
stitch regulator assembly is toward the back of the table (Figure 1).
2.
The stitch regulator, machine and carriage are connected by
a ribbon cable that has 3 connectors (Figure 2, page 9). The
machine should arrive from the factory with the ribbon cable
already attached by Connectors A and B. The remaining end,
Connector C, will be connected in Step 4.
Figure 1
Back of
table
Carriage
Stitch
Regulator
Assembly
(X-Motion)
Front of
table
IMPORTANT NOTE: Very carefully remove the plastic wire
tie securing the Carriage Stitch Regulator Assembly (X-
Motion) after the carriage is placed onto the tracks of the
quilting frame.
This manual is related to the following products: