Reposition, Position to a corner, Center – Baby Lock ProStitcher Version 14.04.0051 (BLPS2) Instruction and Reference Guide User Manual
Page 51
Pro-Stitcher User Manual
5.24 Design Menu
Reposition
There are several options for positioning a design
on the quilt. The primary method for positioning is
to create an Area based on the actual quilt and then
to use the Reposition or Skew tools to move the
design relative to that Area. However, if an Area is
not defined, the quilter may still use the Reposition
tools to place a design in the precise position desired
(Figure 5.79).
NOTE: The alignment tools found in the Skew/
Align panel and the Reposition functions in the
Reposition panel are mutually exclusive. The quilter
may need to turn off some Skew/Align options
before using the Reposition functions. For example,
if an Area is defined and Skew is turned on, the
design will be forced to skew (and thus position)
to the extents of the defined Area. To move the
design to a different location, the Skew option must
first be turned off. Likewise, if the design is set to
be stretched horizontally or vertically within the
defined Area, those alignment options must be
turned off before any of the functions in Repeat will
work. If other alignment options are selected, using
the Reposition tools will cause those alignment
settings to be turned off.
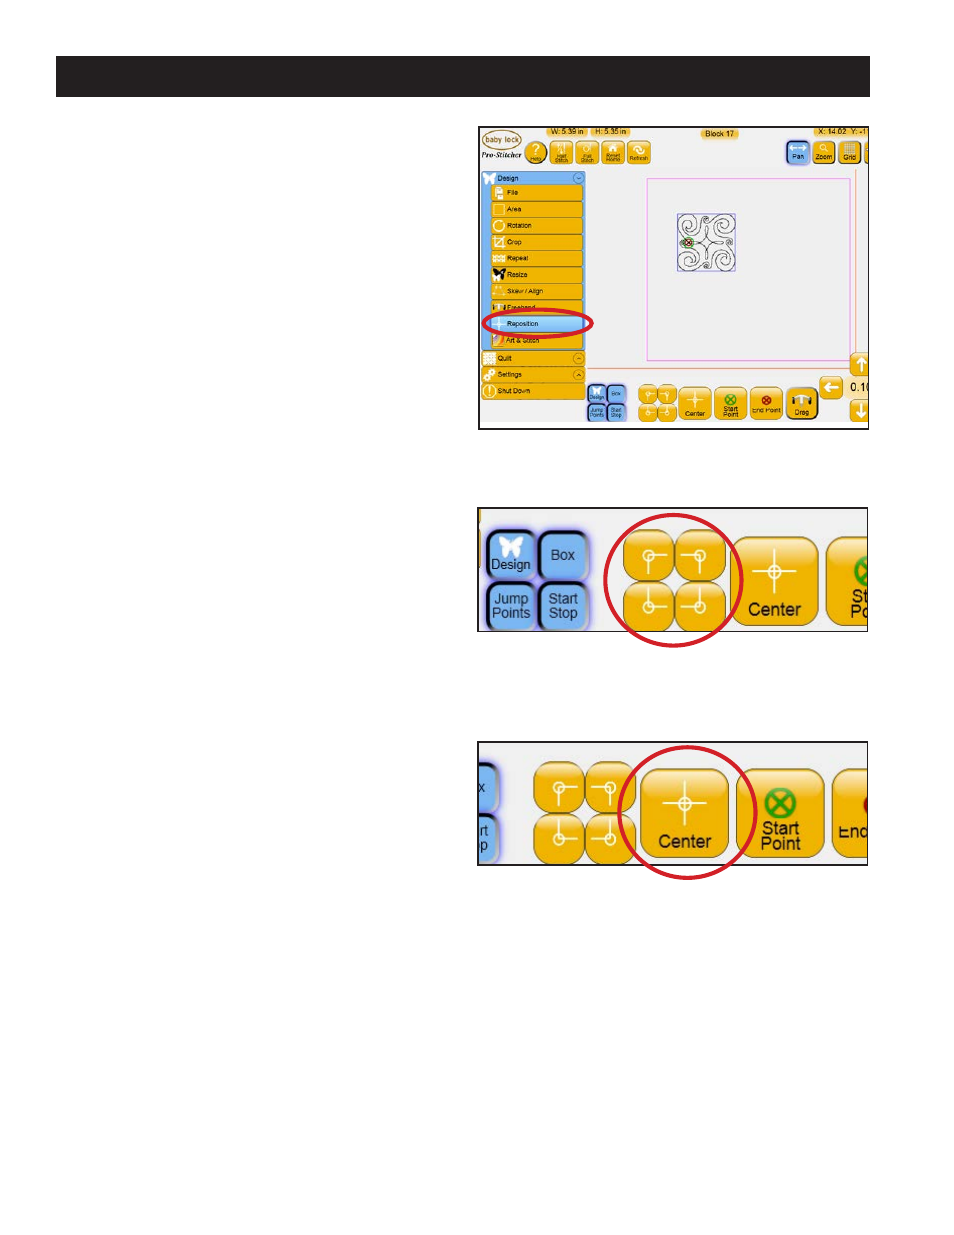
Position to a Corner
Four Corner buttons are available to position the
design based on the blue bounding box
(Figure 5.80). To use these tools, move the quilting
machine needle to a corner of the region on the
quilt where the design is to be quilted. If the top-
left corner is chosen, press the button on the
screen corresponding to the top left-hand corner;
the top left-hand corner of the design will now be
positioned where the quilting machine needle and
crosshairs are located.
Center
To position a design based on the center point, move
the quilting machine needle to the center point of
the block or other area of the quilt. Press the Center
button and the design will now be centered around
the current needle and crosshair position
(Figure 5.81).
Figure 5.79
Figure 5.80
Figure 5.81