Multi-point – Baby Lock ProStitcher Version 14.04.0051 (BLPS2) Instruction and Reference Guide User Manual
Page 35
Pro-Stitcher User Manual
5.8 Design Menu
Multi-Point
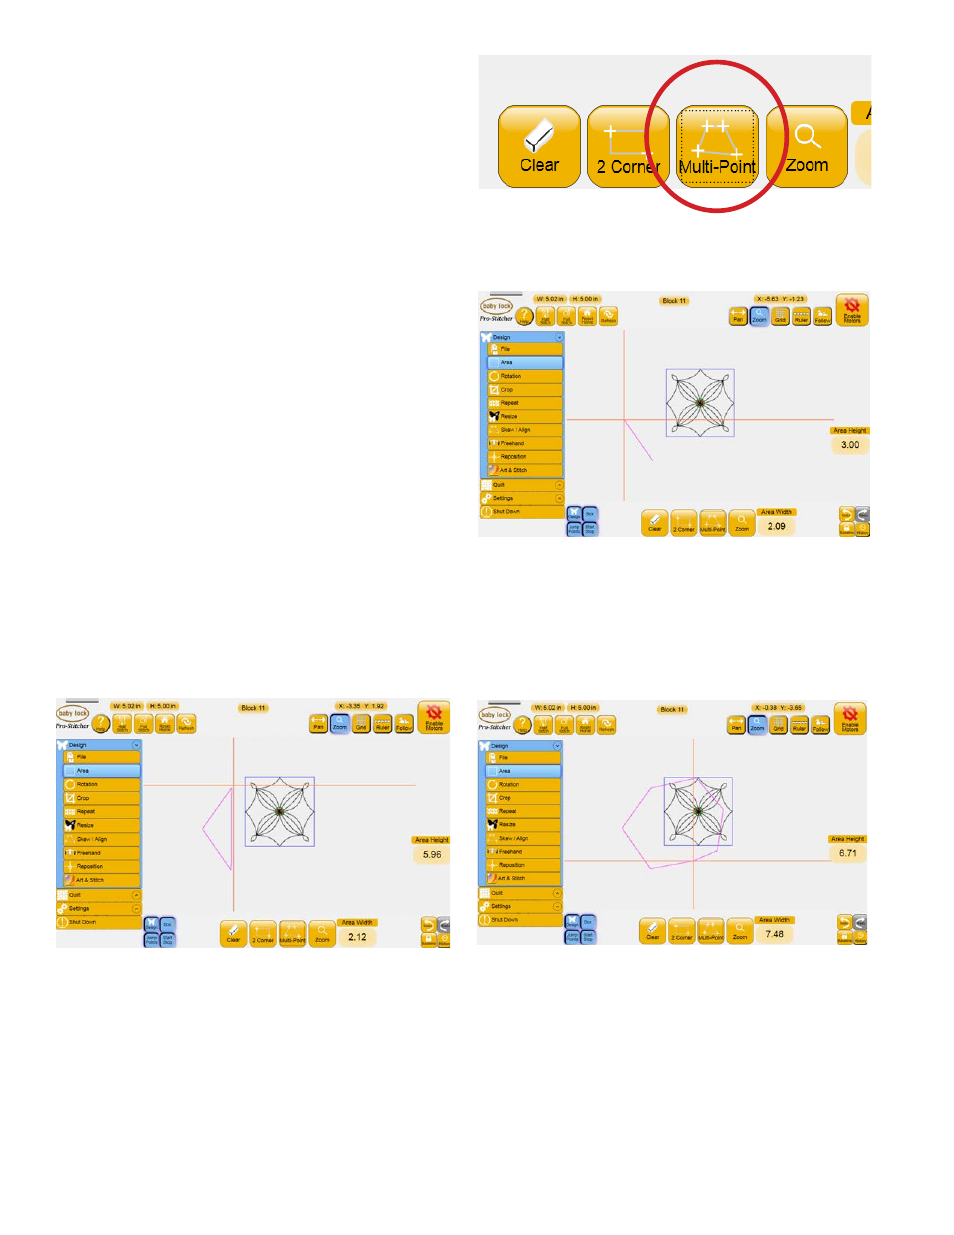
For more complex areas, plot multiple points to
create any shape such as a triangle or a shape with
numerous points using the Muliti-Point button
(Figure 5.21).
Mark the first point of the quilting area by moving
the quilting machine to line up the needle with a
point on the quilt and press Multi-Point.
Move to a second point along the perimeter of the
quilting area and again press Multi-Point. A purple
line joins the two marked points (Figure 5.22).
Move to a third point along the perimeter of the
quilting area and press Multi-Point again. The Pro-
Stitcher automatically closes the shape back to the
first point when the third point is marked, creating
a purple triangle to indicate the multi-point area
(Figure 5.23).
Mark other points as desired to create a detailed
quilting area (Figure 5.24).
Figure 5.21
Figure 5.22
Figure 5.23
Figure 5.24