Sc2400 setup and installation, Preparing the unit for primary power – Tru-Weld SC2400 Arc Welder User Manual
Page 11
11
SC2400 Setup and Installation
Preparing the Unit for Primary Power
Only qualified personnel should perform this installation.
♦
Turn the input power off at the disconnect switch or fuse box before working on the welder.
♦
Do not touch electrically hot parts.
Remove the top cover of the SC2400. All of the connections that will need to be made are accessi‐
ble with the top cover removed.
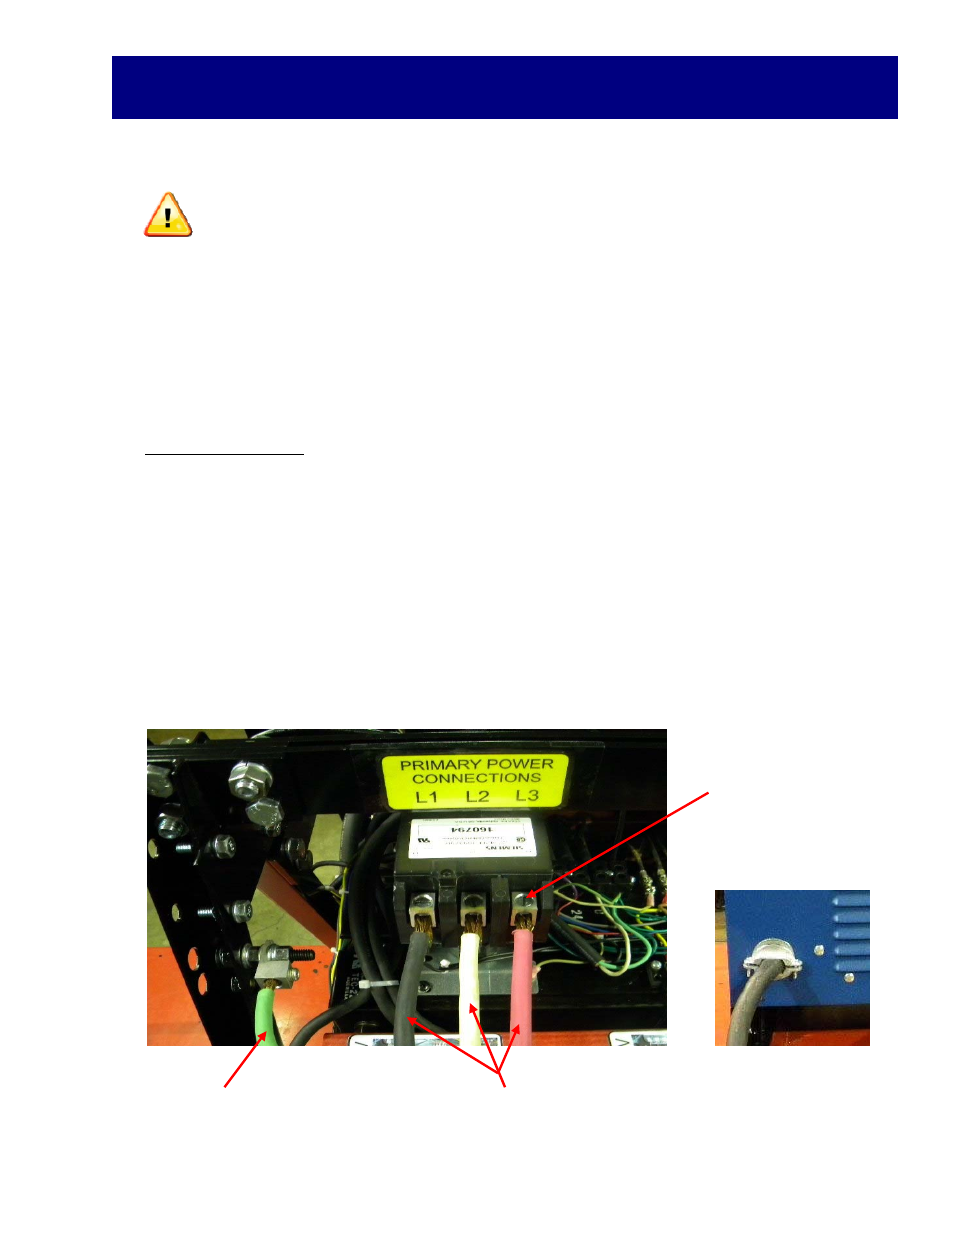
Primary Power Cable
♦
Route the Primary Power Cable through the Power Inlet Hole in the top left corner on the
backside of the welder.
♦
Connect the power leads (Black, White, Red) to the L1, L2, and L3 connectors as shown in Fig‐
ure 1. Firmly tighten screws that hold the power leads in place.
♦
Attach the ground wire (Green) to side bracket of welder as shown in Figure 1.
♦
Once the Primary Power Cable is connected, tighten Power Cable Clamp on the back of the
welder, holding the power cable firmly in place (see Figure 2). Allow enough play in cable so
that the cable is free from any obstructions and does not lay across jumper board.
Power Connections
Ground Connection
Figure 1
Hold down screws
Figure 2