Oklahoma Sound #MMC User Manual
Page 10
10
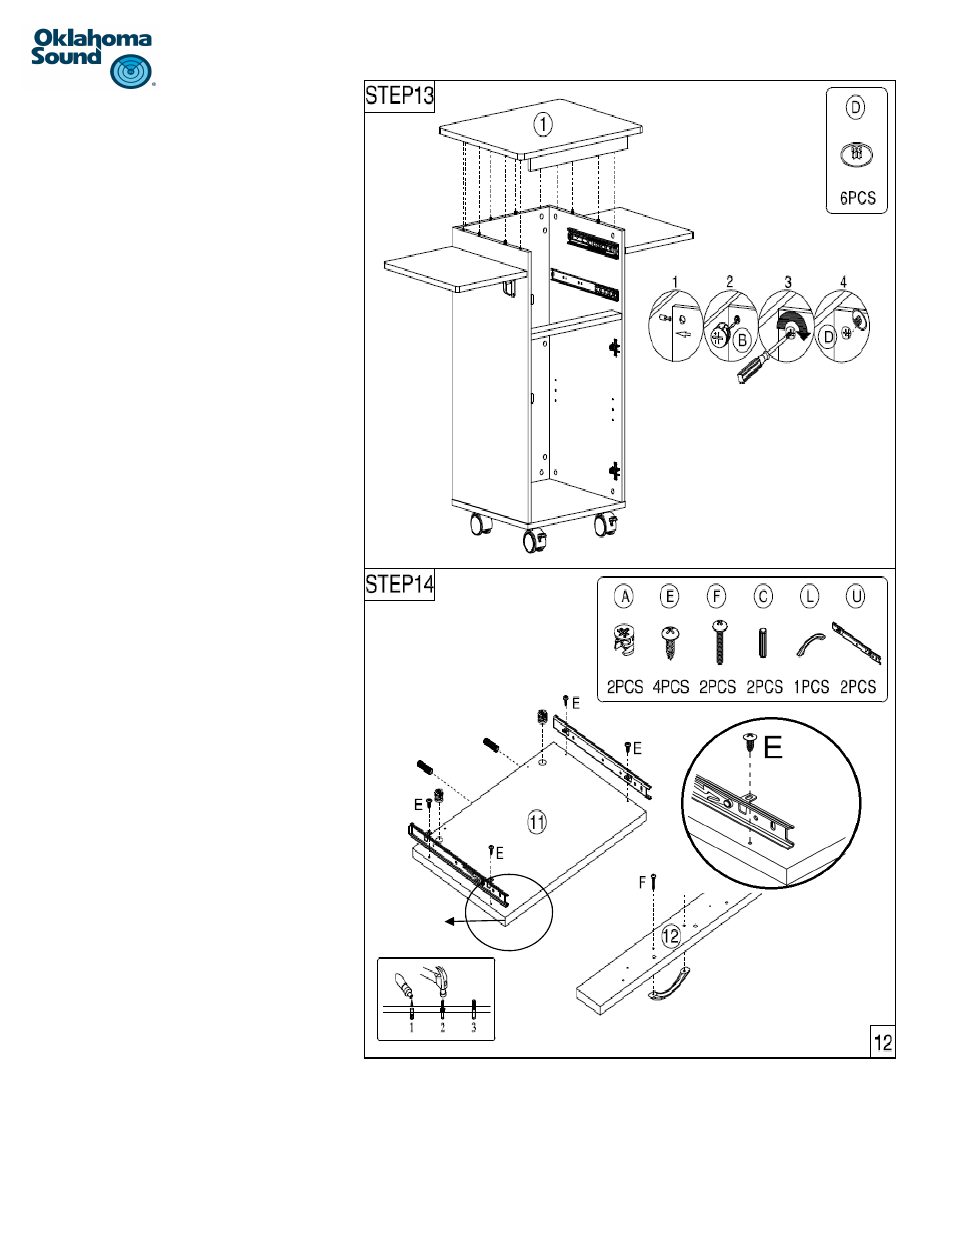
Step 13:
a) ConƟnue by aƩaching panel #1 (with the
aƩached panel #9) to the cabinet.
b) Align the six cam bolts on the boƩom of
the panel #1 with the six holes on the
edge of the cabinet.
c) Lower panel #1 to have the cam bolts in-
serted into the cam locks completely.
d) Once panel #1 is completely lowered and
the surface panel is flush with the cabi-
net, turn the cam locks to Ɵghten the two
panels together.
e) Once the panels are aƩached use the cam
covers #D to cover the cam locks.
Step 14: Laptop Shelf Assembly
a) IdenƟfy panel #11 and place on a clean, soŌ
surface with the holes facing upwards.
b) Insert two cam locks #A in the holes on the
panel as shown .
c) ConƟnue to insert two wooden dowels #C to
the edge of the panel as shown.
d) Next idenƟfy the inner porƟon of the 12”
slides part #U that were taken apart in step
1. AƩach the slides to the side edge of the
panel using two screw #E per slide through
the tabs on the boƩom of the slider into the
predrilled holes on the boƩom of shelf as
shown.
e) Be sure that the end of the slide with the
open end is at the side of the panel where
there are no dowels ,as shown in the picture.
f)
IdenƟfy panel 12 and place on a clean, soŌ
surface.
Open end
g) AƩach the silver handle part #L by placing it over the two holes on the front of the panel. (The side with only two holes showing is
the front of panel #12). Use two screw #F to aƩach the handle to the panel.
h) Use a Phillips screwdriver to aƩach the handle Ɵghtly to the panel by screwing the two screws through the two predrilled holes
and threading them through the two ends of the handle.