Receiver operation – KBC Networks MiniLink User Manual
Page 8
RECEIVER OPERATION
A. RECEIVER SET UP
1. LOCATON
The Receiver is designed to be placed on a flat surface for stability. The Receiver is not
weatherproof and should be placed indoors or in an environmental enclosure if used
outdoors or in a harsh environment.
2. POWER
The Receiver is powered by a 10-14.5 VDC power supply connected to the Power In
connector on the rear of the case, incorporating internal reverse voltage protection. The
Receiver itself will draw 220 mA of power and the LNB, which gets its power from the
Receiver, uses 220 mA.
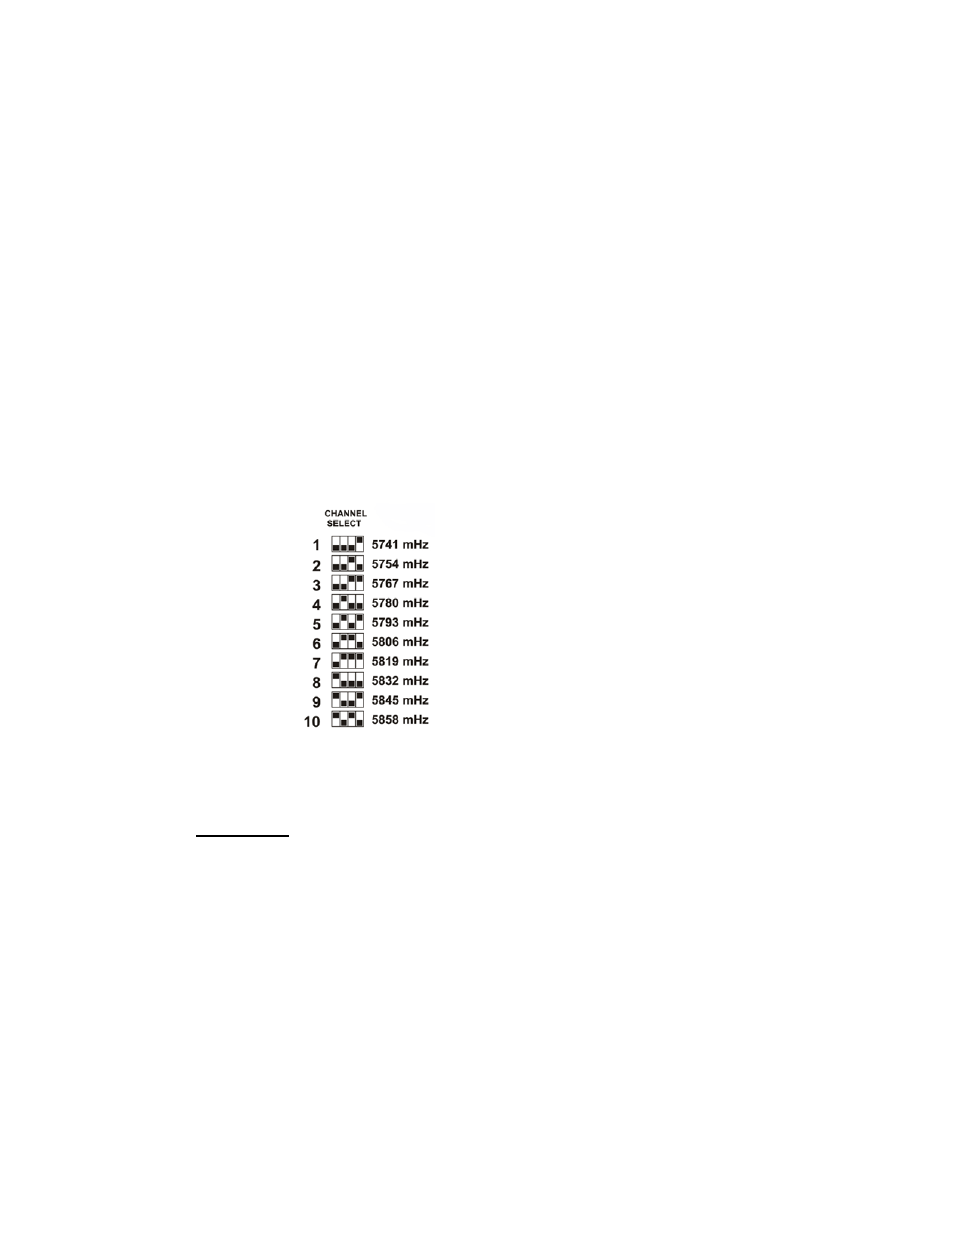
3. CHANNEL SELECT
Channel selection is accomplished by programming of the 4-position dipswitch located at
the rear panel. Match the dipswitches to the setting on the label for the desired channel
(Any numbers visible on the switch itself are not used. The white squares indicate the
switch location).
4. ORDER OF SETUP AND OPERATION
• Select Frequency (Factory set to channel 10)
• Connect Power, Video and Audio outputs to receiver.
WARNING: TO PREVENT DAMAGE TO THE RECEIVER, CONNECT THE
RECEIVER TO THE LNB BEFORE APPLYING POWER TO THE RECEIVER.
B. MAINTENANCE
Your KBC MiniLink product is an example of superior design and craftsmanship. The
following suggestions will help to ensure maximum operational life:
• Keep the product dry. If it does get wet, wipe it dry immediately. Liquids may contain
minerals than corrode electronic circuits.
• Use the system only within the environmental specifications indicated. High
temperatures can shorten the life of electronic devices and melt plastic parts. Excessive
mechanical shock can damage the case, connectors or internal circuit board.
- 6 -
NOTE: Dipswitch configurations for
each channel can vary between the
transmitter and receiver. Match the
dipswitch positions on each individual
unit in use with the drawing layout as
pictured on each unit for the desired
frequency channel.