Leds, Pre-installation steps, 2 identifying parts – CRU Forensic Notebook DriveDock User Manual
Page 3
WiebeTech
F o r e n s i c N o t e b o o k D r i v e D o c k v 4 U s e r M a n u a l ( A 9 - 0 0 0 - 0 0 1 2 )
R E V 1 . 0
- 3 -
1. Pre-Installation Steps
1.1 Forensic Notebook DriveDock Accessories.
Check the accessories packaged with your Forensic Notebook DriveDock. Please contact
WiebeTech if any items are missing or damaged. The box should contain:
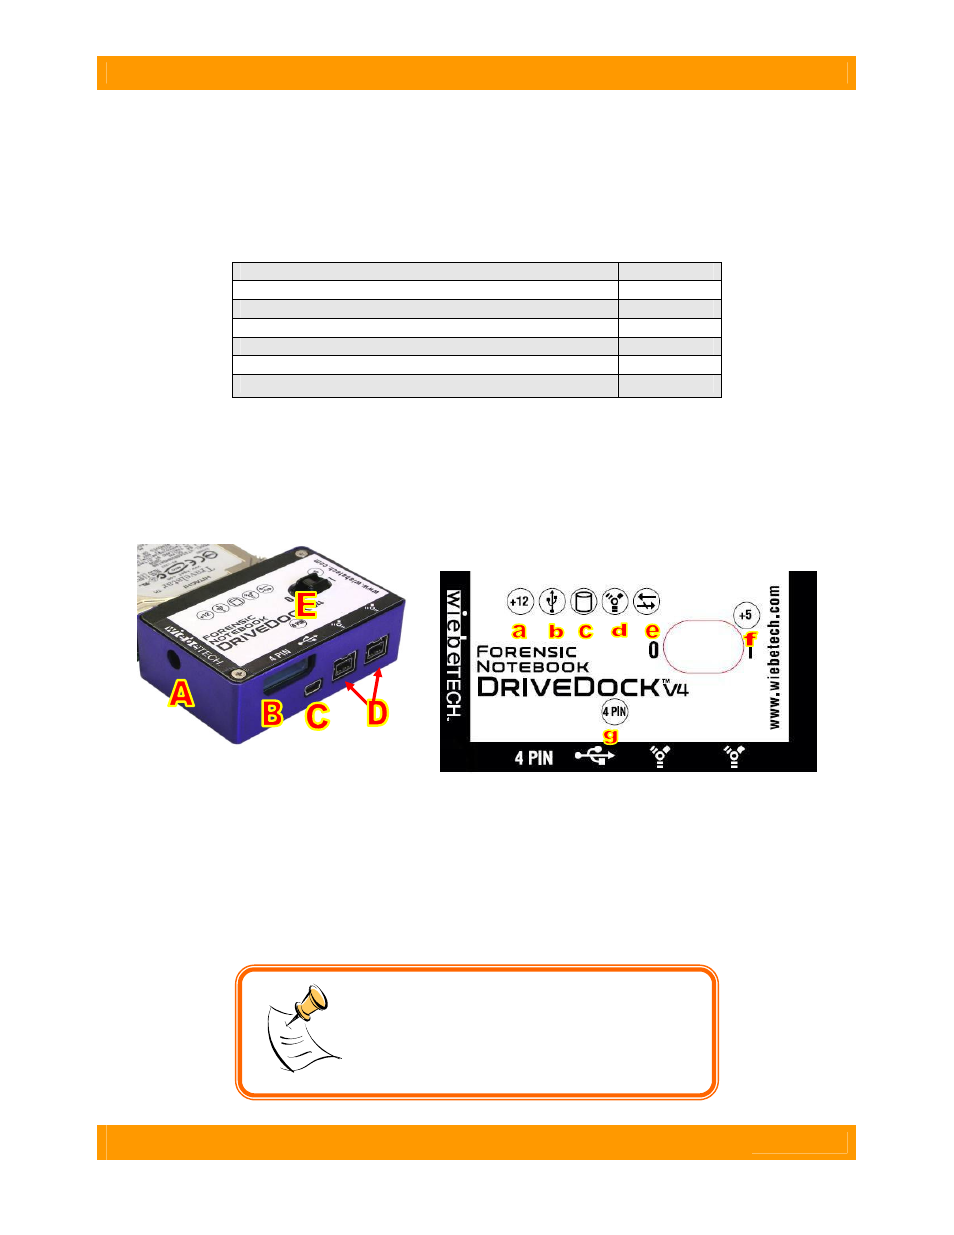
1.2 Identifying Parts
Take a moment to familiarize yourself with the parts of your new DriveDock. This will aid you in the
remaining steps.
Forensic Notebook DriveDock
1
AC adapter & power cord
1
FireWire 800 cable
1
FireWire 800 to 400 converter cable
1
Hard drive screws
4
Rubber bumpers
6
CD containing manual and warranty information
1
A
DC +12V power input from AC
adapter
a
+12V DC power input is present
B
4-pin DC input
b
Dock is connected to a USB host
C
USB 2.0 mini port
c
Hard drive access
D
1394b (FireWire 800) ports
d
Dock is connected to FireWire host
E
Power Switch (On / Off)
e
Write-blocked and HPA/DCO detector
f
+5V Power output to drive
g
4-pin power input is present
LEDs
NOTE:
Forensic Notebook DriveDock’s HPA/DCO
detection can be seen with a fast blink of the forensic
write-blocked LED (4 blinks per second). If the LED
does not blink it is reporting that the drive is write-
blocked, but there is not an HPA or DCO on the drive.
If there is a slow blink it is reporting that there is an
error on the HPA or DCO (1 blink per second).