Leds, Drivedock – CRU Forensic Notebook DriveDock User Manual
Page 2
Phone: Toll Free 866.744.8722 Main 316.744.8722 • Fax: 316.744.1398 *
*
*
www.wiebetech.com
2
2.
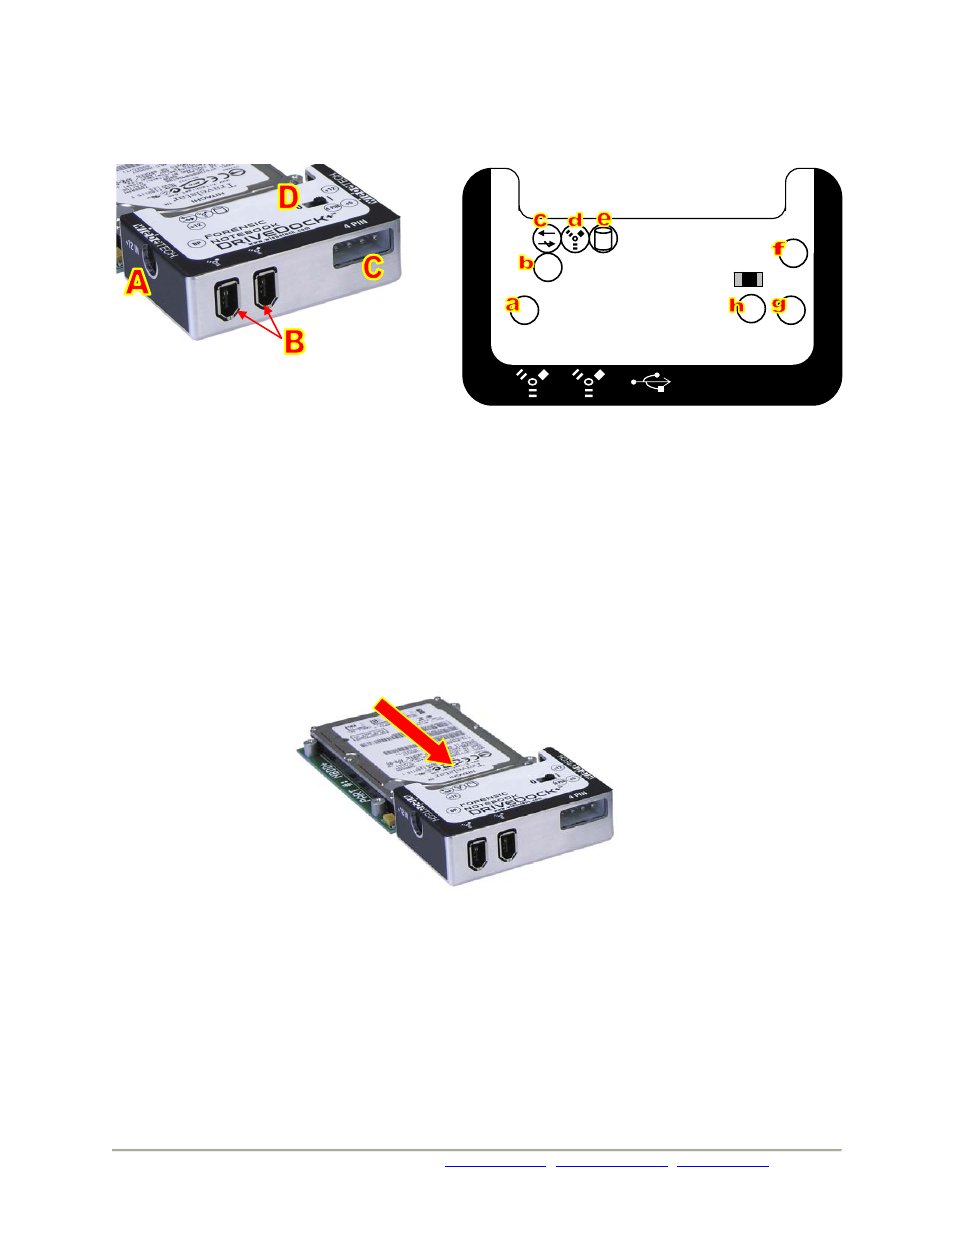
Take a moment to familiarize yourself with the parts of your new Forensic NoteBook DriveDock+™. This
will aid you in the remaining steps.
3.
Connect the hard drive to the dock. If you’ve removed the drive from a laptop computer, it may be inside a
mounting sleeve. You’ll need to remove this so that the drive will fit with the DriveDock. Place the drive onto the
green plate with the label side up. Carefully slide the drive forward until the pins are fully inserted into the IDE
connector. If you wish, you may secure the drive in place with the included screws.
4.
Connect the FireWire cable from your computer into the appropriate port on the DriveDock.
5.
Connect power to the Dock. There are three options:
a. The NoteBook DriveDock can be bus powered through FireWire, and therefore does not require an
additional power source when used with powered FireWire hosts. When bus power is present, the LED
labeled “BP” will illuminate.
b. To connect to FireWire hosts lacking sufficient bus power, plug in the optional AC adapter. When the AC
adapter is connected, the LED labeled “+12” will illuminate.
c.
Alternatively, you may supply power through a standard 4-pin Molex connector. When power is connected
in this way, the LED labeled “4 PIN” will illuminate.
A
+12V power input from optional AC adapter
B
1394a FireWire 400 Ports
C
DC input for 4-pin power connector
D
Power Switch ( | = On, 0 = Off)
a
FireWire bus power is present
b
+12V DC power input is present
c
Unit is write-blocked
d
Unit is connected to FireWire host
e
hard drive access
f
+12V Power output to drive
g
+5V Power output to drive
h
4-pin power input is present
Forensic
NoteBook
DriveDock+™
+12
BP
+5
4 PIN
0
|
+12
LEDs