Prog. set flo oc l/min reset cal i.r – Casella CEL Sampling heads for personal dust sampling User Manual
Page 18
Make sure that the arrow points towards the pump.
2.
Switch the pump on and adjust the Low Flow adapter to the required
flow rate using the screw mounted in the side.
3.
Connect the pump to the flow meter and set the flow rate to
1.2 - 1.5 l/min.
4.
Switch the pump on and adjust the Low Flow adapter to the required
flow rate using the screw mounted in the side. The flow may be
calibrated using a low flow calibrator or a Bios Dry Cal Calibrator.
5.
Remove and replace the sorbent tube.
6.2.2 Inserting Tubes into Their Holders
1.
Check that the flowmeter used is operating at the correct rate by
using a spare sampling tube
2.
Break off both ends.
A tube cutter is available from Casella CEL.
3.
Place one end in the tube connected to the pump, the other end
connects to the flowmeter.
To determine which way round the tube should go, look for the arrow
painted on the side. The arrow indicates the direction of flow and
must point towards the pump.
4.
Using a Dry Flow flowmeter or Bubble flowmeter, adjust the flow
rate according to the instructions, to suit the specific application.
With the flow rate set, remove the tube from the tube holder and replace
with a clean one, making sure that the arrow points towards the pump.
When sampling is complete, the sealing caps must be replaced before the
tube is sent for analysis.
02058
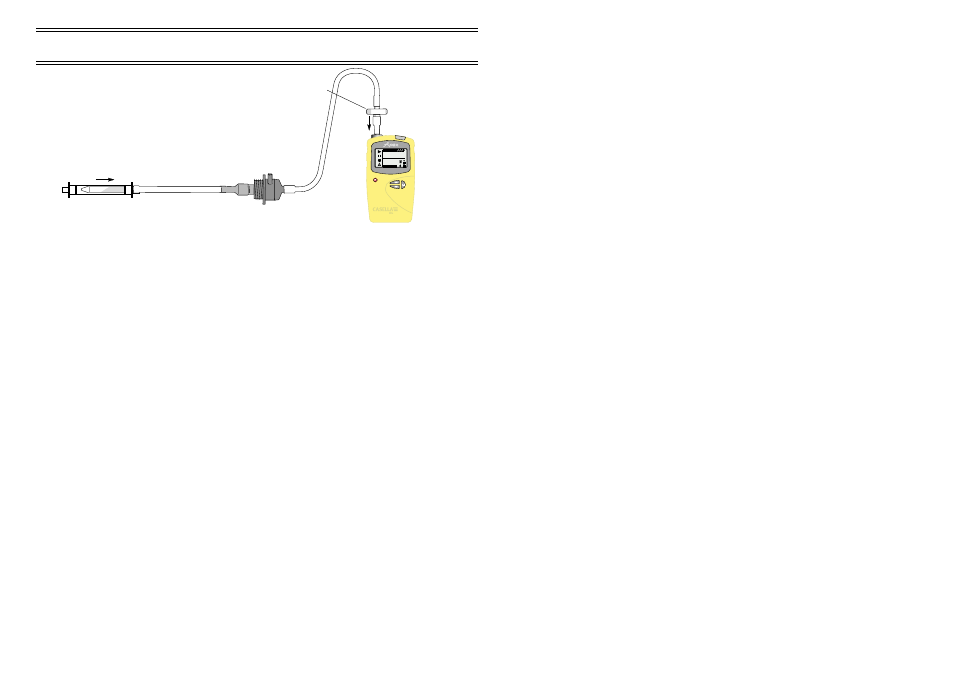
Flow
Apex Pump
Constant Pressure Controller
Low Flow Adaptor
Sorbent Tube
in Tube Holder
PROG.
SET FLO
oC
L/min
RESET
CAL
I.R.
TEMP 19.48
2.5
Flow
Figure 16: Low flow measurement arrangement using a CPC and Low Flow
Adaptor
Calibration
Page 18 of 24
SAMPLING HEADS AND ACCESSORIES
Users Guide