Installation instructions, Installing the unit in the cabinet, Cabinet panel installation (model id24 only) – Dacor PD User Manual
Page 12
10
Installation Instructions
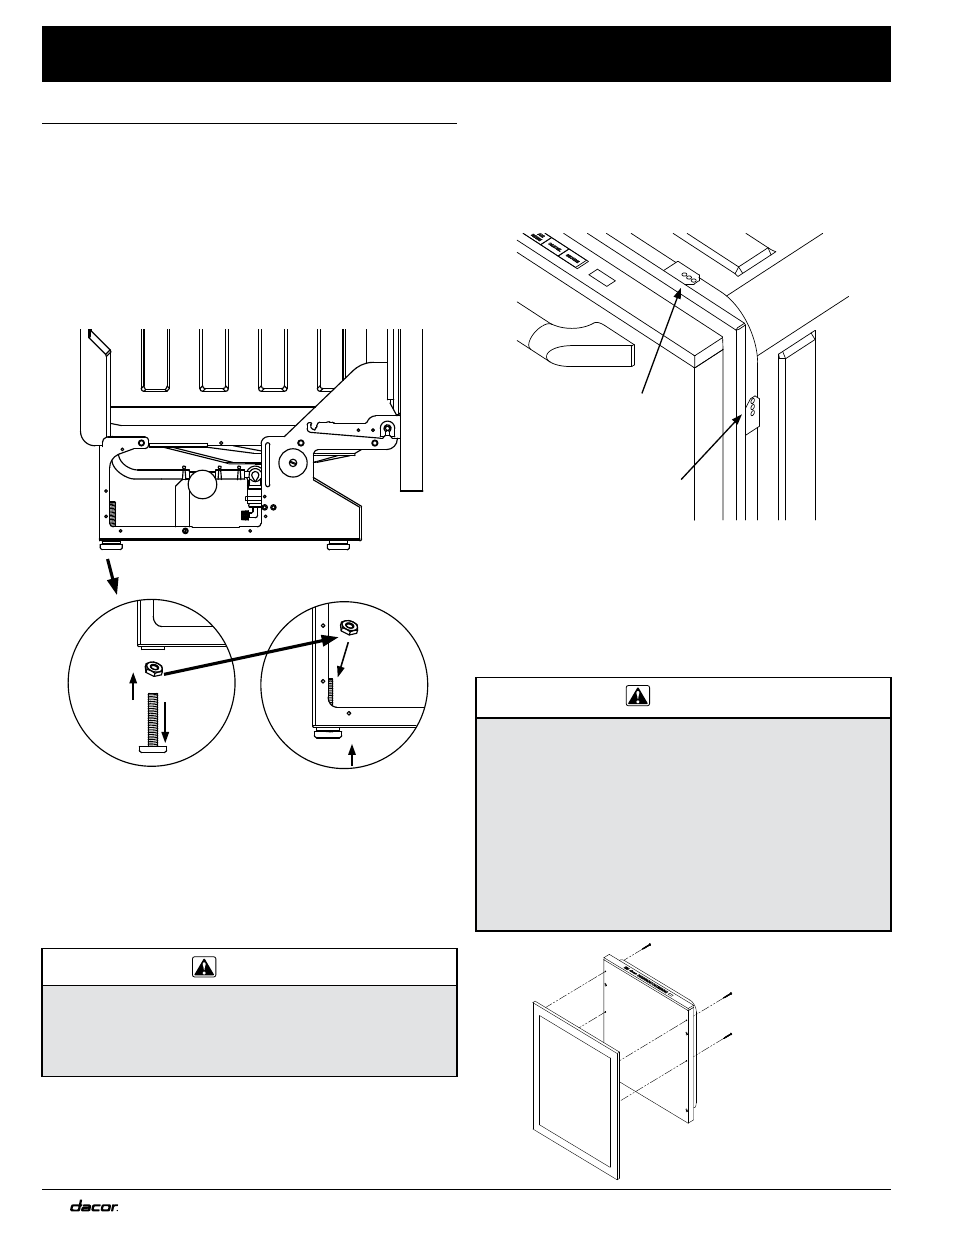
Side anti-tip
bracket
Top anti-tip
bracket
NOtE: The leg nuts can be removed to make the
dishwasher lower. To do so:
Turn the leg until it comes out of the chassis.
•
Remove the nut from the leg.
•
Re-thread the leg into the chassis.
•
Reach inside the chassis and thread the nut onto the
•
top of the leg.
Installing the Unit in the Cabinet
(continued)
Slide the Dishwasher into the Cutout
Pull the electrical wiring and both hoses (drain and
•
water supply) through the utility access hole in the side
of the cabinet as you slide the dishwasher into the
opening. Stop when the dishwasher contacts the back
wall or aligns with the front cabinet opening.
Install the Anti-tip Brackets
CAUtION
Make sure to anchor at least one anti-tip bracket on
•
each side of the dishwasher.
The anchoring material must be no more than 1/4”
•
(6mm) from the anti-tip bracket.
The anti-tip brackets protect against possible tipping
caused by heavy bottom rack loads on the door.
There are anti-tip mounting locations provided around
1.
the top and sides of the dishwasher front frame.
To attach the anti-tip bracket anchors, insert the
2.
anchoring screws through the 1/2” diameter access
holes inside the dishwashing compartment on the
ceiling and the sides, near the front. Make sure that the
anchoring screws pass through the anti-tip brackets
located on the outside of the dishwasher.
CAUtION
To prevent corrosion and the possibility of the panel
•
falling off, use only stainless steel screws where
instructed.
The provided mounting screws are designed for
•
panels with a thickness of 5/8” to 3/4”. Smaller panels
may require different mounting hardware to prevent
damage to the outside surface.
Failure to construct the custom panel and/or toe kick
•
as instructed on the template may result an improper
fit and may prevent the door from closing properly.
Cabinet Panel Installation (Model ID24
Only)
Install the custom panel and/or custom toe kick according
to the instructions on the included template (Dacor PN
101934). If the panel requires decorative door hardware,
attach it before panel installation.
CUStOM PANEL
INStALLAtION
(ID24 ONLY)