Setup, Step 1: unpack box, Wi-q user’s manual – Velodyne Wi-Q User Manual
Page 8
8
Wi-Q User’s Manual
Setup
Your Wi-Q subwoofer is easy to set up. Once you finish setting up, use the remote control to operate the subwoofer.
Below is an overview of the setup steps. The rest of this section provides details on these steps.
Step 1:
Unpack the box.
Step 2:
Set up the WiConnect System Transmitter.
Step 3:
Mount the WiConnect System Transmitter to the wall (optional).
Step 4:
Set the audio receiver options.
Step 5:
Place and connect the subwoofer.
Step 6:
Run the automatic equalizer.
Step 7:
Set the phase.
Step 1: Unpack Box
1.
Unpack the system using caution when lifting and moving to avoid injury.
2.
Save the carton and packing materials for future use.
Note:
Use this packaging if you ever need to move or ship the subwoofer to Velodyne for service.
Using other packaging may result in severe damage. To save storage space, flatten the box and
place the other packing material in a plastic bag.
3.
Record the serial number in the space provided on
4.
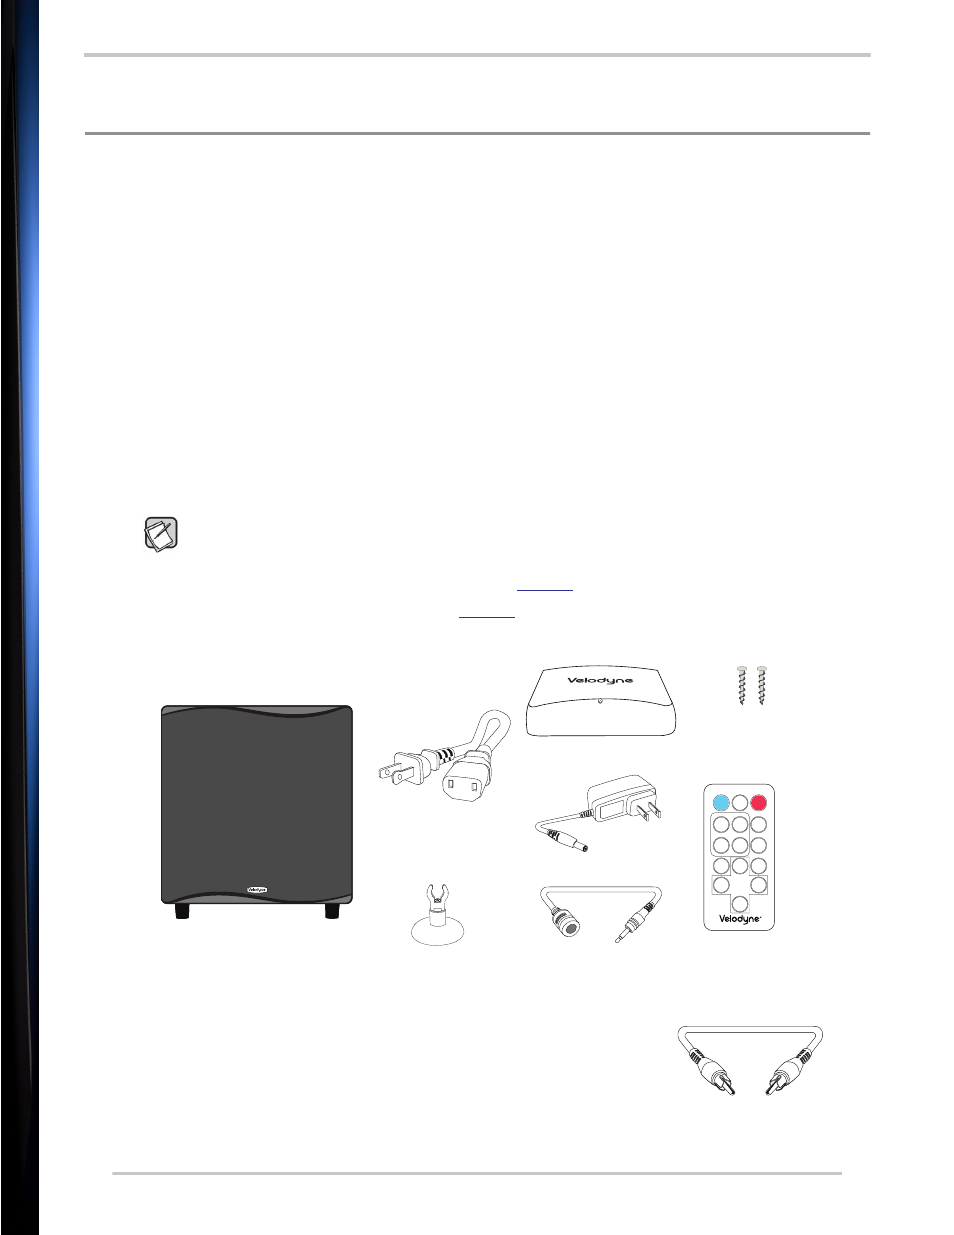
Make sure you have all the items shown in
. If any items are missing or damaged, contact the
retailer where you purchased this subwoofer.
Figure 1: Wi-Q package contents
5.
Make sure you also have an RCA-to-RCA (male-male) cable, so you can
connect the transmitter to your audio system.
MIC
EQ
Mute
PWR
1
2
3
4
0
270
90
180
Light
Night
+
-
Jazz
Games
Movies
Rock
Presets
Volume
Phase
Subwoofer
Microphone
Mic stand
Transmitter
Power cord
Power adaptor
Self-tapping
wood screws
Remote
control
Figure 2: RCA-to-RCA