Velodyne Wi-Q User Manual
Page 10
10
Setup
Wi-Q User’s Manual
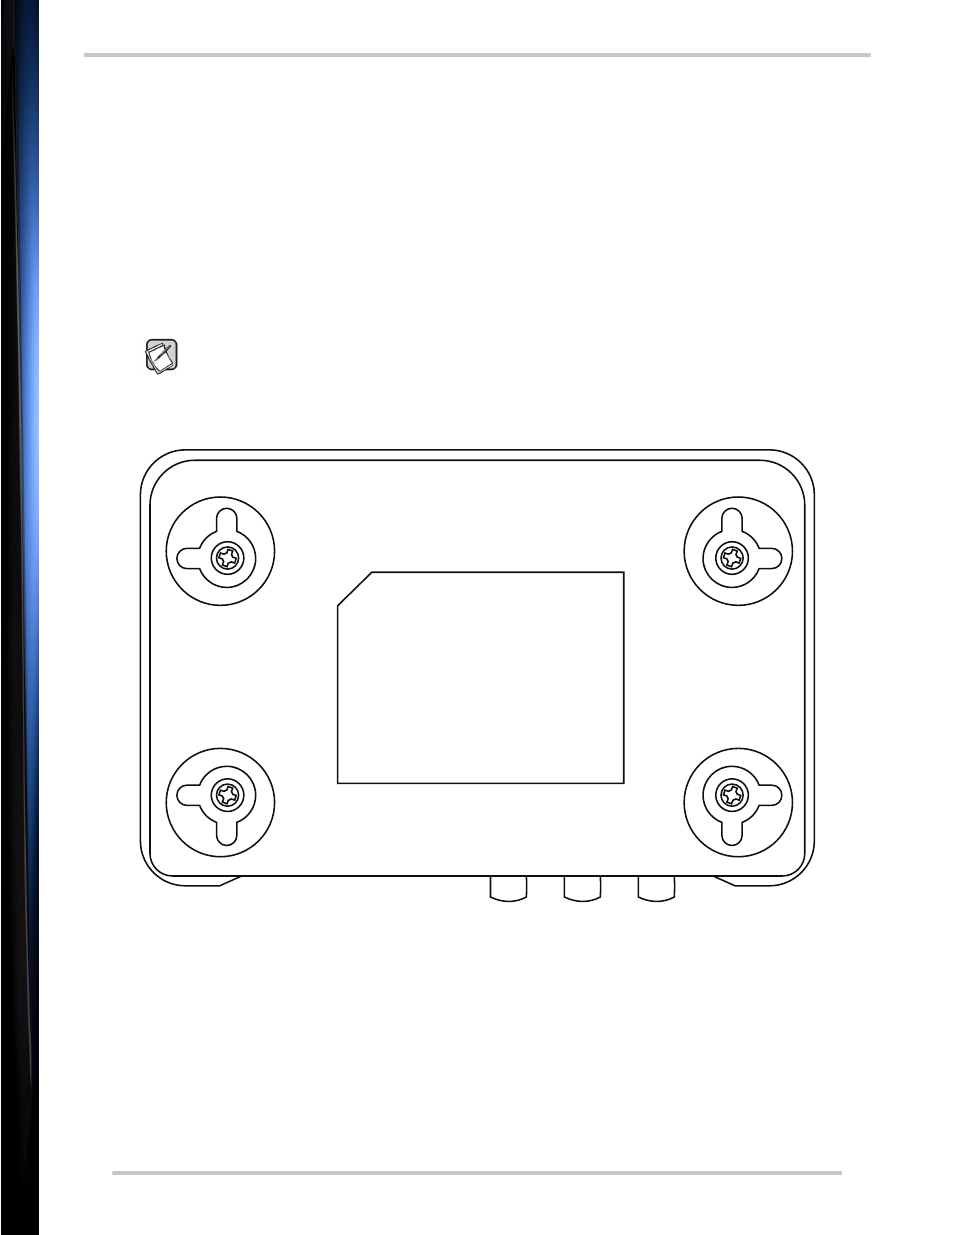
Step 3: Mount WiConnect System Transmitter to Wall
(Optional)
You can mount the transmitter on the wall or place it with your other audio components. The transmitter
can be mounted in a vertical or horizontal orientation, and the Wi-Q system doesn’t need to be visible to
function properly.
1.
Use the template below to mark the mounting locations on the wall.
2.
Mark the two screw locations for either the horizontal or vertical mounting orientation.
3.
Hand turn each of the included self-tapping wood screws into each marked location. Tighten the
screws until about 1/8” (3.17mm) of the screw shank is exposed.
Note:
The provided wood screws aren’t suitable for stone or other hard wall surfaces. If you can’t
hand drive the screws, you may need to drill holes and provide other wall anchors.
4.
Hook two of the slotted holes on back of the transmitter onto the two screws.
Figure 5: Transmitter mounting template
- CHT-Q Series (26 pages)
- CHT-R Series (24 pages)
- DEQ-R Series (26 pages)
- Digital Drive Series (54 pages)
- Digital Drive 1812 Signature Edition (57 pages)
- Digital DrivePLUSSeries (42 pages)
- Digital DrivePLUSSeries (40 pages)
- Digital DrivePLUSSeries (19 pages)
- EQ-Max Series (24 pages)
- Impact Series (20 pages)
- MicroVee (24 pages)
- MiniVee Series (20 pages)
- Optimum Series (28 pages)
- SC-602 Amplifier (27 pages)
- SC-ICG (12 pages)
- SC-IF/IC (14 pages)
- SC-IWBB (64 pages)
- SMS-1 (49 pages)
- SPL-800i (20 pages)
- SPL-Ultra Series (22 pages)
- SubContractor Series (30 pages)
- VX-11 (16 pages)
- WiConnect (24 pages)
- WiConnect (19 pages)
- CHT Front Row System (6 pages)
- CHT-15 (12 pages)
- Deco (12 pages)
- DF-10sc (6 pages)
- DLS-3500 (6 pages)
- DLS-R Series (9 pages)
- DPS 10-12 Series (17 pages)
- DS-10 (49 pages)
- FSX-12 (8 pages)
- HGS 10 (10 pages)
- HGS-12X (19 pages)
- HGS-15 THX Ultra 2 (10 pages)
- HGS-15X THX Ultra 2 (20 pages)
- SPL-800 (8 pages)
- SPL-800 Series II (20 pages)
- SPL-R Series (17 pages)
- VA-1250X (8 pages)
- VA-806 (6 pages)
- VA-907.2 (6 pages)
- VDR Series (18 pages)