Managing data, Participant lists, Creating a participant list – Turning Technologies TurningPoint Cloud User Manual
Page 15: Downloading a participant list
Creating a participant list from your Turning Account allows participants to
register for a course. After the participant list is created, an e-mail invite is
sent to participants requesting them to register for the course associated
to the participant list.
1. Go to
https://account.turningtechnologies.com
and sign in to your
Turning Account.
2. Click the
Participant Lists
tab.
3. Click
Add
.
4. Enter the participant list
name
and
ID
.
TIP:
It is highly recommended to name the participant list after the course
(see below). Participants can search for the course by course name,
course ID, instructor name or EXACT instructor email.
5. Click
Save
. The participant list is successfully saved and added to the
Participant Lists menu.
6. Select the participant list and click the
Manage
icon. The participant list
opens.
7. Click
Add
.
8. Enter a participant’s email address in the appropriate field and click
Enter
. To add multiple participants, separate email addresses with a
comma. Valid email addresses will be marked green while invalid
email addresses will be marked red.
TIP:
You can copy and paste email addresses into the Invite Participants
window. However, email addresses MUST be separated with a comma.
9. Click
Send
to invite participants.
NOTE:
Click the
Manage
icon and select
Accepted
or
Invited
to track
which participants have or have not registered for the course.
Creating a Participant List
Participant information can be imported from a student roster in a Learning
Management System (LMS) or from your Turning Account.
NOTE:
Importing from an LMS can only be used if the integration has been installed
on the LMS server. Please contact your IT Department to confirm that the LMS
integration is installed and configured to operate with TurningPoint Cloud.
1. Open TurningPoint Cloud and sign in to your Turning Account.
2. Select the
Manage
tab.
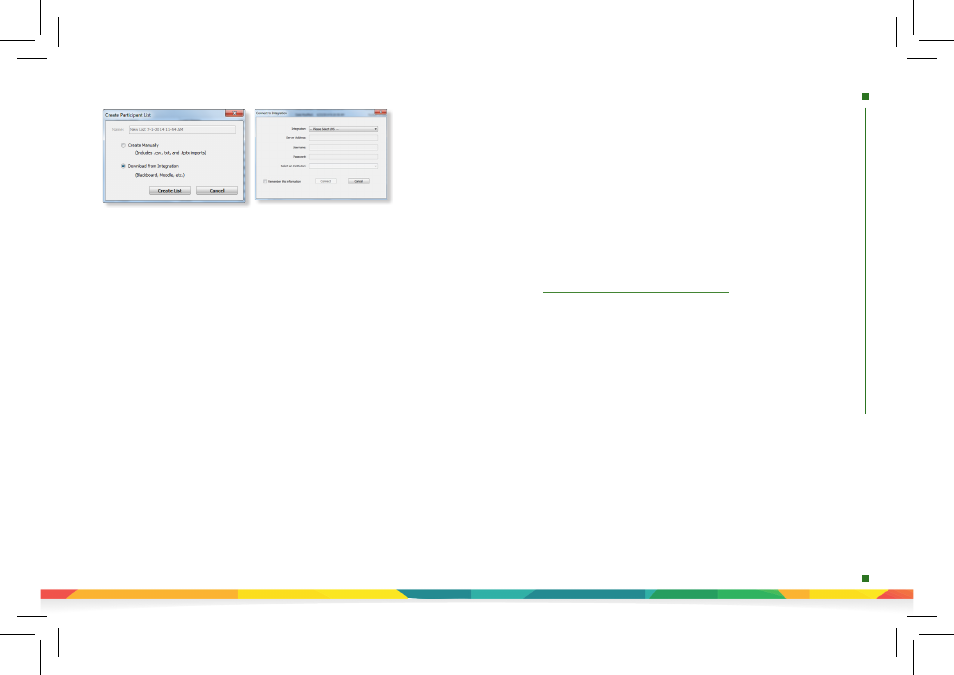
3. Click the Participant List drop-down menu and select New. The Create Participant
List window opens.
4. Select the
Download from Integration
radio button and click
Create List
. The
Connect to Integration window opens.
5. Select the appropriate
Integration
from the Integration drop-down menu.
6. Enter the
Server Address
,
Username
and
Password
in the appropriate fields.
7. Click
Connect
. Optionally, click
Remember this information
to have the
Integration, Server Address and Username stored for future use.
8. If applicable, select the
Institution
from the Select an Institution drop-down menu.
The
Import Partcipant List window opens.
9. Select the
course or courses
to import. Optionally, select the
Select All
checkbox
to import all courses.
10. Click
Import
. A confirmation box is displayed.
11. Click
OK
. The participant list is added to the left panel of the Participant List
Overview screen.
12. Select the
participant list
to view the participant information.
NOTE:
The imported participant list contains the following information: Device ID(s),
License Status, First Name, Last Name, User ID and Email.
Downloading a Participant List
managing
data
|
participant
list
Managing Data
TurningPoint Cloud sessions are grouped based on the participant list with
which they are associated. Participant lists created in TurningPoint Cloud can
be used for PowerPoint Polling, Anywhere Polling and Self-Paced Polling.
Participant Lists