Tiptop Circadian Rhythms User Manual
Page 5
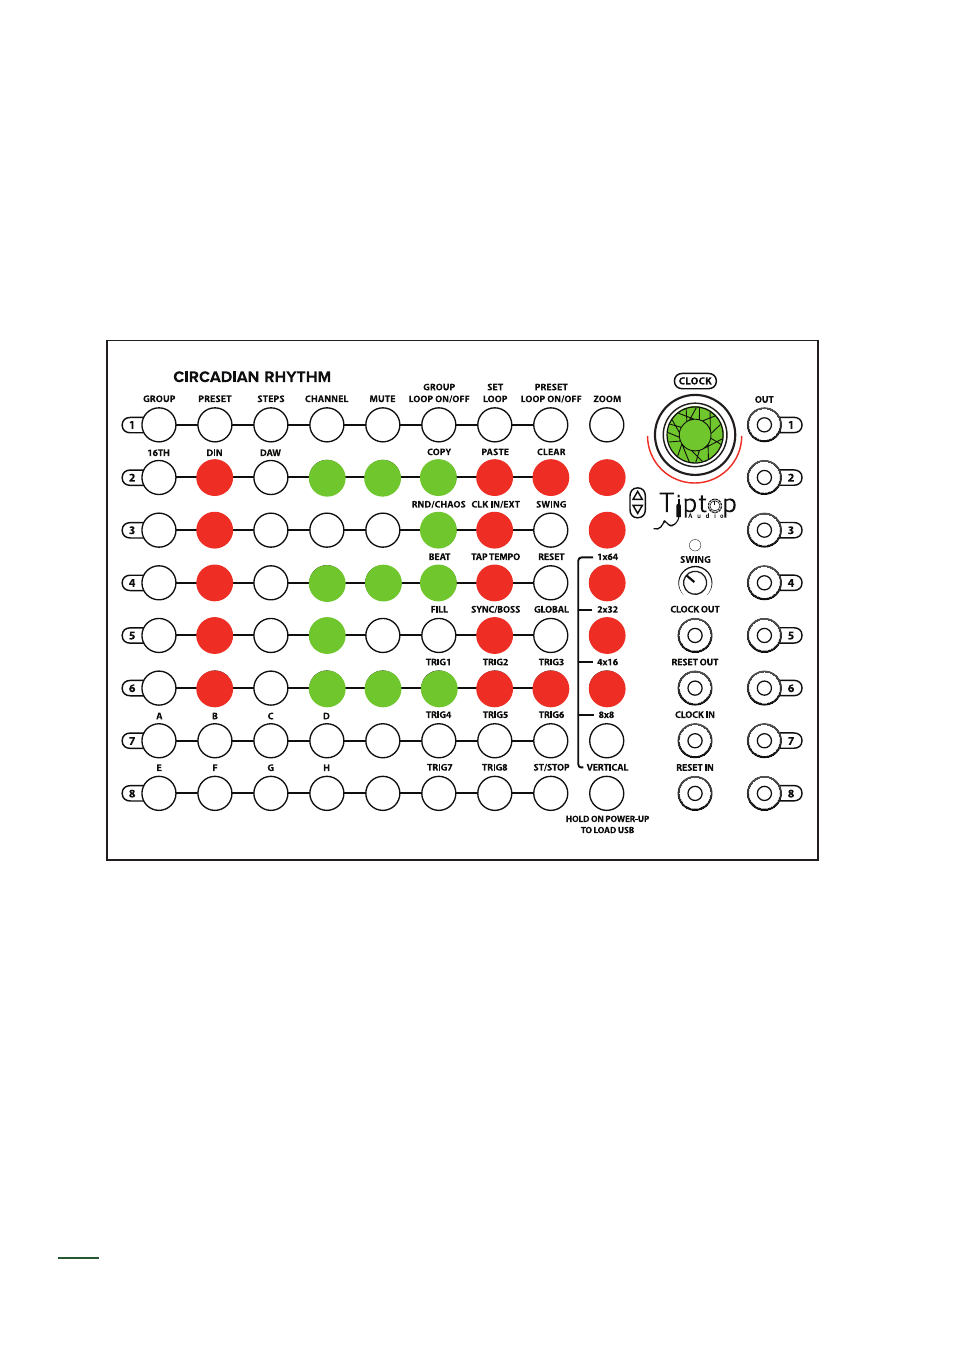
Quickstart Tutorial 1: Vertical View Basics
For the purposes of this exercise, we’ll use the Tiptop 808 BD, Hihats, and Snares, but you can use
any module that takes a gate or a trigger for an input to make a sound (for example, this could be
an envelope generator triggering a VCA or a lo pass gate). Now, connect trigger outputs 1, 2, and
3 to the BD, Hihats, and Snares trigger/gate inputs respectively.
CR has fi ve main views (from top to bottom: 1x64, etc…), all in the lower righthand corner. For the
moment, we’re going to explore the vertical view.
First, let’s set our BPM to 120. Rotate the Clock knob. You’ll notice that the button matrix displays
in the BPM by lighting up the buttons. Pretty slick, right?
The button in the lower righthand corner of the CR is called Vertical: make sure it is illuminated in
Blue. Think of Vertical as your home button and primary view. Vertical displays most of the fun-
ctionality that you’ll be using to program rhythms. Further, all of the labels that appear above the
buttons in the primary eight columns are meaningful only in the Vertical view.
For this tutorial, in the Vertical view, we’re going to focus on the third and fourth columns called
Steps and Channels. The Channel column refers to the button that is selected in each row. So, if
the channel button for row 1 is green, it means that we are currently viewing Channel 1 which will
output to trigger/gate 1 on the right side of the CR (the BD in our example).
v
v+
-
03
CLOCK 120 BPM