Usage/setup – Slate Digital Trigger Advanced Drum Replacer User Manual
Page 10
Usage/Setup
• Set the input volume first, and raise the level unVl most hits are peaking near the top of
the display. This will ensure maximum range for dynamic velocity triggering of our
samples.
• Set the ‘Detail’ to the edge of the bleed waveforms
• Set the ‘ReTrigger’ value
• Then, set the ‘SensiVvity’
Suppression
TRIGGER 2 has the unique funcVonality to be set in a way that it can automaVcally be instructed
to NOT trigger certain leakages on a drum track using it’s Leakage Suppression mode. Using
Leakage Suppression technology, you can trigger a drum track with 100% accuracy, even if it
has a lot of bleed from other drum tracks.
To use the Leakage Suppression, first create a stereo group or aux track in your workstaVon and
instanVate TRIGGER 2 on the first insert. Using aux sends, route the drum track that you wish
to replace/augment to the LEFT channel of this new group track (in some workstaVons this can
be done via panning the original track. Consult your host’s user manual for further instrucVon).
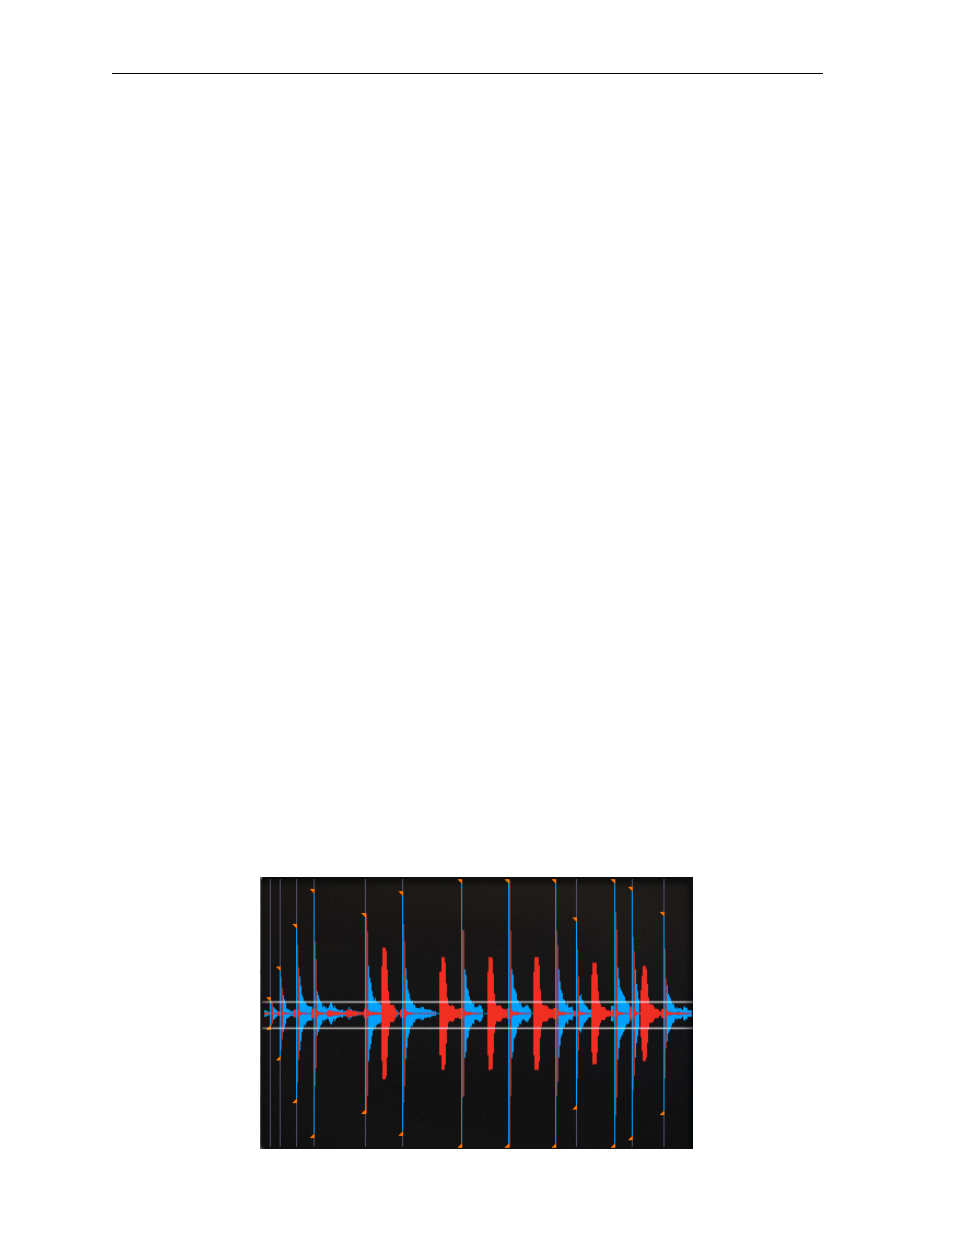
Before we go further, let’s assume that we are triggering from a snare drum and it has both
bass drum and hi hat leakage. Assuming you have individual bass drum and hi hat tracks, use
the aux sends on these tracks and send them to the RIGHT side of the TRIGGER 2 stereo group
channel. So now we have the snare drum track being sent to the LEFT side of the TRIGGER 2
group, and both the bass drum and hi hat tracks being sent to the RIGHT side of the TRIGGER 2
group. Now find a secVon of the mix where there is a lot of bass drum and hi hat leakage on
the snare drum track. Adjust the Suppression control in the upper leu porVon of the display
unVl TRIGGER 2 starts to ONLY trigger the snare drum hits, while suppressing bleed from other
drums. It should look like this:
STEVEN SLATE - TRIGGER 2 10